Integrating Elastic Path Composable Commerce
Prerequisites
- Ensure that you have an account within Elastic Path Commerce Manager.
- Ensure that you have a paid plan in your Studio account.
- Ensure that you have created the following items in Commerce Manager for seamless integration into the Studio storefront:
- Ensure that you have configured Elastic Path Payments Powered by Stripe in Commerce Manager.
- (Optional) Ensure that you have set up an Algolia integration or Advanced Commerce (GrapheneHC) integration if you want to enable search indexing in your Studio storefront.
Configuring Elastic Path Integration
The following steps describe how to configure an integration between Studio and Elastic Path Composable Commerce.
-
Log into Commerce Manager.
-
Go to SYSTEM > Application keys to create your new API keys. Make a note of the API keys as you will need them to configure the Elastic Path integration in Studio. See Application keys.
-
Log into Studio.
-
Go to Settings > Integrations.
-
Navigate to Payment & Storefront.
-
Select + next to Elastic Path.
-
Enter the following details that you generated from step 2.
- Store ID
- Client ID
- Client Secret
- API Base URL
-
The Coupon Endpoint URL is not currently in use. Please leave this blank.
-
Leave Password Profile blank. Once you create the integration, Password Profile is auto-populated.
-
(Optional) In Catalog Rule Tag, enter the tag you specified when you created your catalog rule in Product Experience Manager. Tags are user-defined criteria that you can use to define eligibility for a catalog. For example, you might use Pro or Elite to define a membership tier. See Configure Shopper Catalog Rules. If you leave this blank, the default catalog is used.
-
(Optional) In Catalog Channel, enter the channel you specified when you created your catalog rule in Product Experience Manager. Channels represent your ecommerce sales channel through which your shoppers may select and pay for your products, for example, Mobile for a mobile app or Web for website. See Configure Shopper Catalog Rules. If you leave this blank, the default catalog is used.
-
(Optional) Configure the shipping options. If you have configured the Shipping Service in the Integrations Hub, you can use the information from the integration to configure your shipping options in the Elastic Path integration. This enables you to use the shipping options available in your Elastic Path store in your Studio storefront.
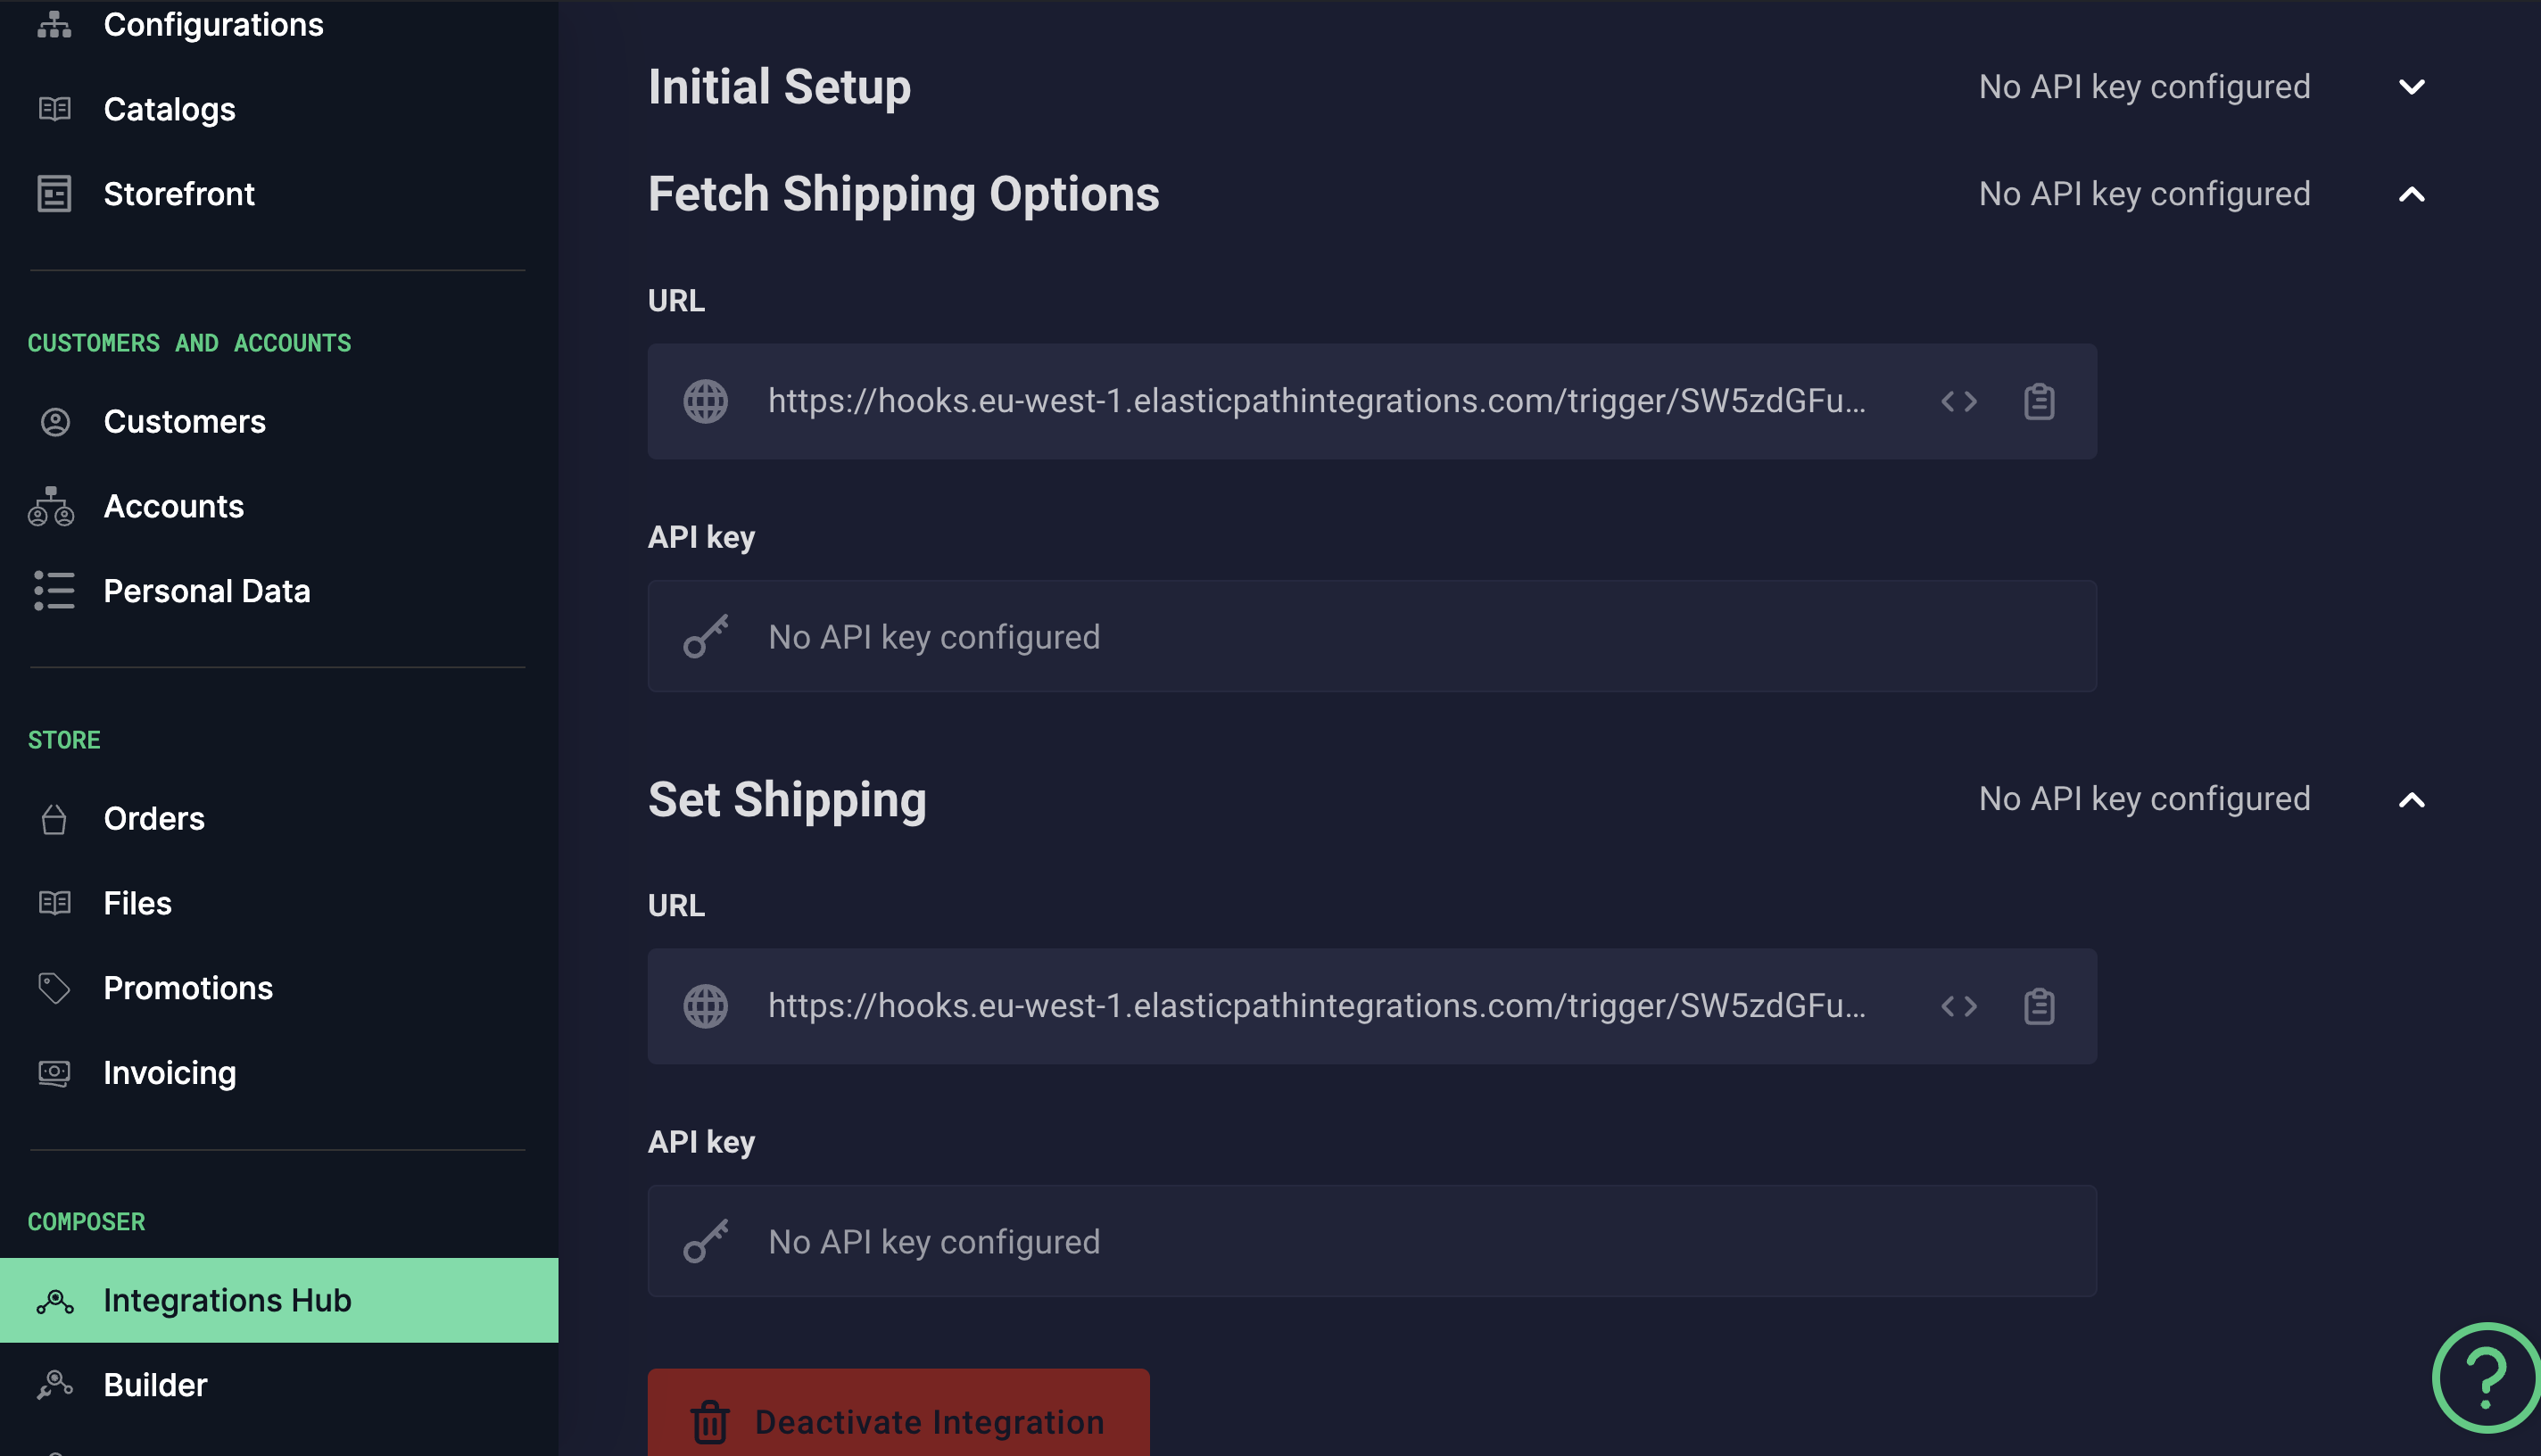
Complete the shipping options with the information from the Shipping Service in Integrations Hub.
| Option | Description |
|---|---|
| Shipping Options URL | Use the Fetch Shippiing Options URL. |
| Shipping Options URL API Key | Use the Fetch Shipping Options API key. |
| Set Shipping Option URL | Use the Set Shipping URL. |
| Set Shipping Option URL API Key | Use the Set Shipping API key. |
-
Select Enable OIDC connect if you want to enable shopper single sign-on in Studio. Using single sign-on allows shoppers using Studio storefronts to access multiple applications and services with a single set of credentials, streamlining the login process and improving your shoppers experience of your online store. See Shopper Single Sign-on.
-
Select Connect account to save your changes. A new section called Storefront is generated.
- In Products, you should see a list of your Product Experience Manager products.
- In Categories, you should the see the hierarchies you specified when you created your Product Experience Manager catalog.
-
Under Content > Website, you can see Checkout and Thank You pages are automatically created and ready to use. You can modify them as needed.
-
You can make changes to your integration at any time. Simply go to Settings > Integrations and select Edit next to Elastic Path. Make any changes, depending on your requirements and select Update account.