Integrating Segment
You can quickly and easily integrate Studio with Segment. Once configured, you can use Studio's built-in Segment component to leverage Segments powerful customer data platform in your storefront.
Segment is a customer data platform that simplifies the process of collecting data and connecting to new tools. With Segment, you can collect, transform, send, and archive your Studio data, and send the data to your marketing, product, and analytics tools, including data warehouses.
You can sync your Commerce data with the Commerce Segment integration. This allows all customer and order changes to be synced with Studio, ensuring that when customers view product details pages or when products are added to carts in your Studio storefront, Segment first processes the data, then translates and routes it to the destinations you have enabled in Segment. This information enables you to personalize the shopper experience that you are offering to your shoppers.
Building Customer Profiles Using Segment Unify
You can use Segment Unify to build a complete view of your customers. With identity resolution, you can track every interaction across an entire user journey in Studio, to create unified, real-time customer identities. You can then use these profiles to provide personalized experiences for your shoppers, using computer traits and predictive analytics. For example, you can provide a special offer to VIP customers. See Using the Segment Integration.
Prerequisites
You must have the following before configuring the Segment integration.
- Ensure that you are integrated with Commerce. See Getting Started with Composable Commerce.
- A Studio storefront.
- A Segment account with your Elastic Path Studio Source configured. See Elastic Path Studio Source.
Best Practices
Follow these steps to integrate with Segment.
- In Commerce Manager, go to Composer and configure a Segment integration in Integrations Hub.
- In Studio, configure the Segment integration.
Configure the Segment Integration
Follow these steps to configure the Segment integration in Studio.
-
Select Settings > Integrations.
-
Navigate to Tracking and Analytics.
-
Select the plus icon next to Segment.
-
Configure the Segment settings.
Option Required Description Source ID Required A Segment source ID that allows you to push data to your Segment account. Source Write Key Required A unique identifier for your Commerce source. See Find your write key. Unify Space ID Optional A Unify ID that allows you to pull insights out of Segment. See Using Segment Unify. Unify Access Token Optional An access token that allows you to pull insights out of Segment. See Using Segment Unify. -
Select Connect account.
Using the Segment Integration
You can use your Segment integration to build customer profiles based on their interactions in your Studio storefront.
Using Segment Computed Traits
The following example describes using a Segment computer trait to provide a special offer to a new customer.
-
Select Content > Landing Pages.
-
Select the landing page where you want to configure your computer trait. For example, you might want to configure this on your product detail page, product detail page templates or any of your site pages.
-
To enable conditional content on your section, select the
**{...}**icon from the section toolbar. -
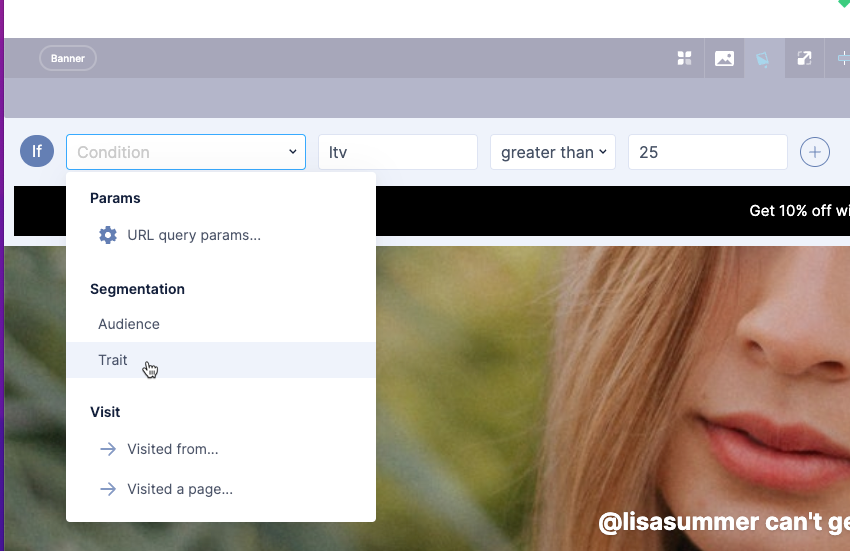
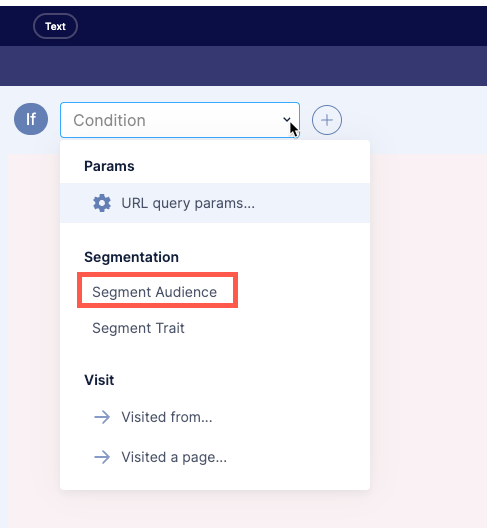
Select Condition and select Trait from the drop-down list.
-
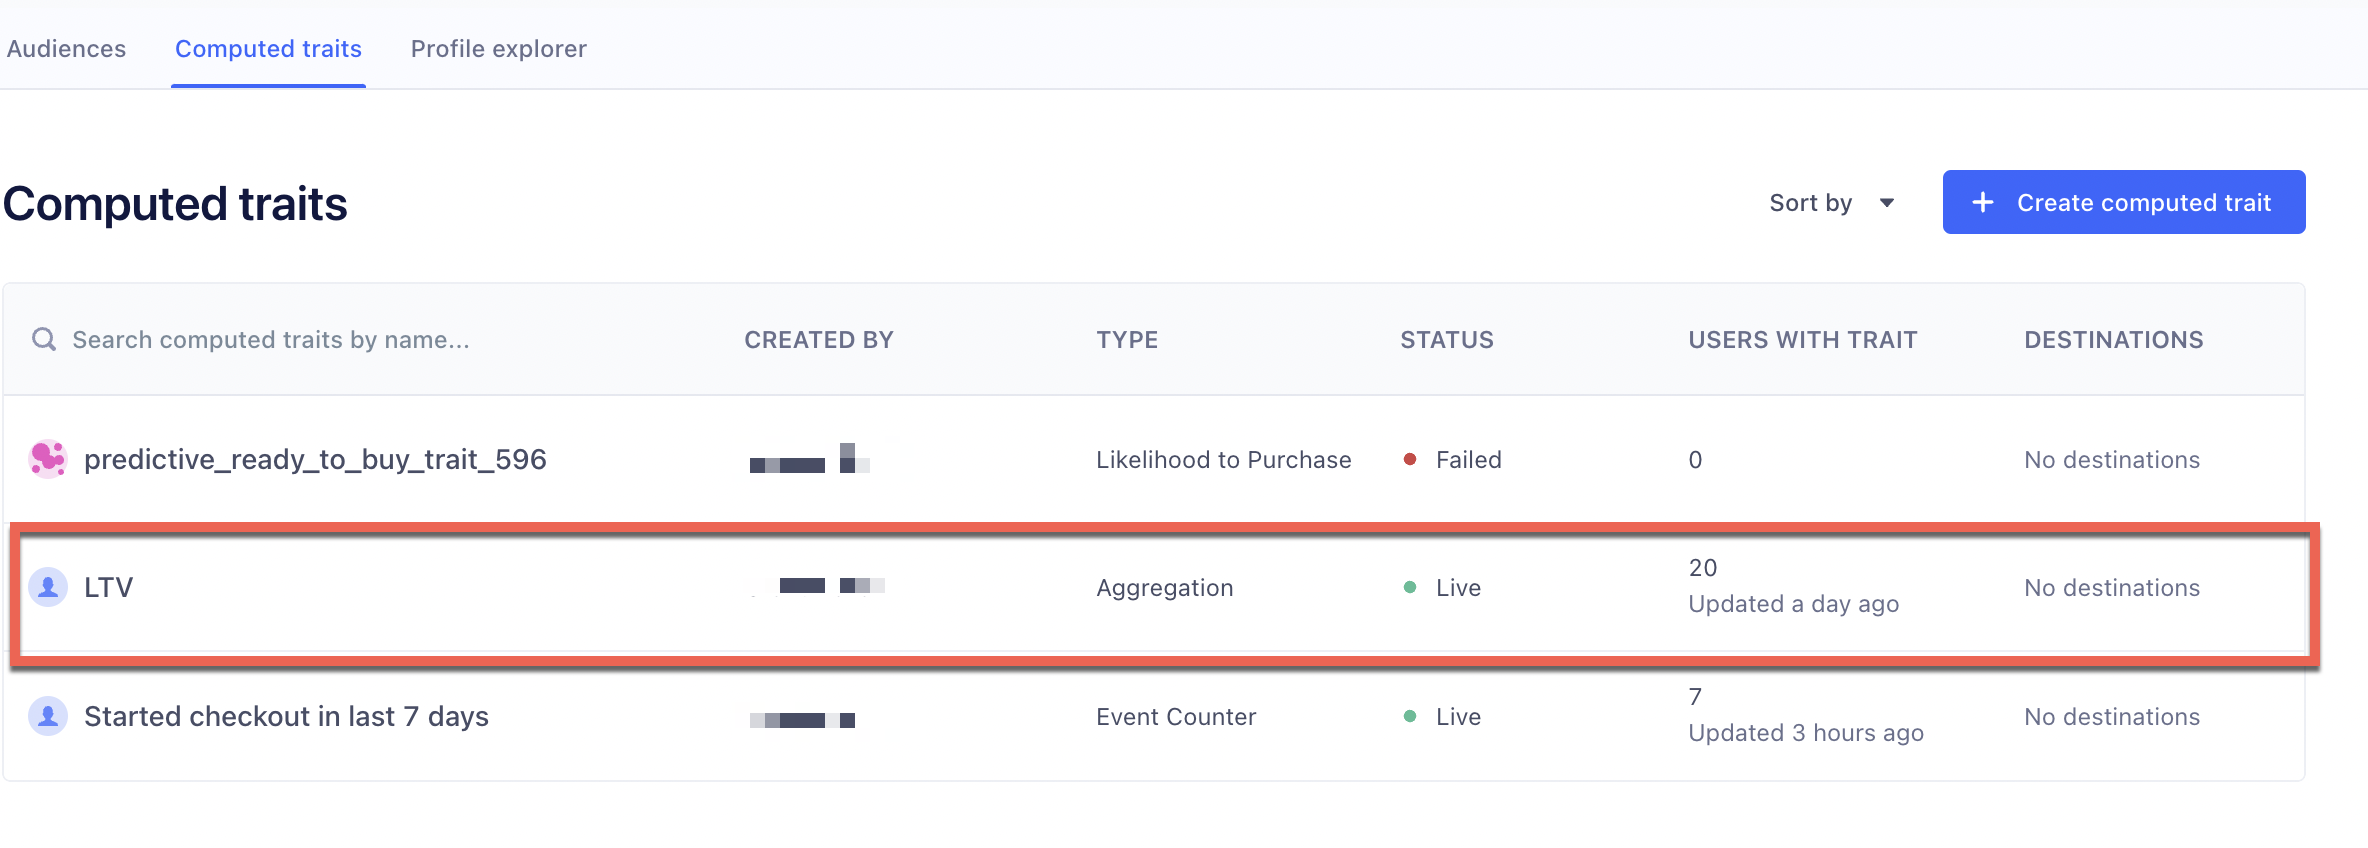
You must have created a computed trait in Unify. Then, in Studio, input a value that corresponds to a computed trait in Unify. The value you input in Studio must reference the trait key and not the trait name. For example, for the LTV computed trait in Segment:
Configure the parameter in Studio as follows:
Parameter Value Parameter ltv Operator greater than or equal Value 25 -
Add a text box.
-
Add your text, depending on your requirements.

-
Save and publish your changes.
-
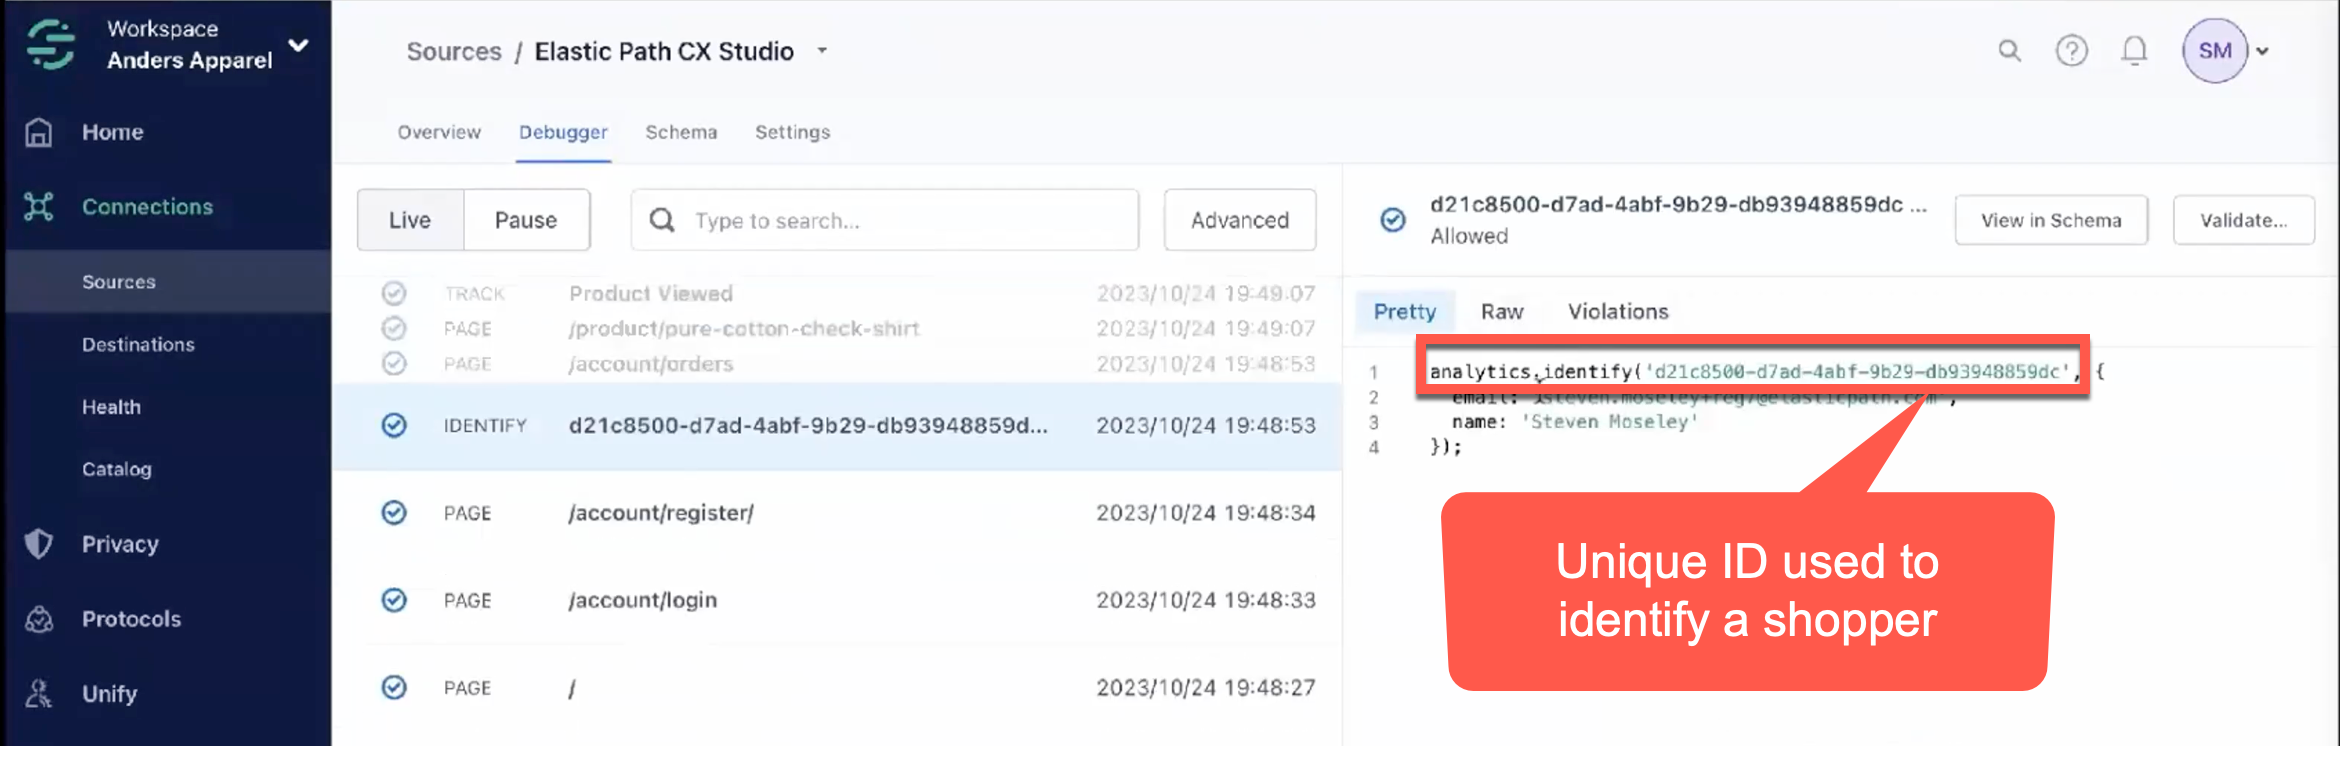
When a shopper logs into the storefront and starts viewing products, you can see in your source in Segment, a new event stream that has all the activity for this user.
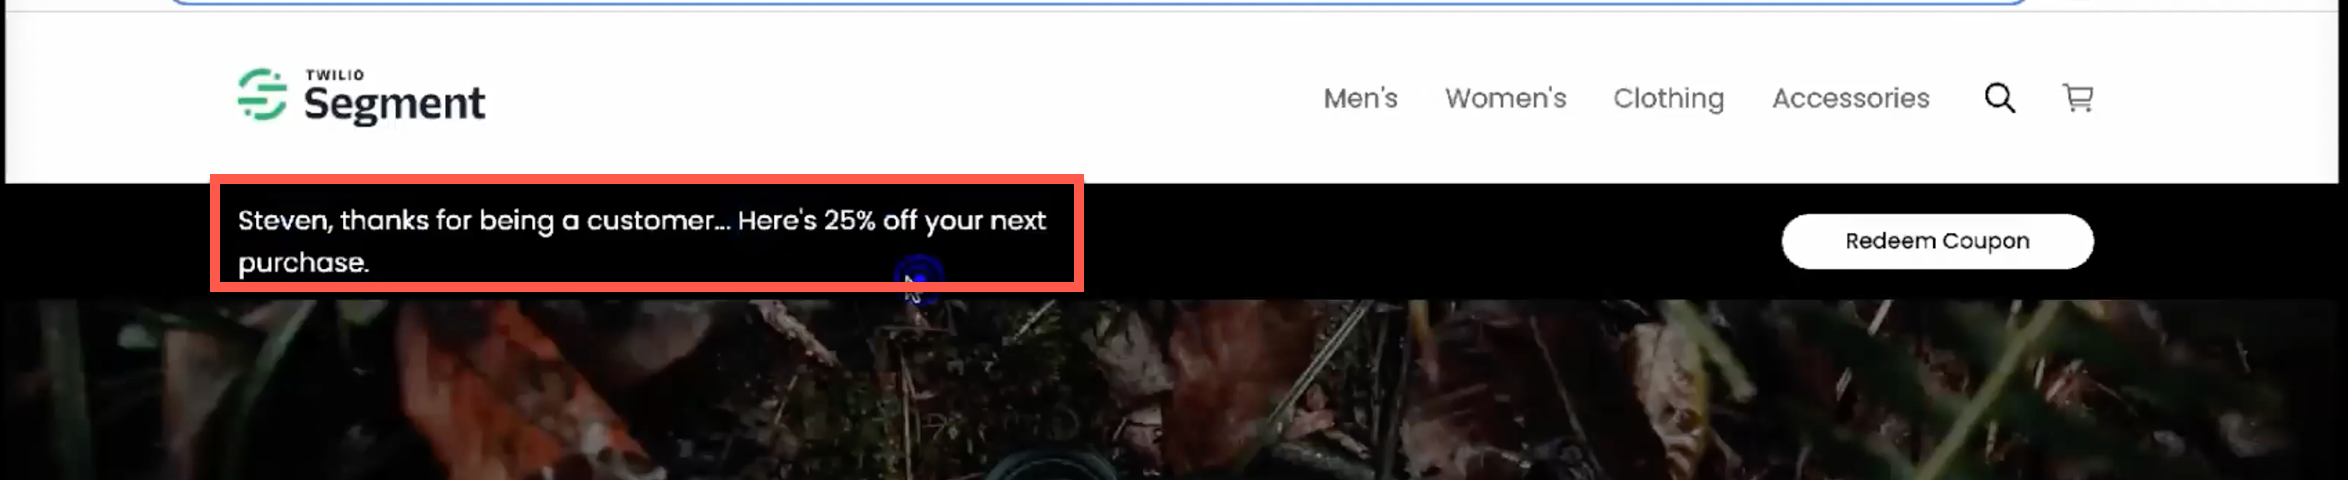
Once the shopper meets the condition, the storefront automatically offers them the promotion.
Using Segment Audience Personalization
The following example describes personalizing content for an Audience in Segment. For example, you may want to offer a promotion to VIP Customers.
-
Select Content > Landing Pages.
-
Select the landing page where you want to configure your audience. For example, you might want to configure this on your product detail page, product detail page templates, or any of your site pages.
-
To enable conditional content on your section, select the
**{...}**icon from the section toolbar. -
Select Condition and select Audience from the drop-down list.
You must have defined an audience in Unify, for example, VIP Customers. Then, in Studio, input a value that corresponds to your audience in Unify. The value you input in Studio must reference the audience key. For example, for the VIP Customers audience in Segment, configure the parameter in Studio as follows:
Parameter Value Operator equals Value vip-customers noteTo personalize content for more than one audience, you can use advanced comparison. For example, if you have several audiences beginning with vip, you can target them all using the starts with operator.
Once the shopper meets the condition, the storefront automatically offers them the promotion.
Viewing Studio Event Streams in Segment
Event streams sources collect data from Studio to monitor shoppers actions in your Studio storefronts.
-
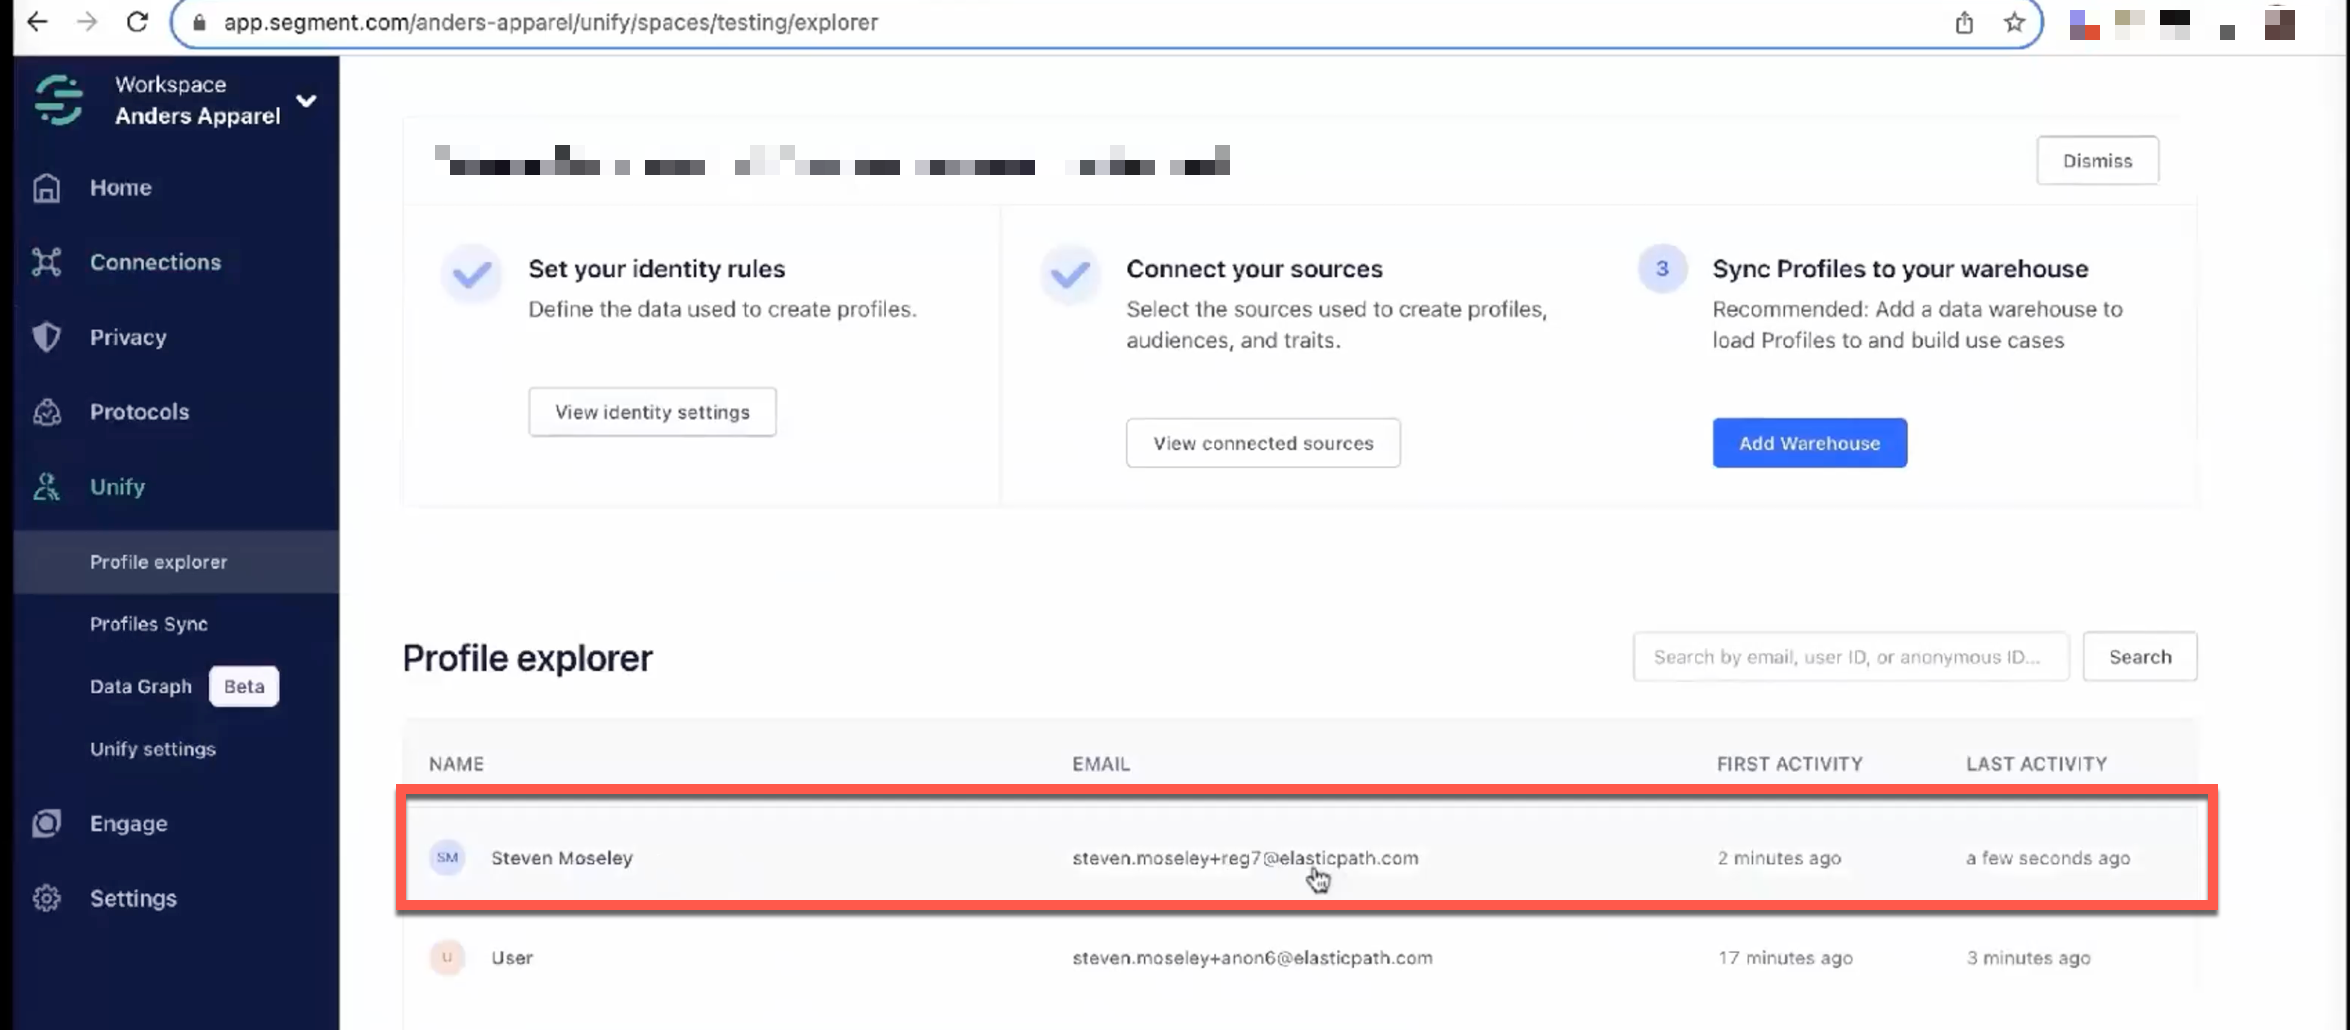
If you go to Unify > Profile Explorer, you can see the profile for the shopper.
-
In addition, if you select a user, you can view the
user_idfor the shopper. This is also the Composable Commerce account number.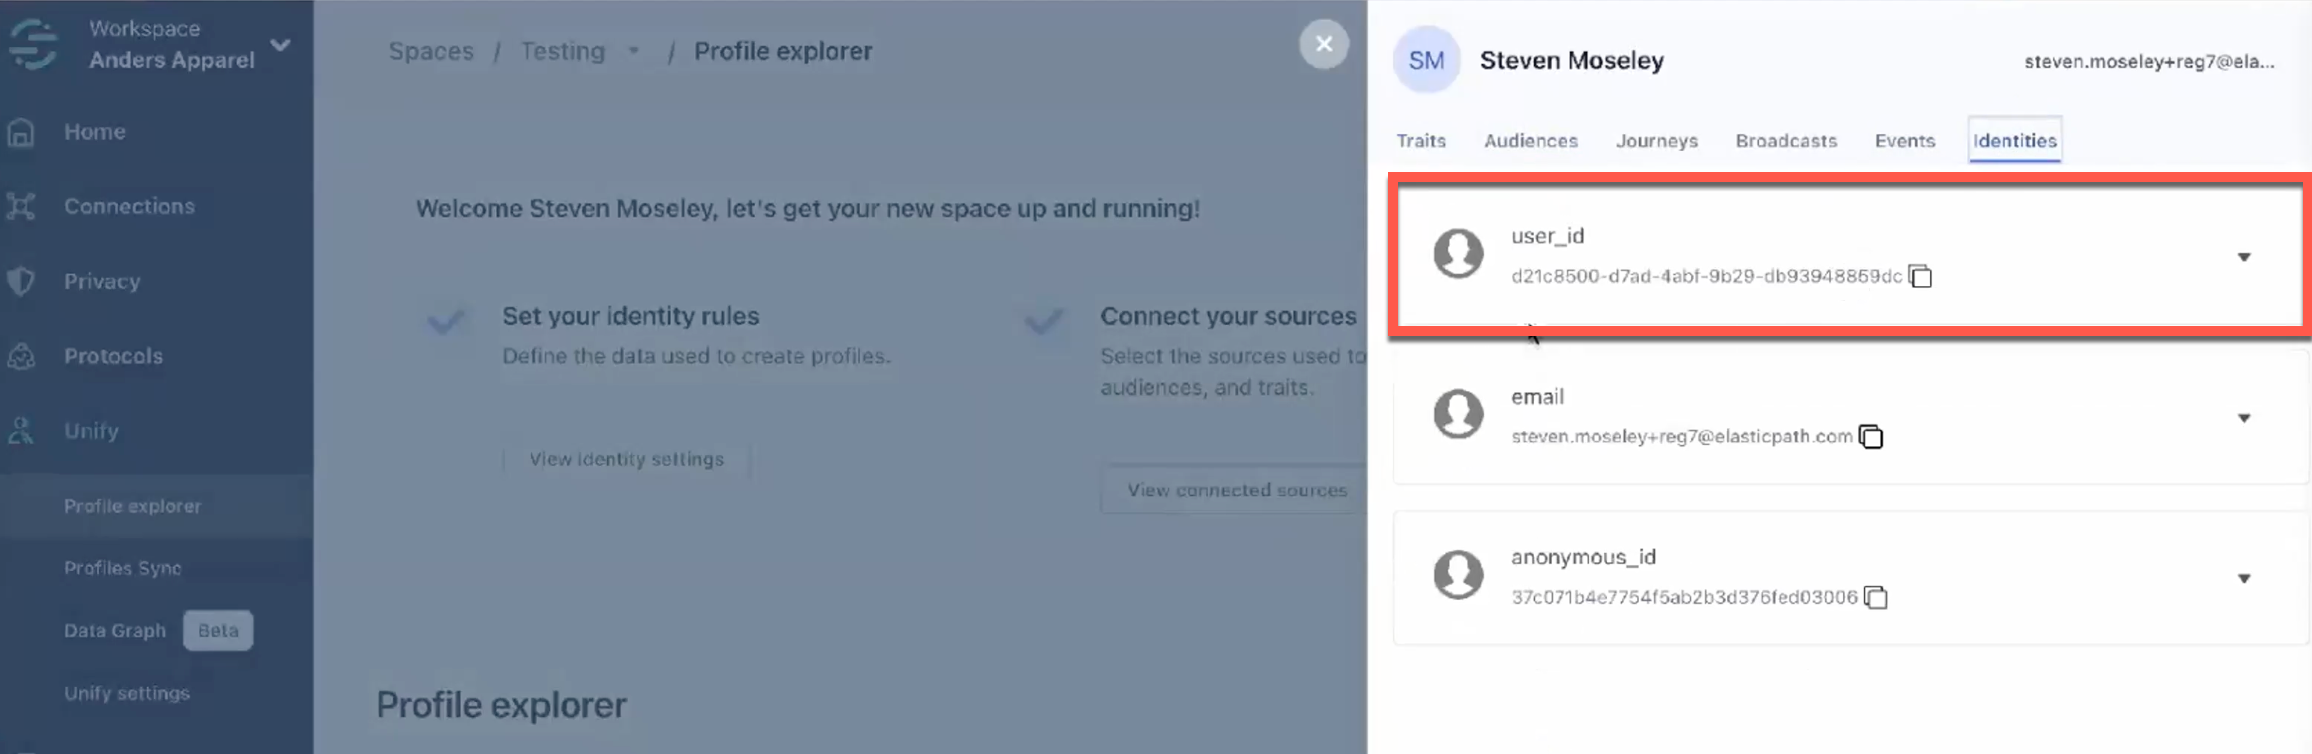
For more information about Segment's computer traits, audience, and predictive analytics, see Segment Documentation.