Integrating Zapier
Zapier Access
Our Zapier integration is only available to users that are subscribed to either our Full, Full+, Enterprise, or Shopify plans. For more information on these plans please reference this link.
When configured, our Zapier integration allows you trigger a Zap based off of the submission of an Studio form on one of your pages.
Connecting Zapier
-
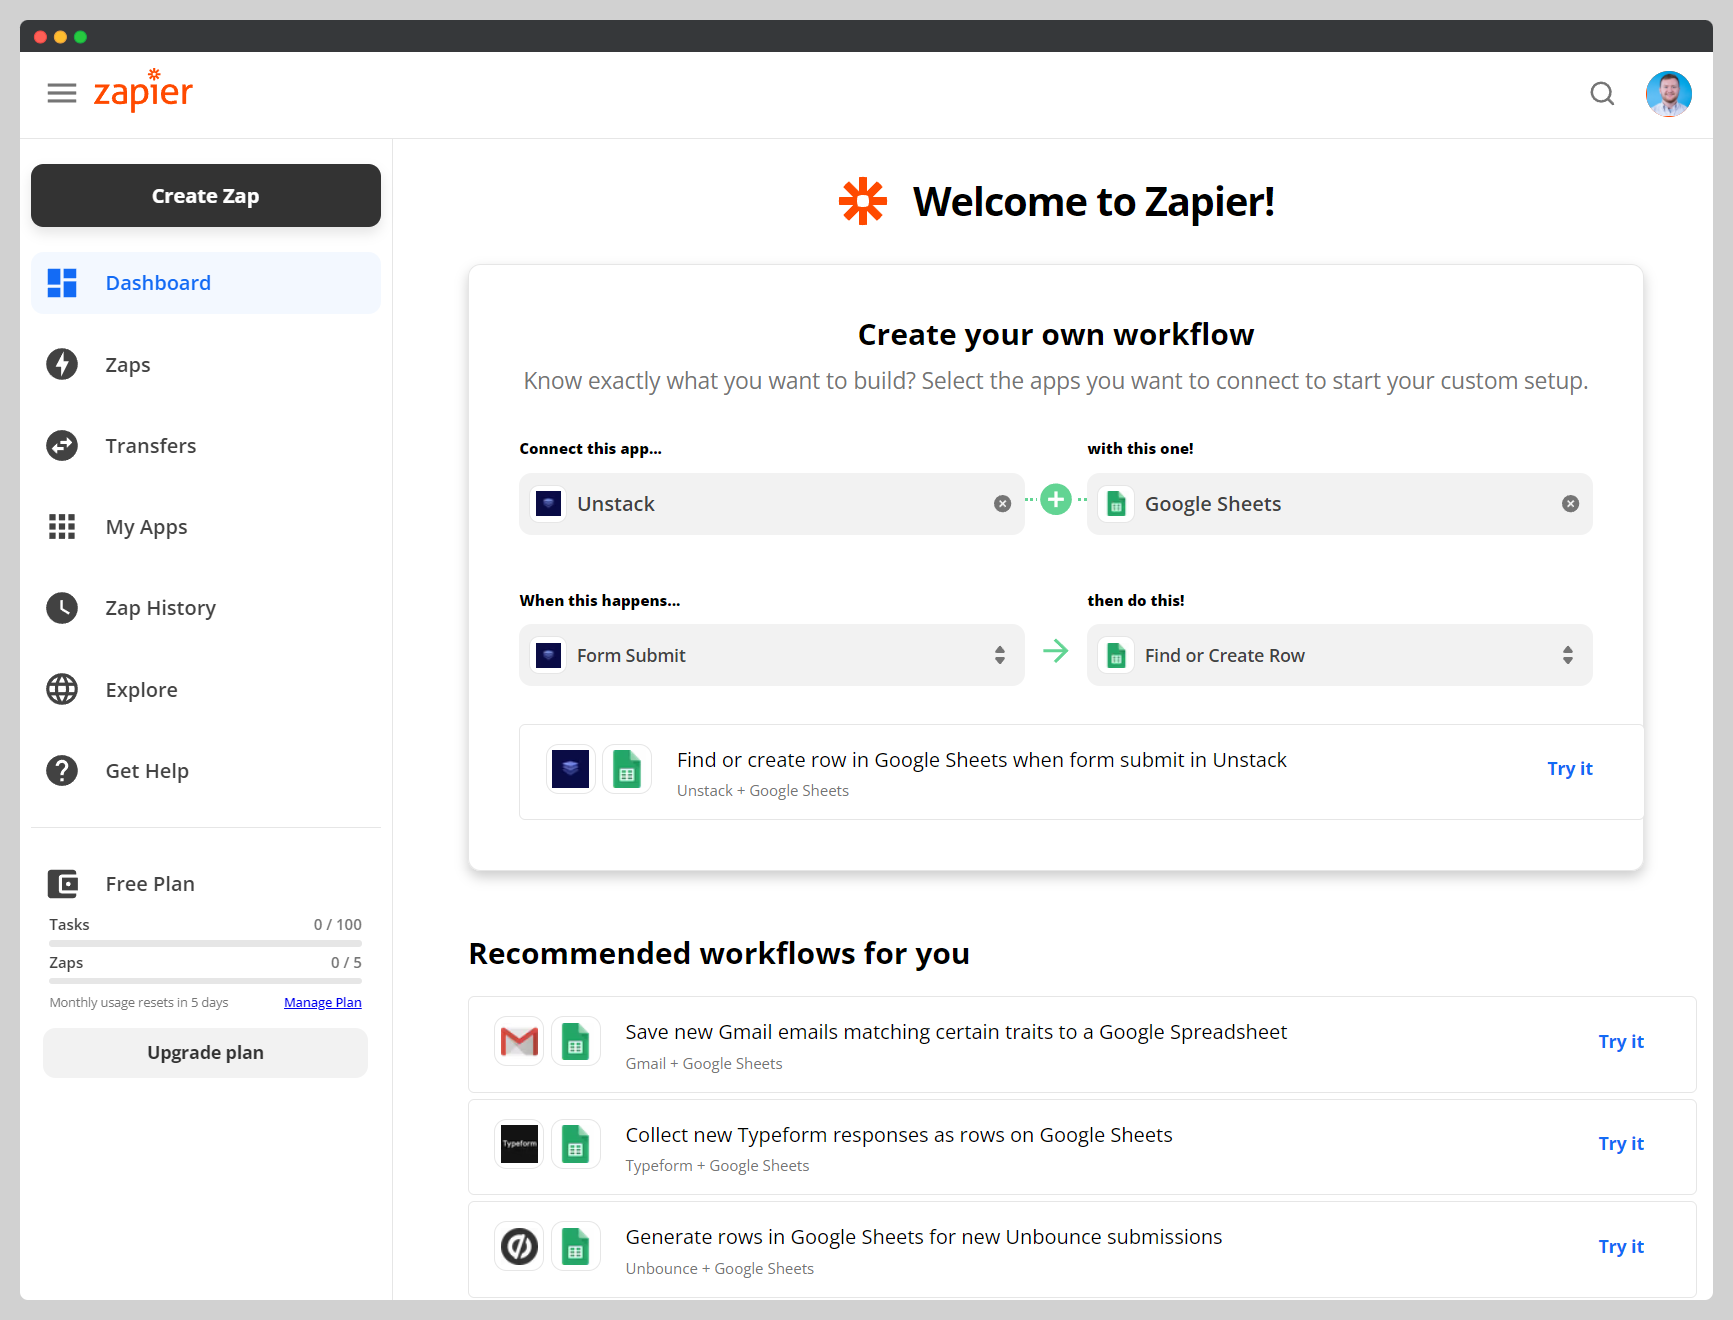
Log into your Zapier account and select Create Zap. From there, search for Studio within the "Connect this app..." field and set the "When this happens..." field to Form Submit. Integrate with the app of your choosing and select Try It.
-
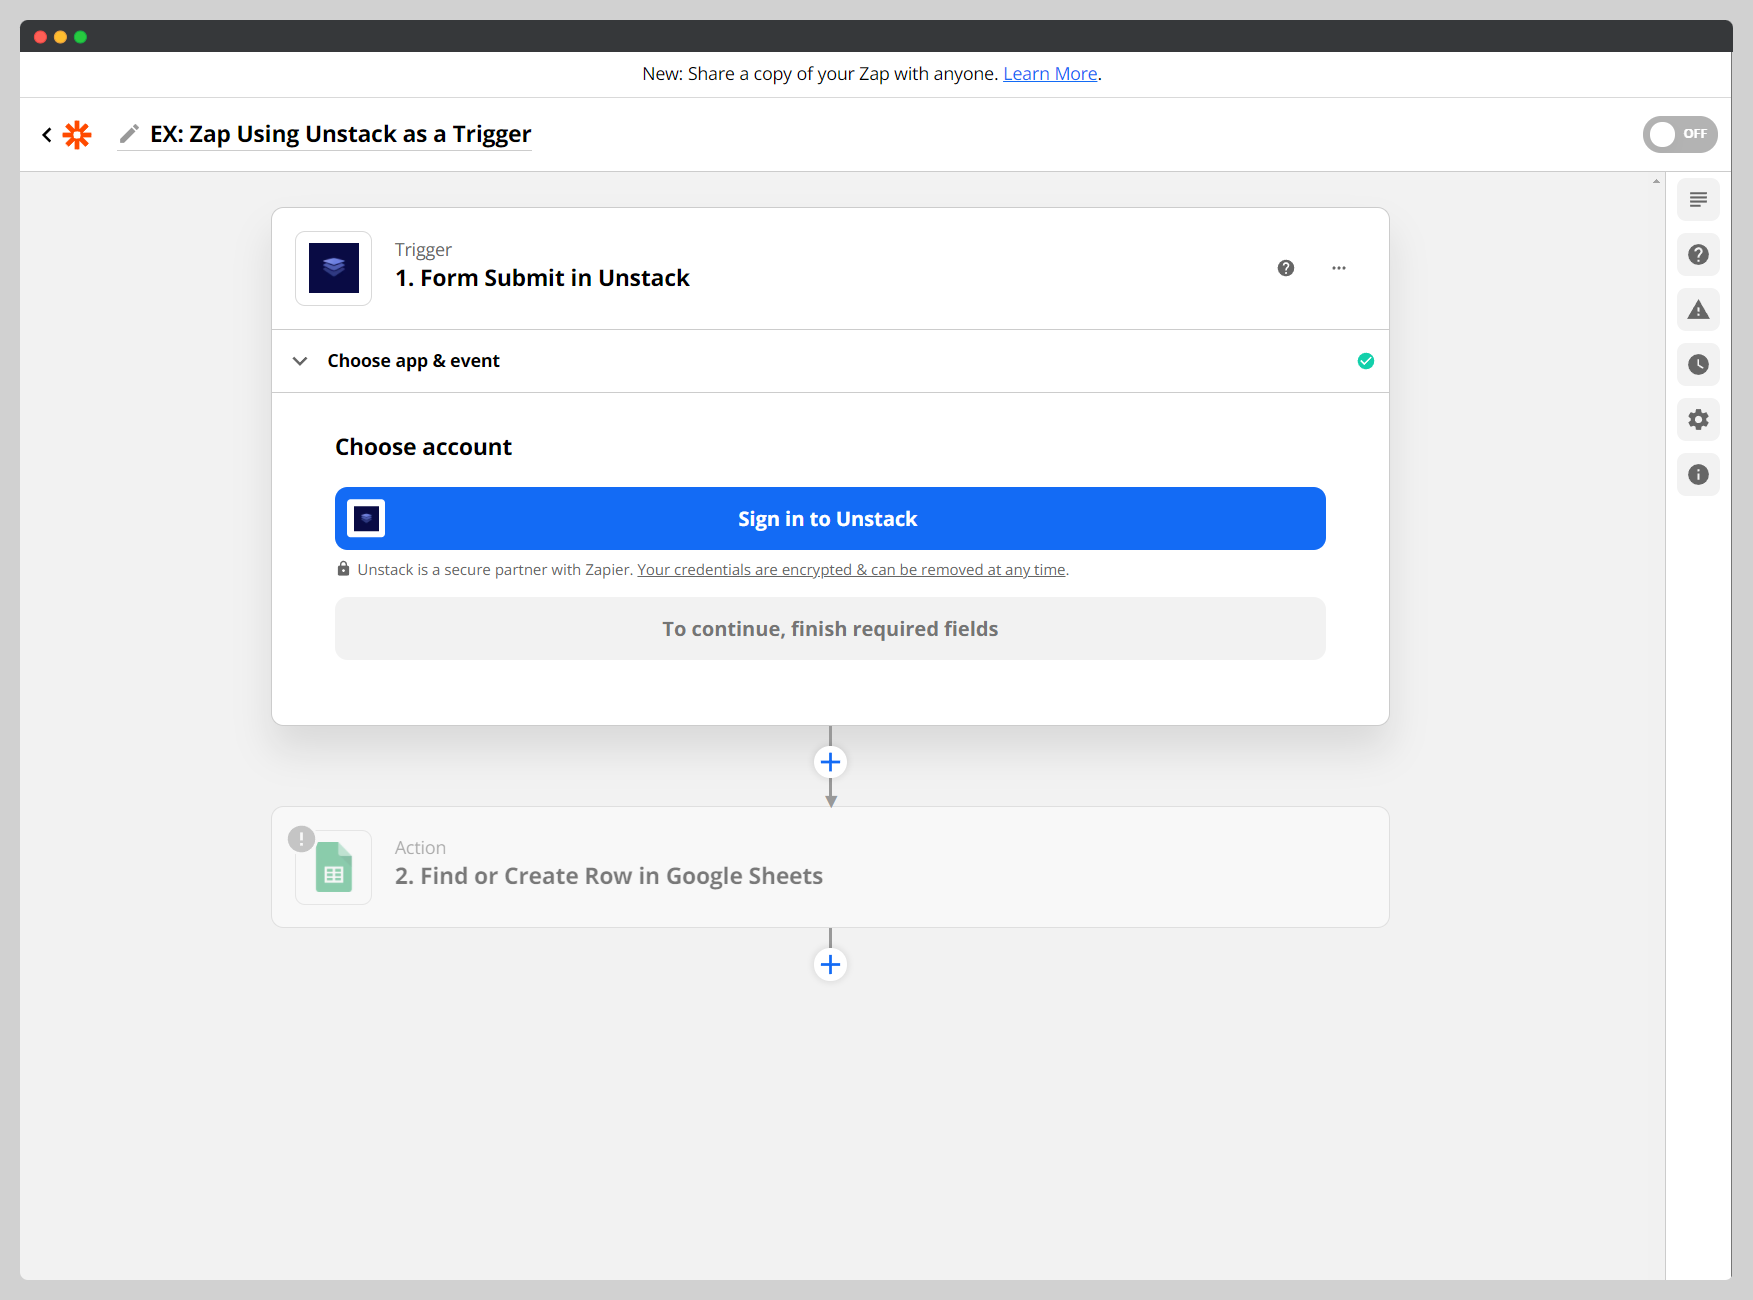
Next, Zapier will prompt you to sign into Studio. Clicking the sign in button will open a second window which asks you for two values: an API Key and aSite ID. Both of these values can be found in your Studio account.
-
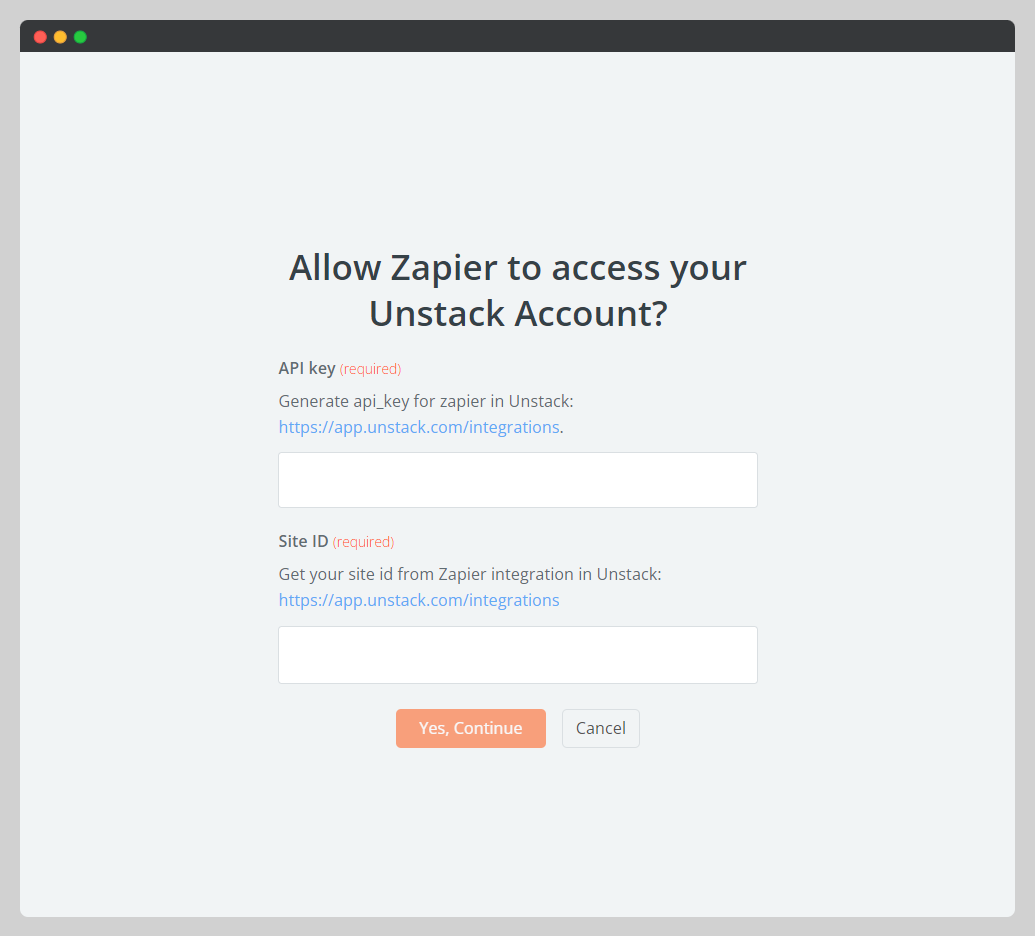
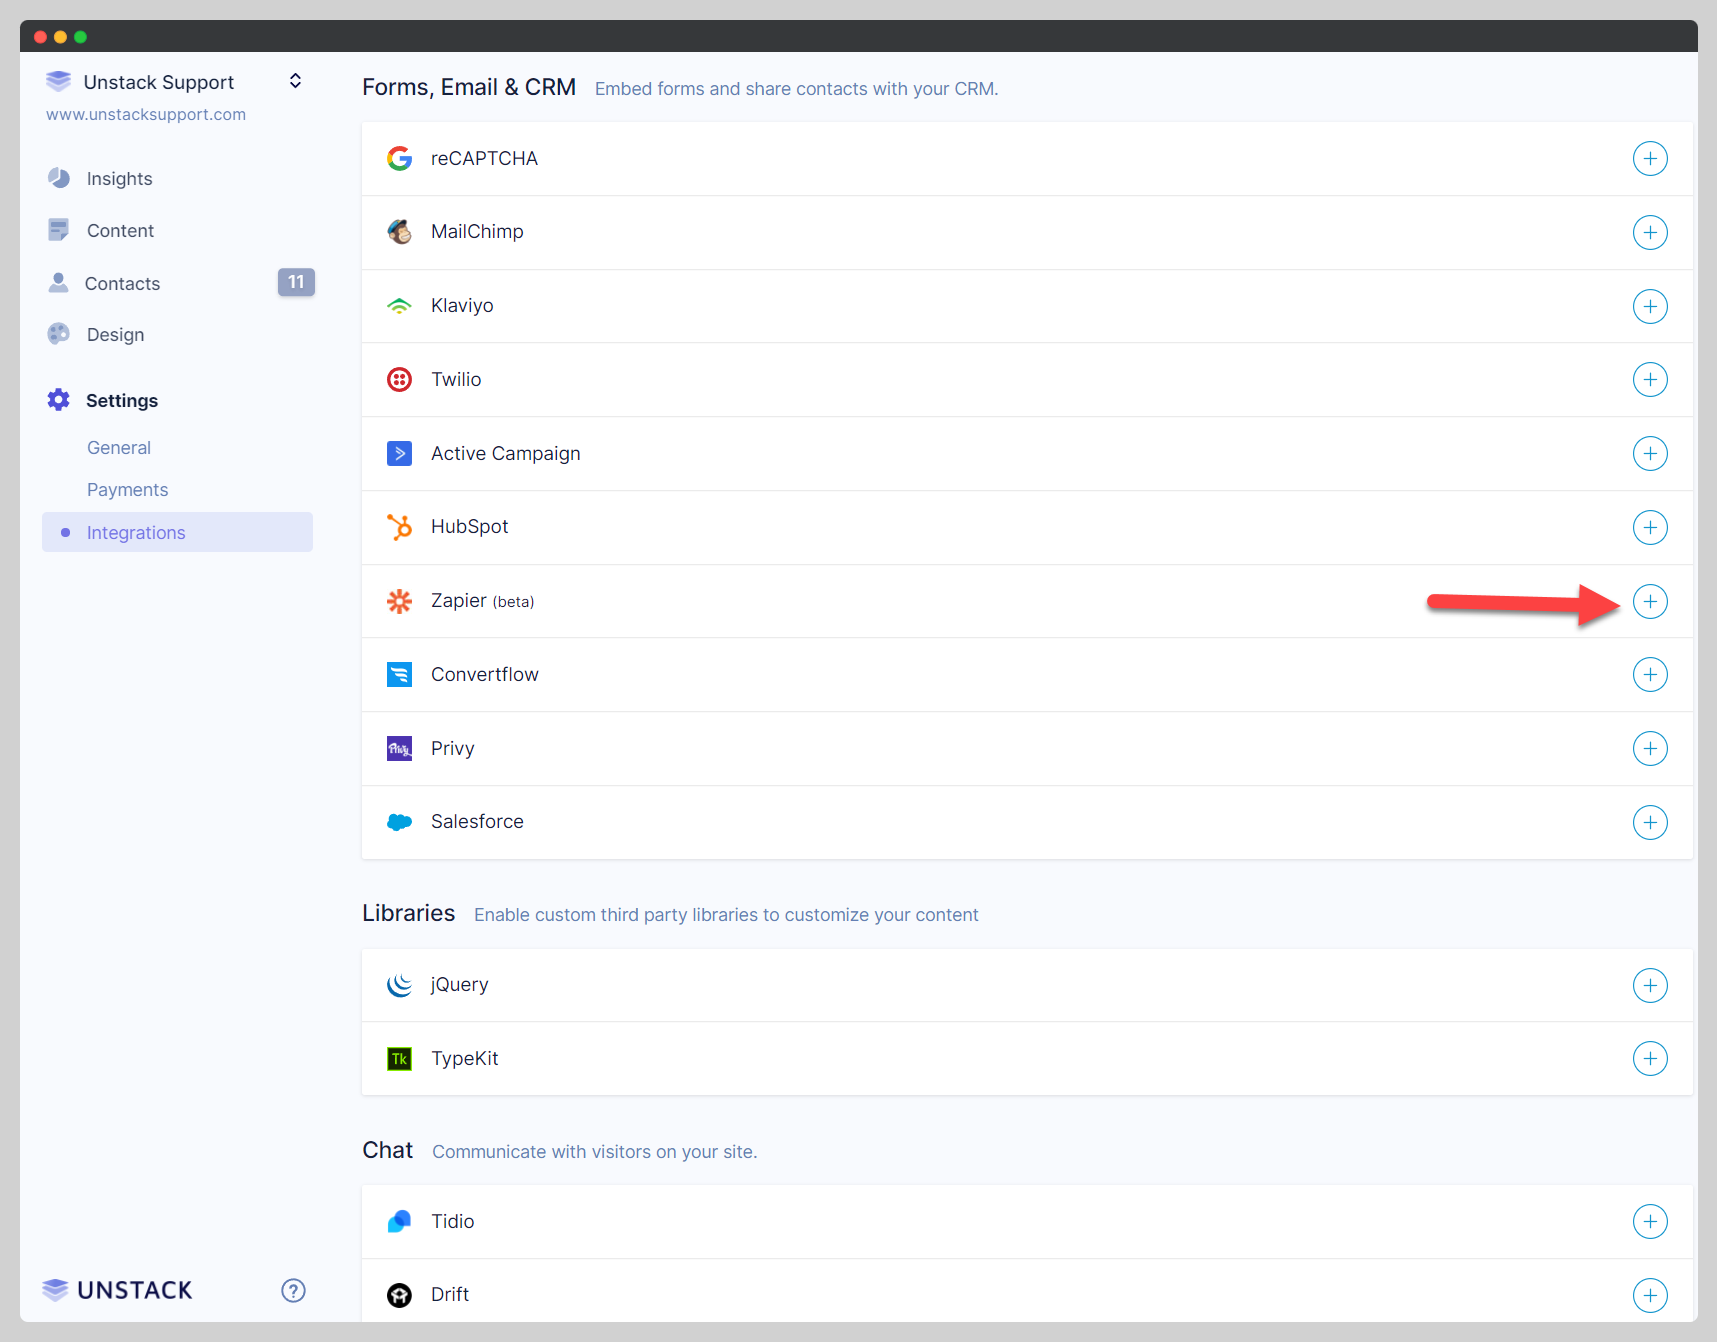
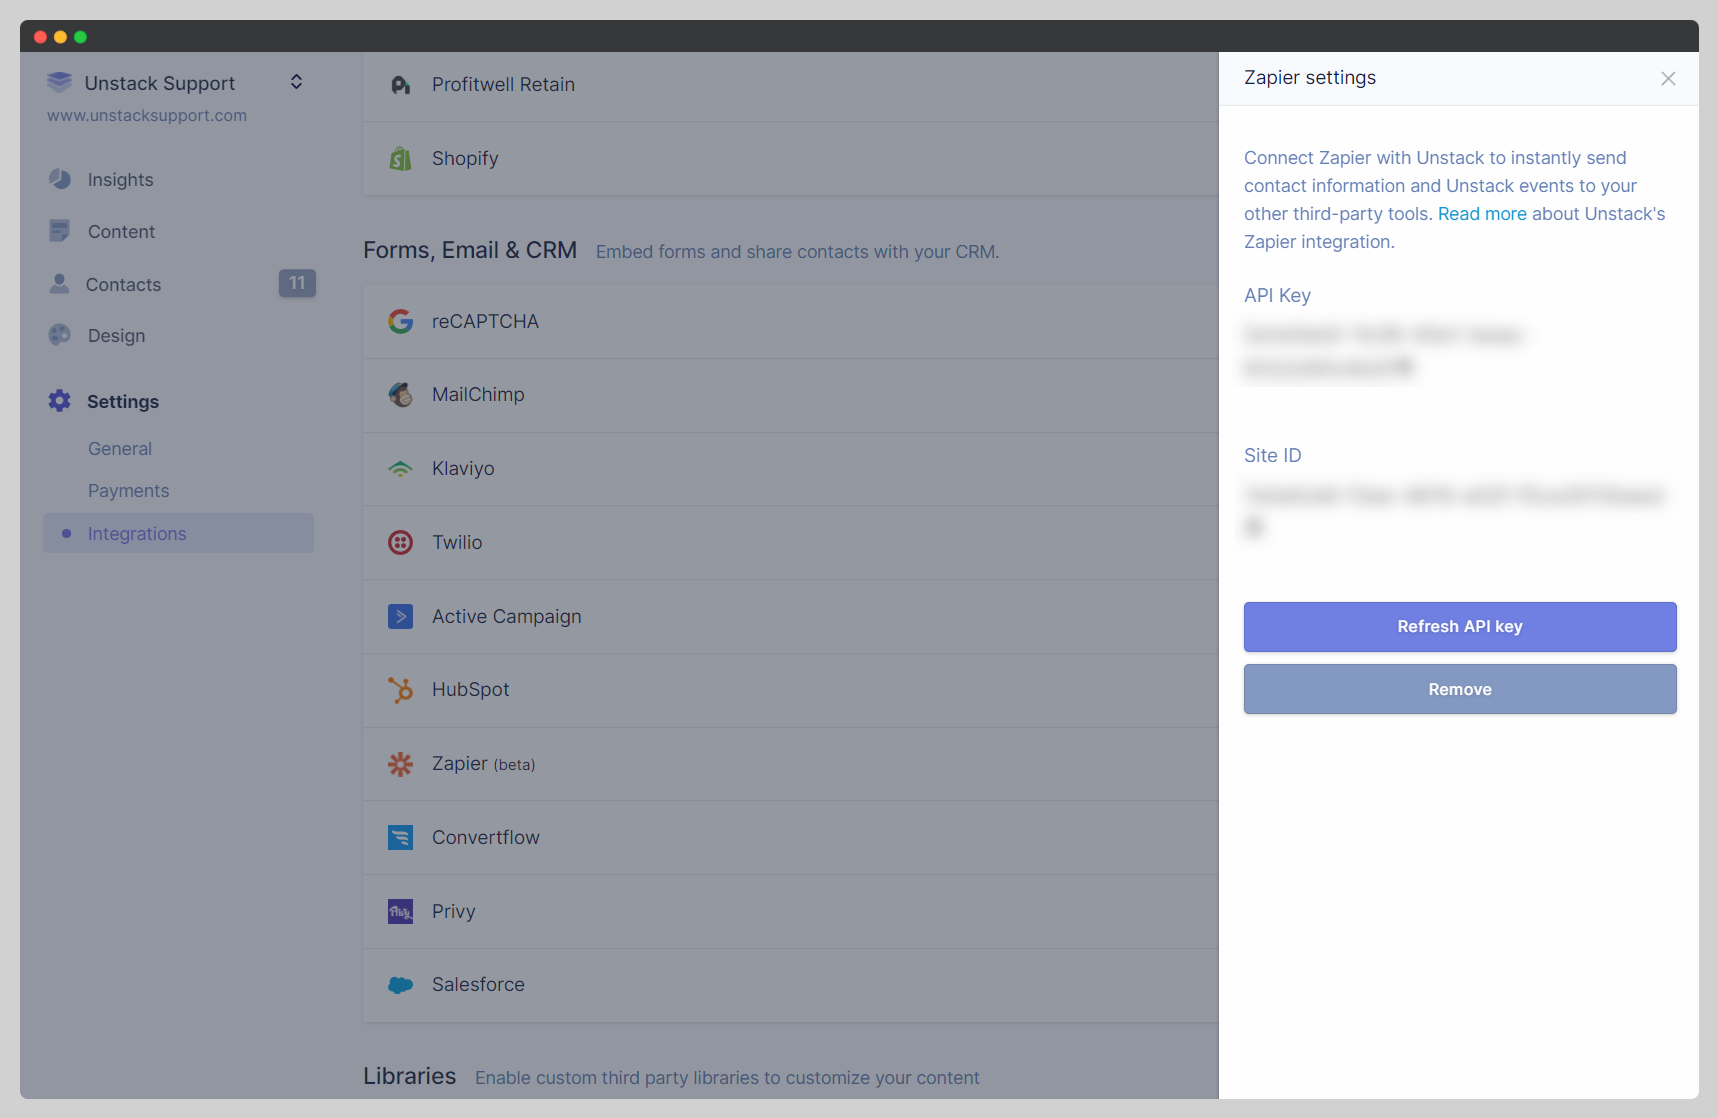
To find the values for API Key and Site ID you'll first need to activate the Zapier integration in your Studio account. This can be done by clicking the (+) symbol next to the Zapier integration under Settings > Integrations. Upon doing so a slide-in with the Site ID will appear from the right. Your API Key is also found here, but doesn't exist until you hit the Generate API Key button.
Armed with both values, paste them into the fields in the pop-up window that appeared during the last step.
-
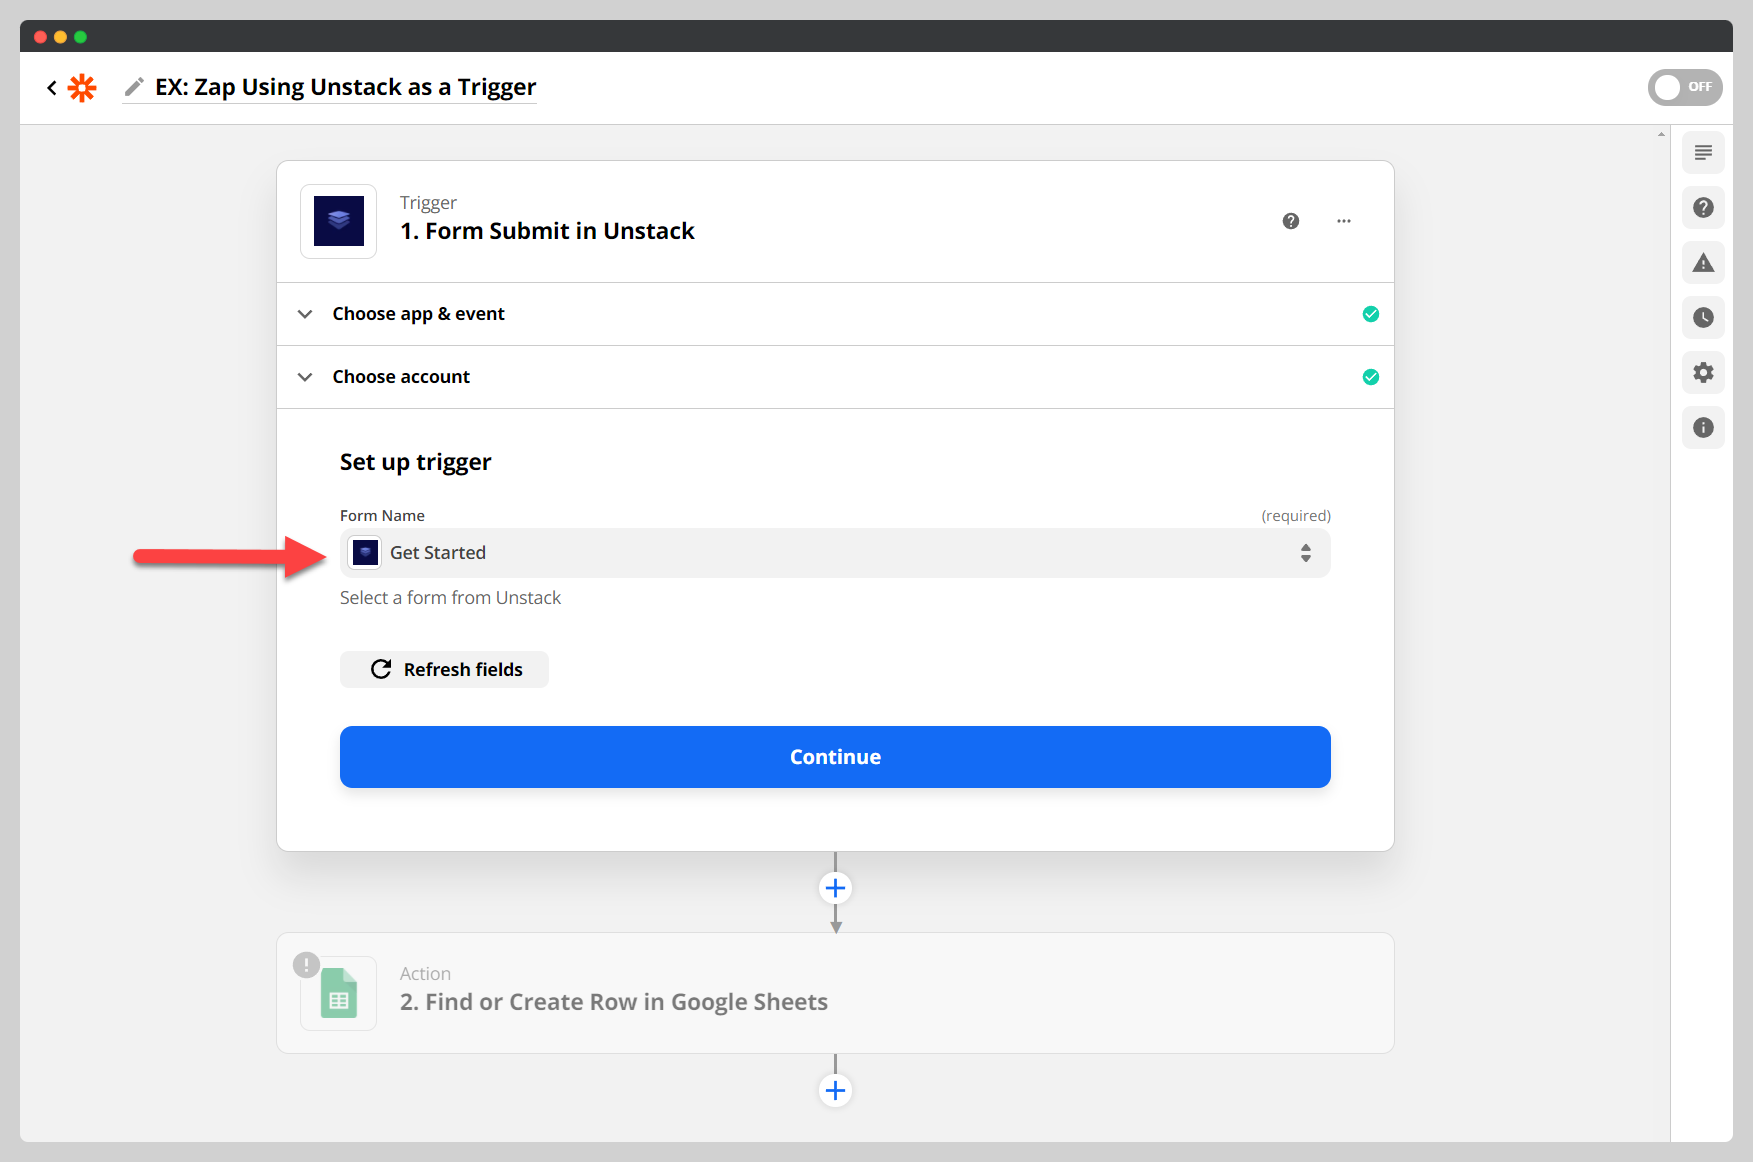
Once you save both values in Zapier, you'll be prompted to select both an Studio Account and Form Name.
As a reminder the only trigger that is currently available through our Zapier integration is the submission of an Studio Form. Therefore we require that you specify which form you'd like to use as the trigger.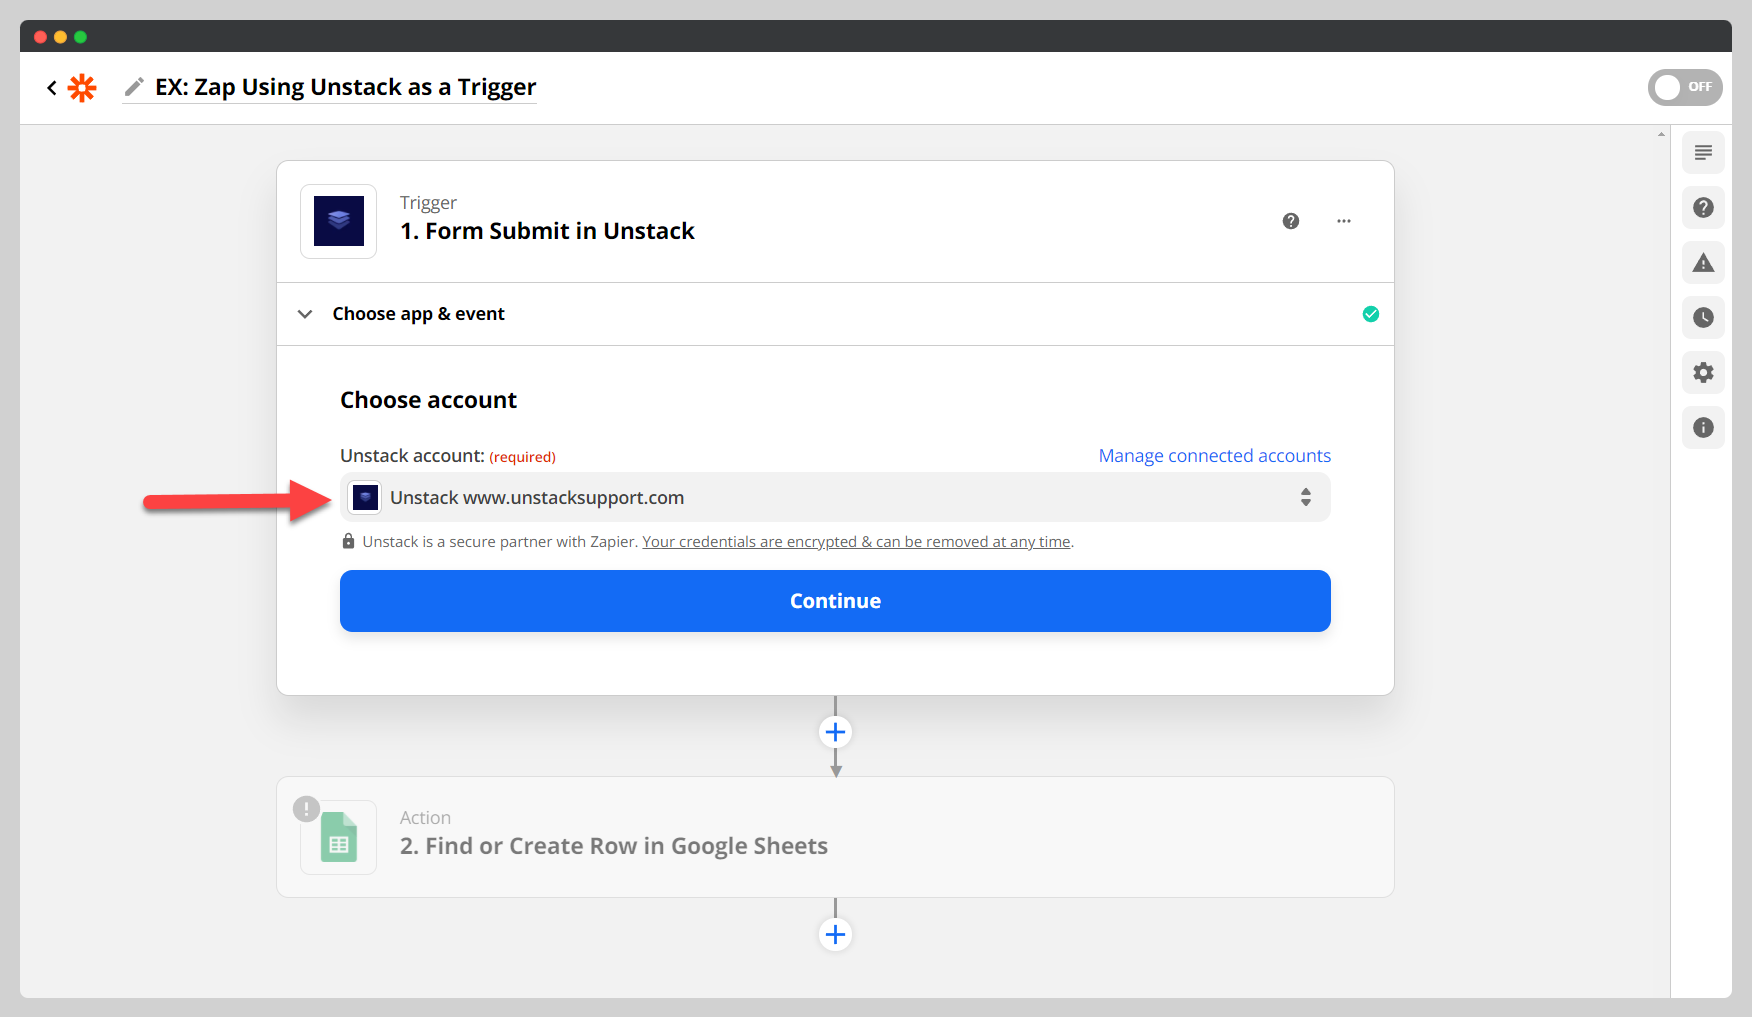
-
If you've reached this step; congratulations! Your Studio account should now be integrated with Zapier. As a reference, below are the various values from Studio that you should use defining an action in Zapier that's using Studio as the trigger.
Built-In Fields Custom Fields
If your Studio form is using the built-in fields that are provided in the form editor, then the table below should help you to map those fields to the values you can use to reference them in Zapier.
| Studio Field | Zapier Value #1 | Zapier Value #2 |
|---|---|---|
| First Name | Data First Name | Contact First Name |
| Last Name | Data Last Name | Contact Last Name |
| Full Name | Data Full Name | - |
| Data Email | Contact Email | |
| Phone Number | Data Phone | Contact Phone |
| Street Address | Data Address1 | Company Address1 |
| City | Data City | Company City |
| State/Region | Company State | - |
| Country | Data Country | Company Country |
| Company Name | Data Organization | Contact Organization |
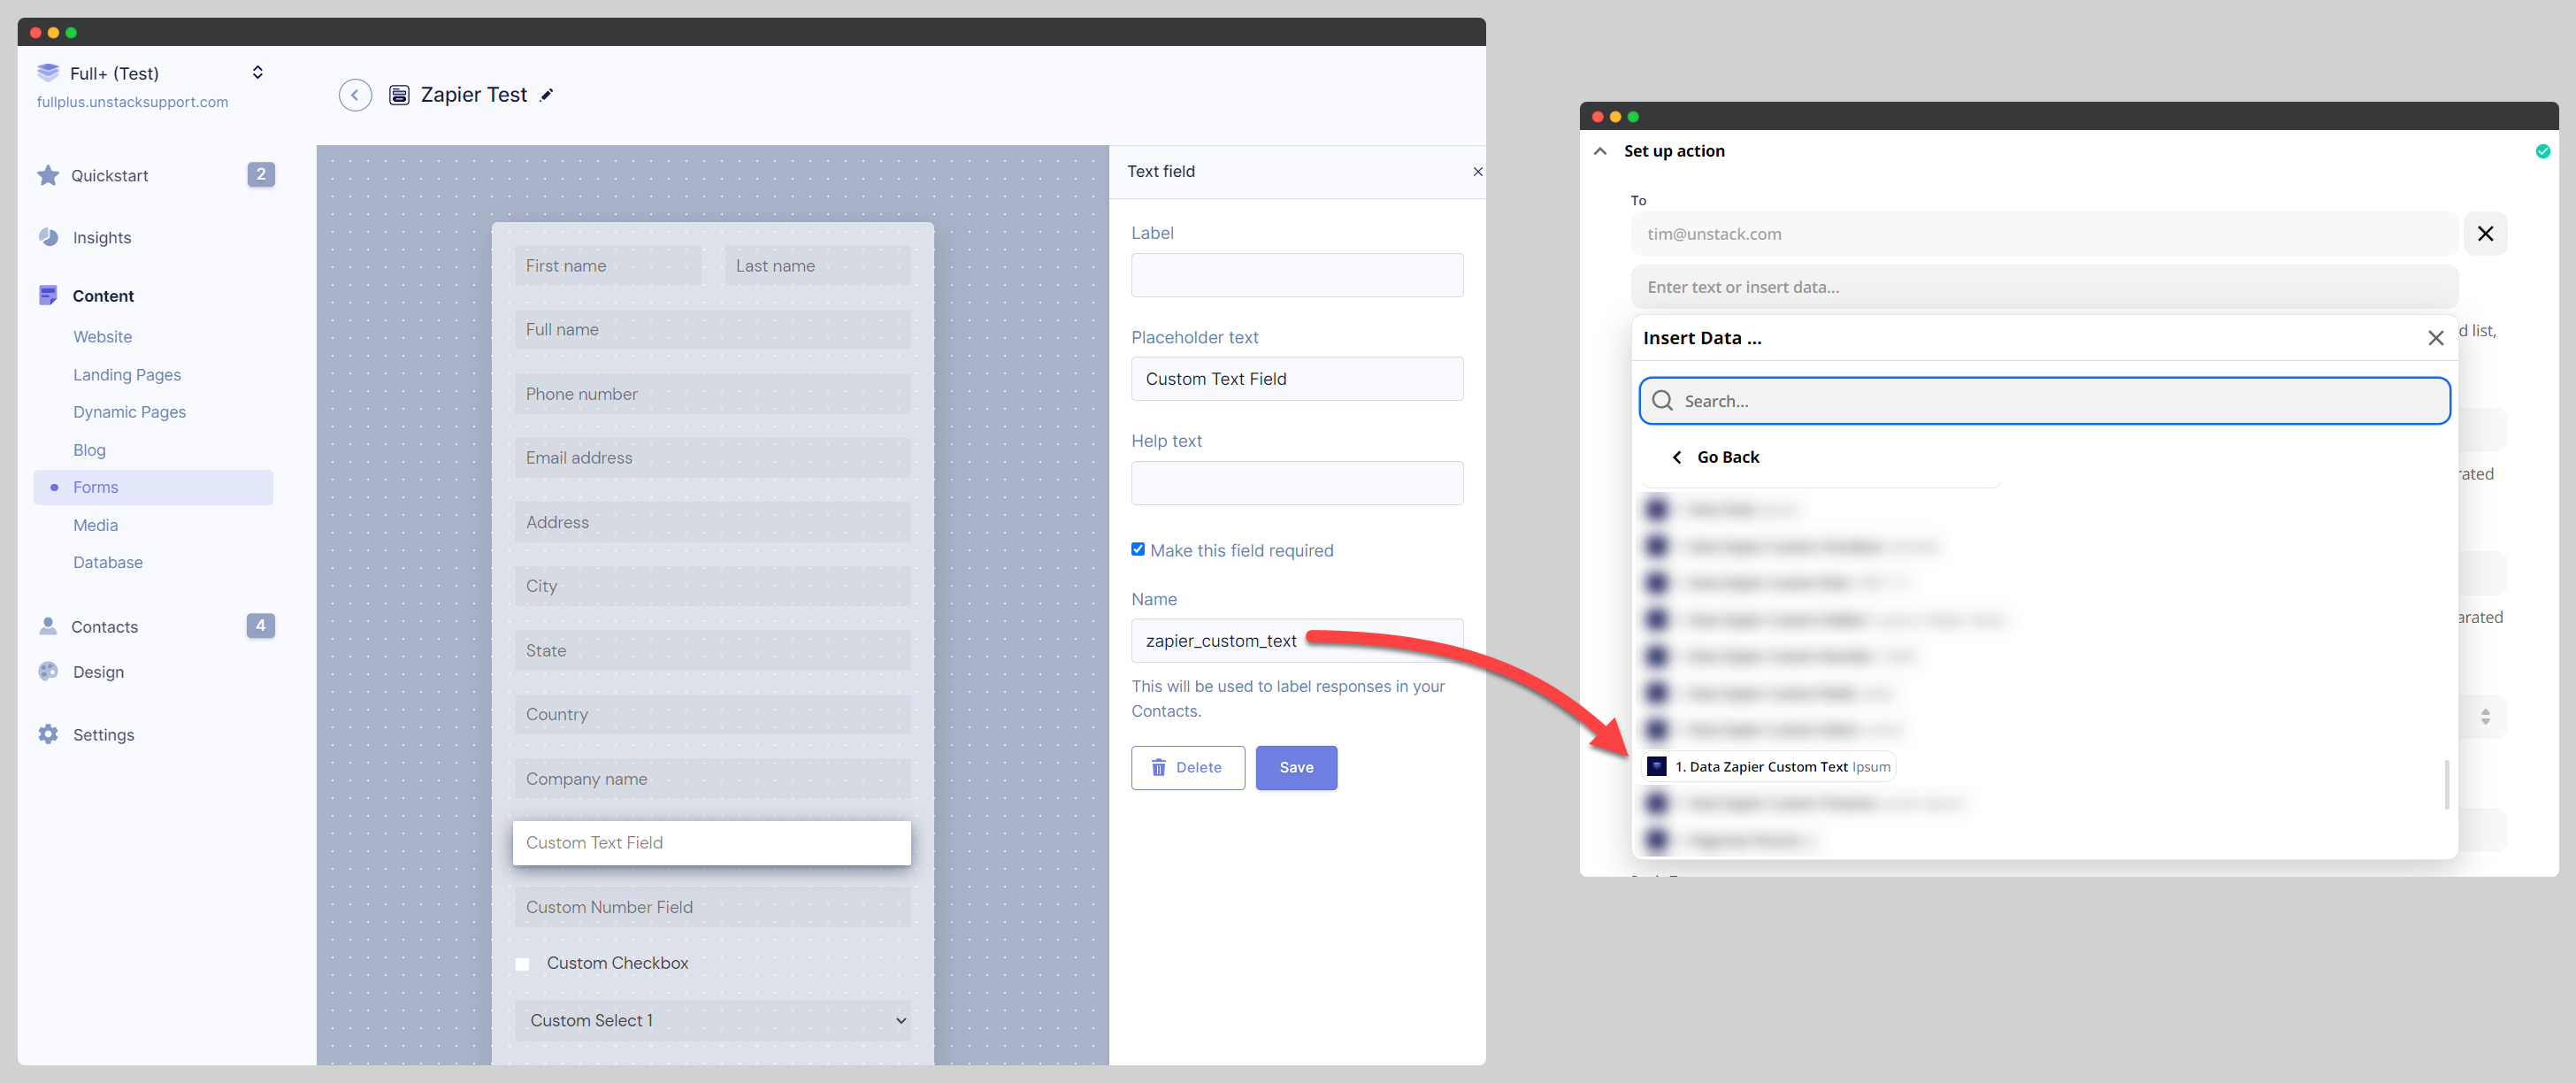
If you've used custom field and want to reference it in your Zap, you'll need to first open your form in the editor to ensure that any custom fields you're using have been given a custom value as their name. It's this name that will help you to identify the custom field in Zapier.
An important note, this name in Zapier will be prefaced by the word "Data" as shown below.