Adding Typekit Fonts
Have a Typekit account and want to pull in some fonts that aren't currently available in your account? This is the article for you.
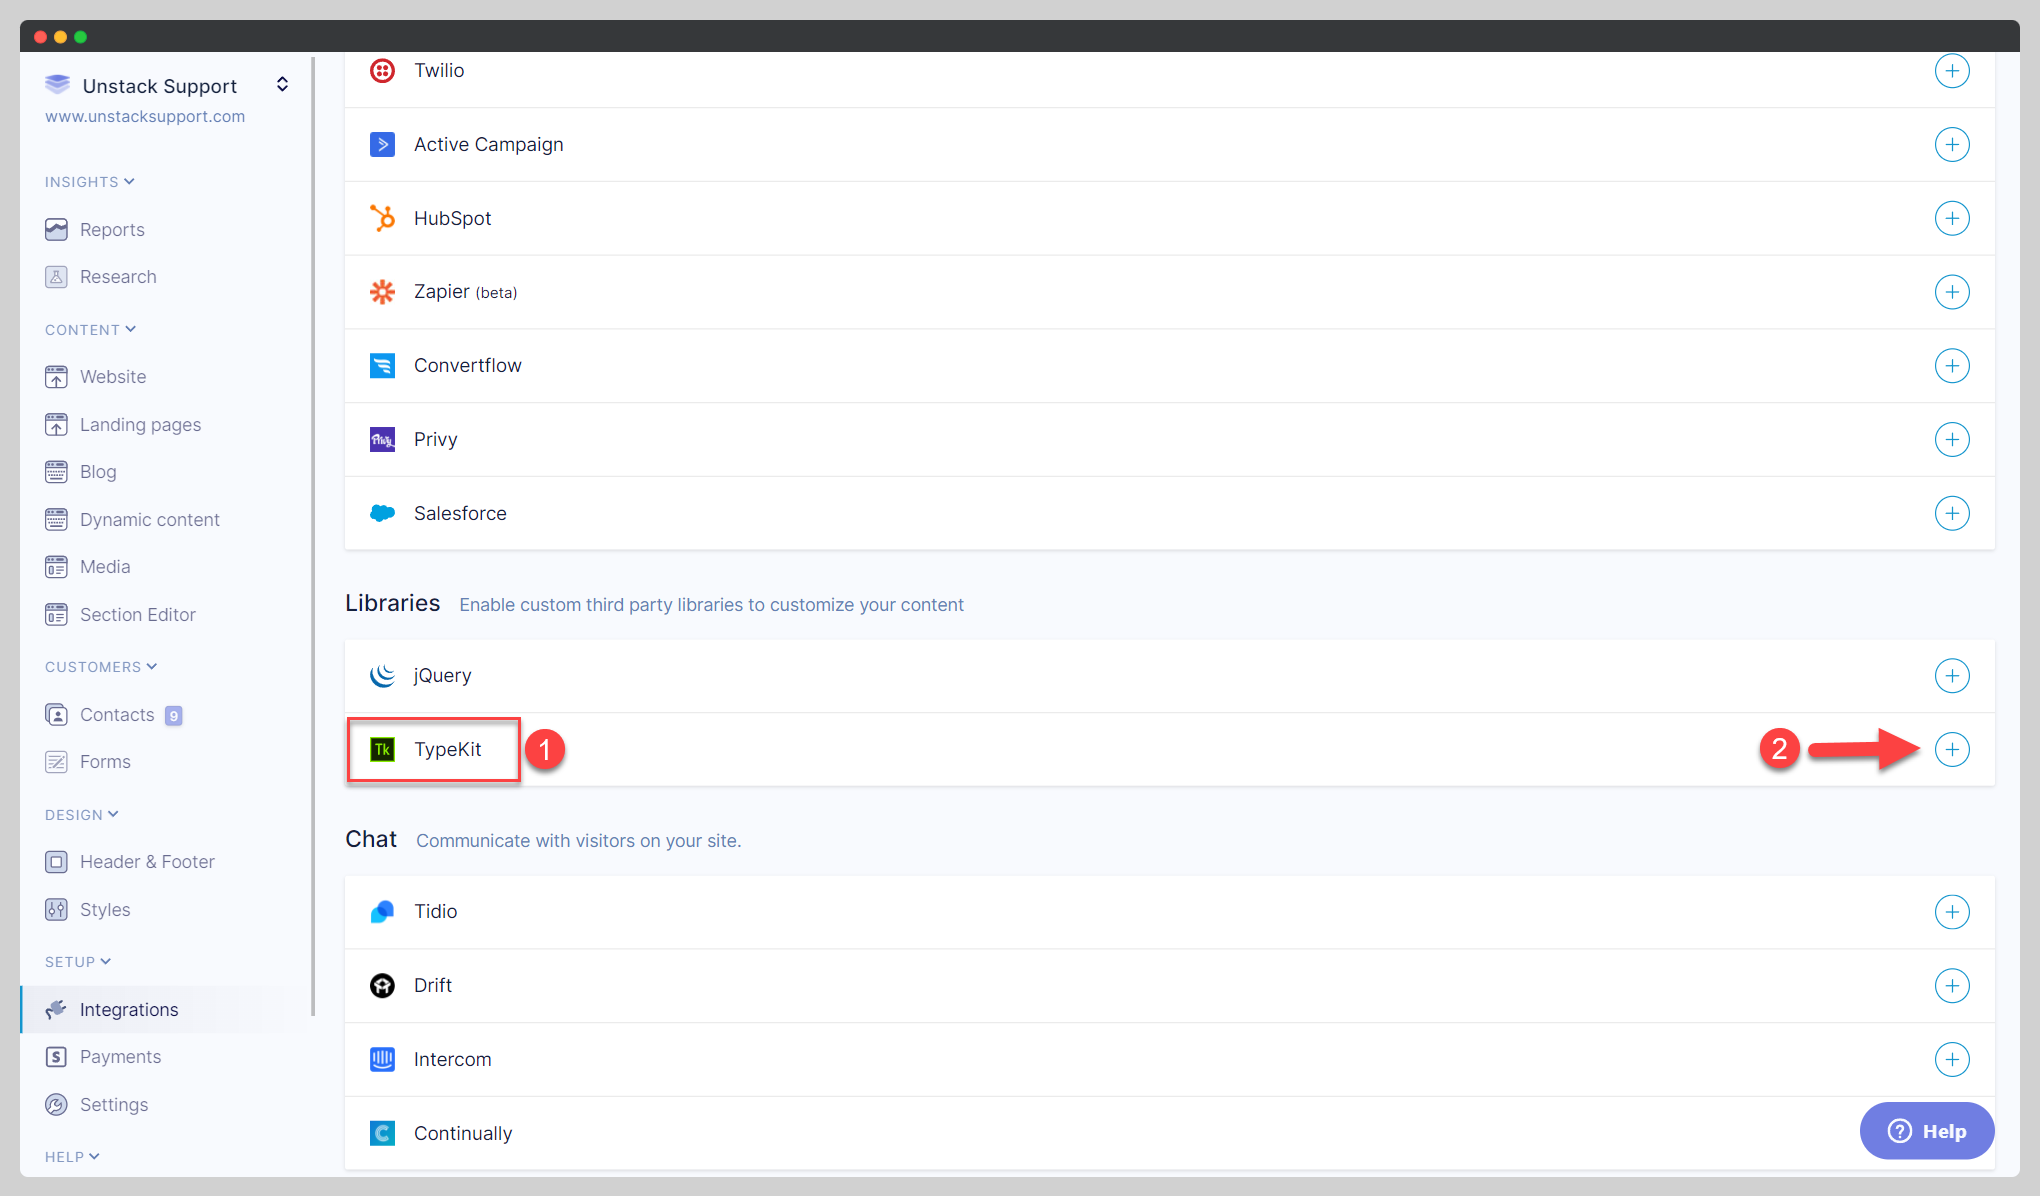
The first step is to log into your Studio account, open Integrations and scroll down to Typekit under Libraries. Click the (+) sign and enter your Kit ID.
Don't already have a Kit ID? Here is how to make one.
- In Typekit, identify the font(s) you'd like to use
- Select "Use Font" which should show you a modal
- In the modal select the "Web" tab and click create new kit
- On the next screen, add the domains where you'd like to use this font and create the kit!
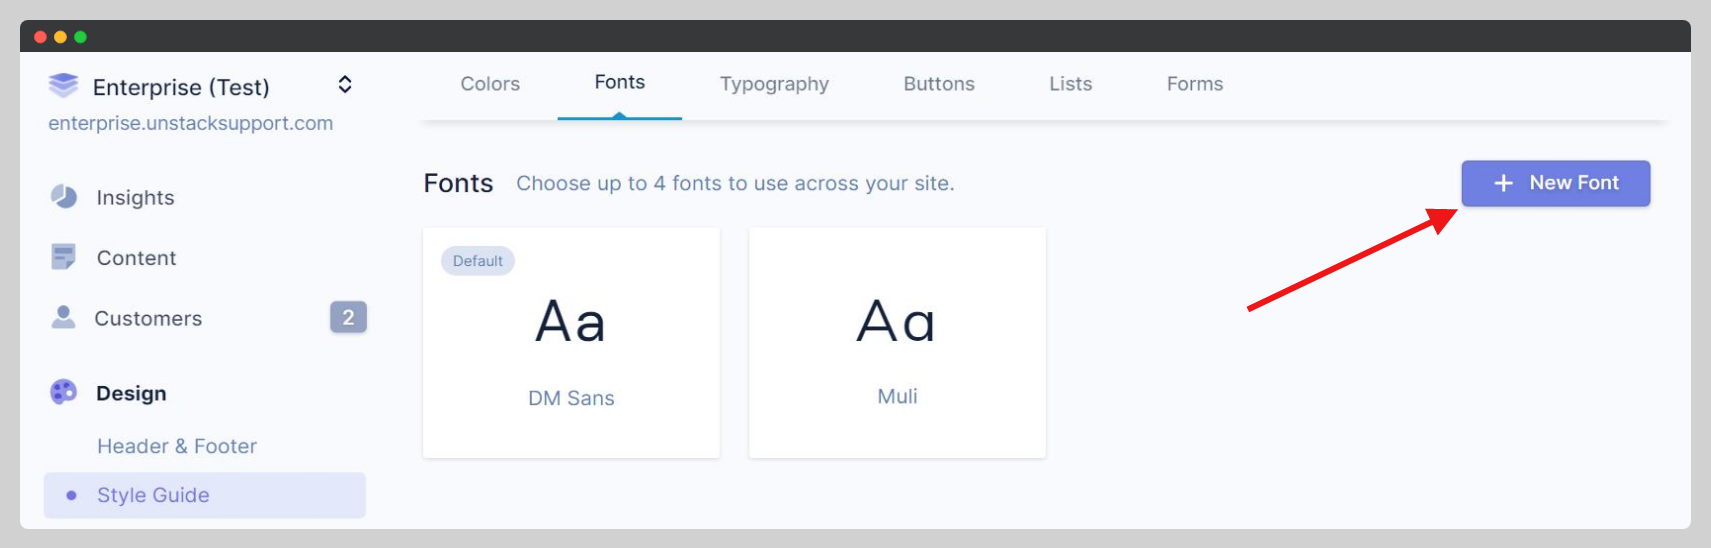
Now that your Kit ID has been added properly, it's time to add the fonts to your account. To do this, navigate to Design > Style Guide, scroll down to Fonts and click +New Font.
Clicking this "New Font" button slides in the drawer (pictured below) and allows you to select from the fonts available to your account though both Google Fonts and the Kit ID you connected above.
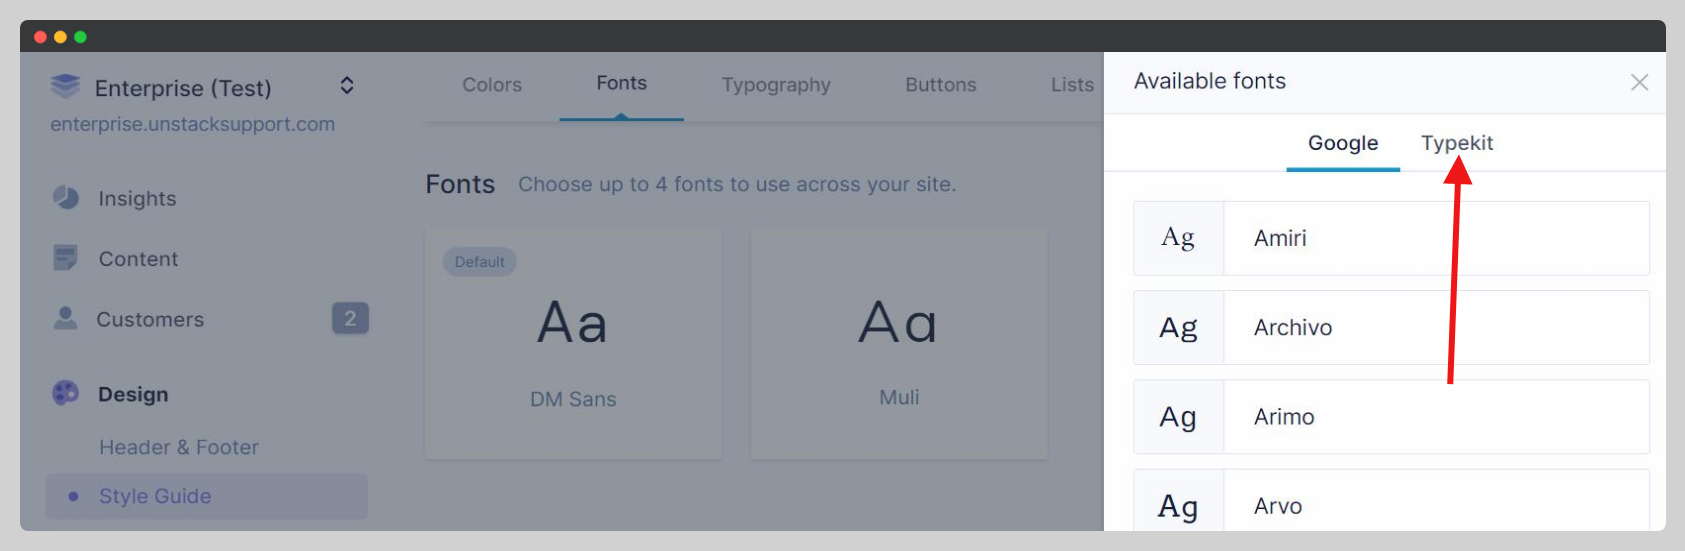
Not seeing any fonts under the Typekit option? Ensure your Kit ID is correct.