Integrating reCAPTCHA
Overview
reCAPTCHA is a tool by Google that is probably your strongest ally in the fight against spam form submissions. It does this by analyzing the user's behavior to confirm that they're human. If it is unable to do so, it will give the user a test that a normal bot would have a hard time completing.
How do I set up reCAPTCHA?
-
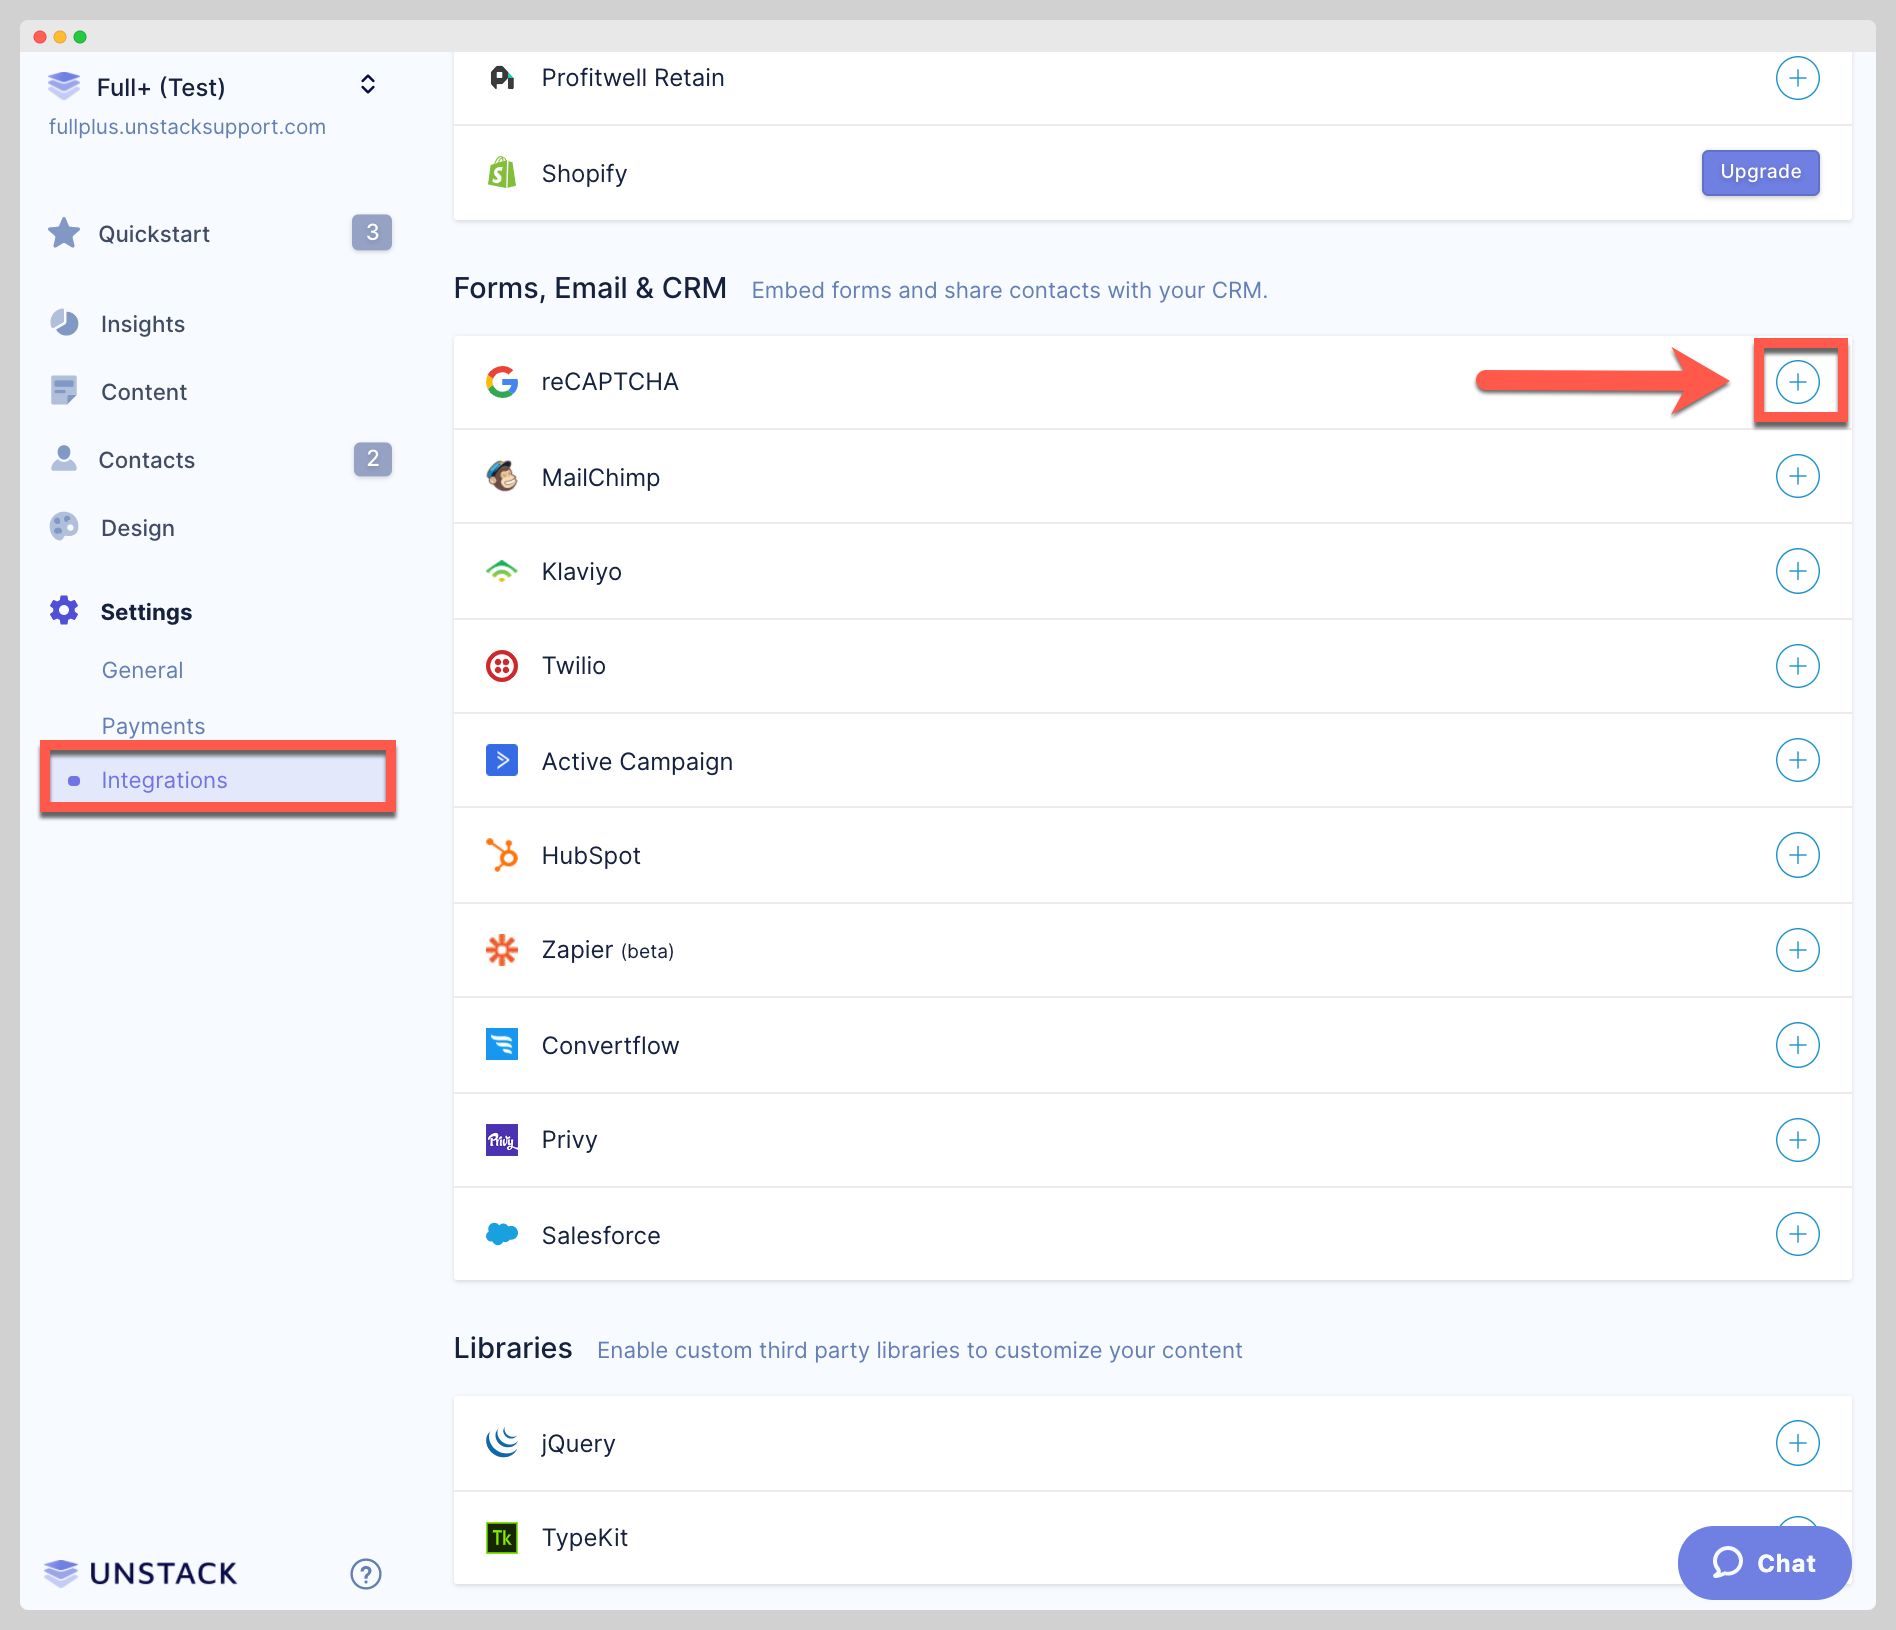
In Studio, open your Integrations page which is found under Settings on the left-hand side of the admin panel.
-
On the Integrations page, scroll down to "Forms, Email & CRM". Directly under that section you'll see an item called reCAPTCHA. Click on the ( + ) to get started.
-
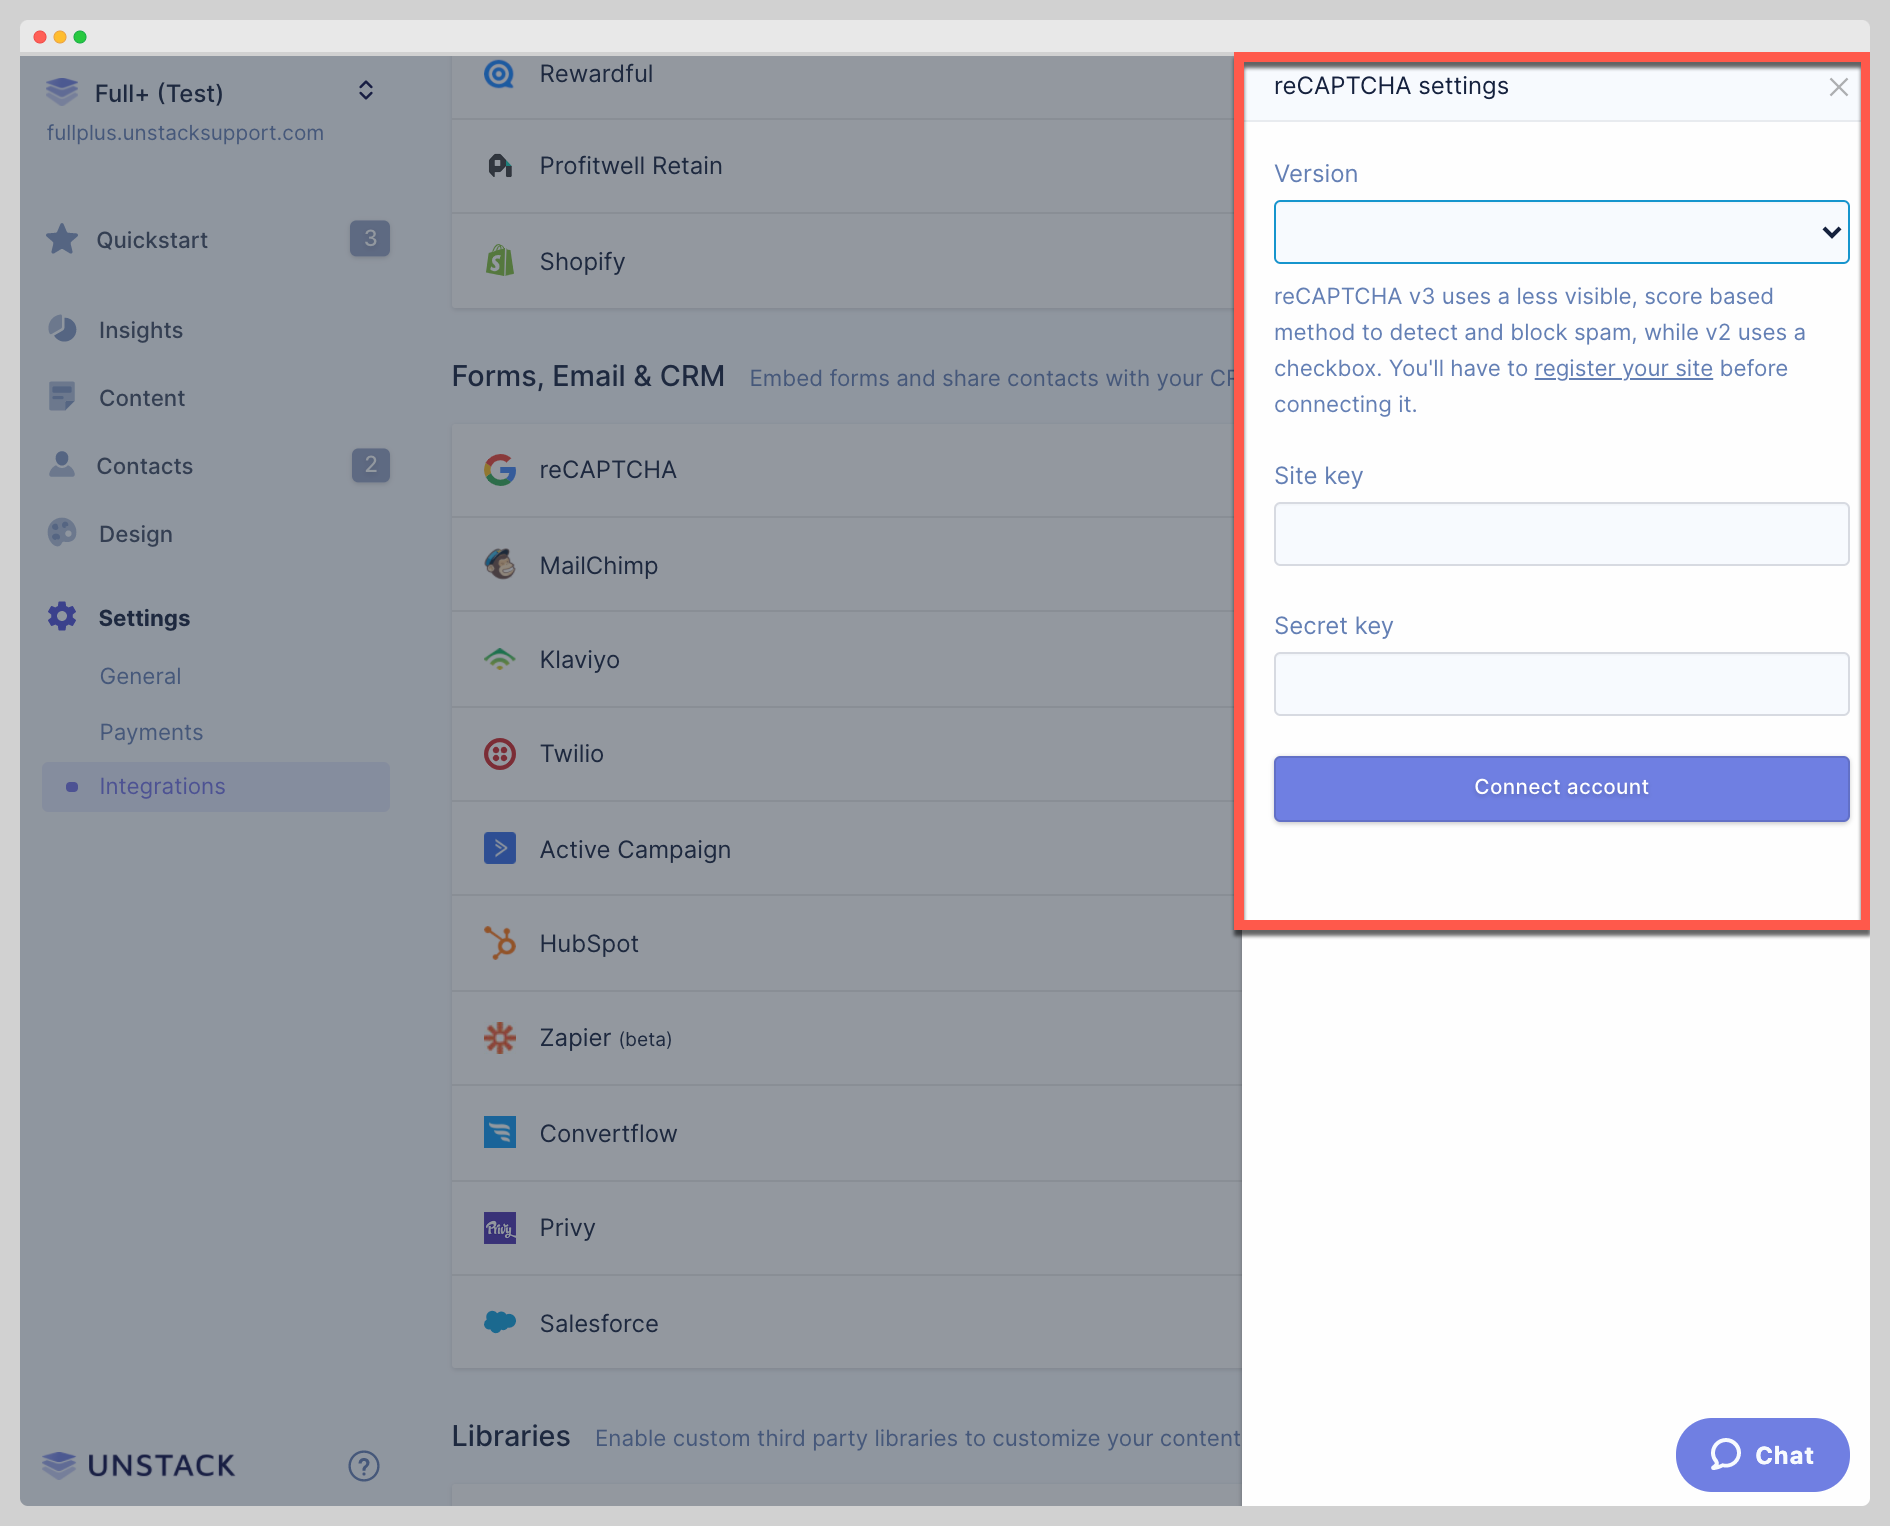
Once you click on the (+) symbol to the right, a drawer will appear asking you to define a "Version" and to input both a Site Key and Secret Key.
-
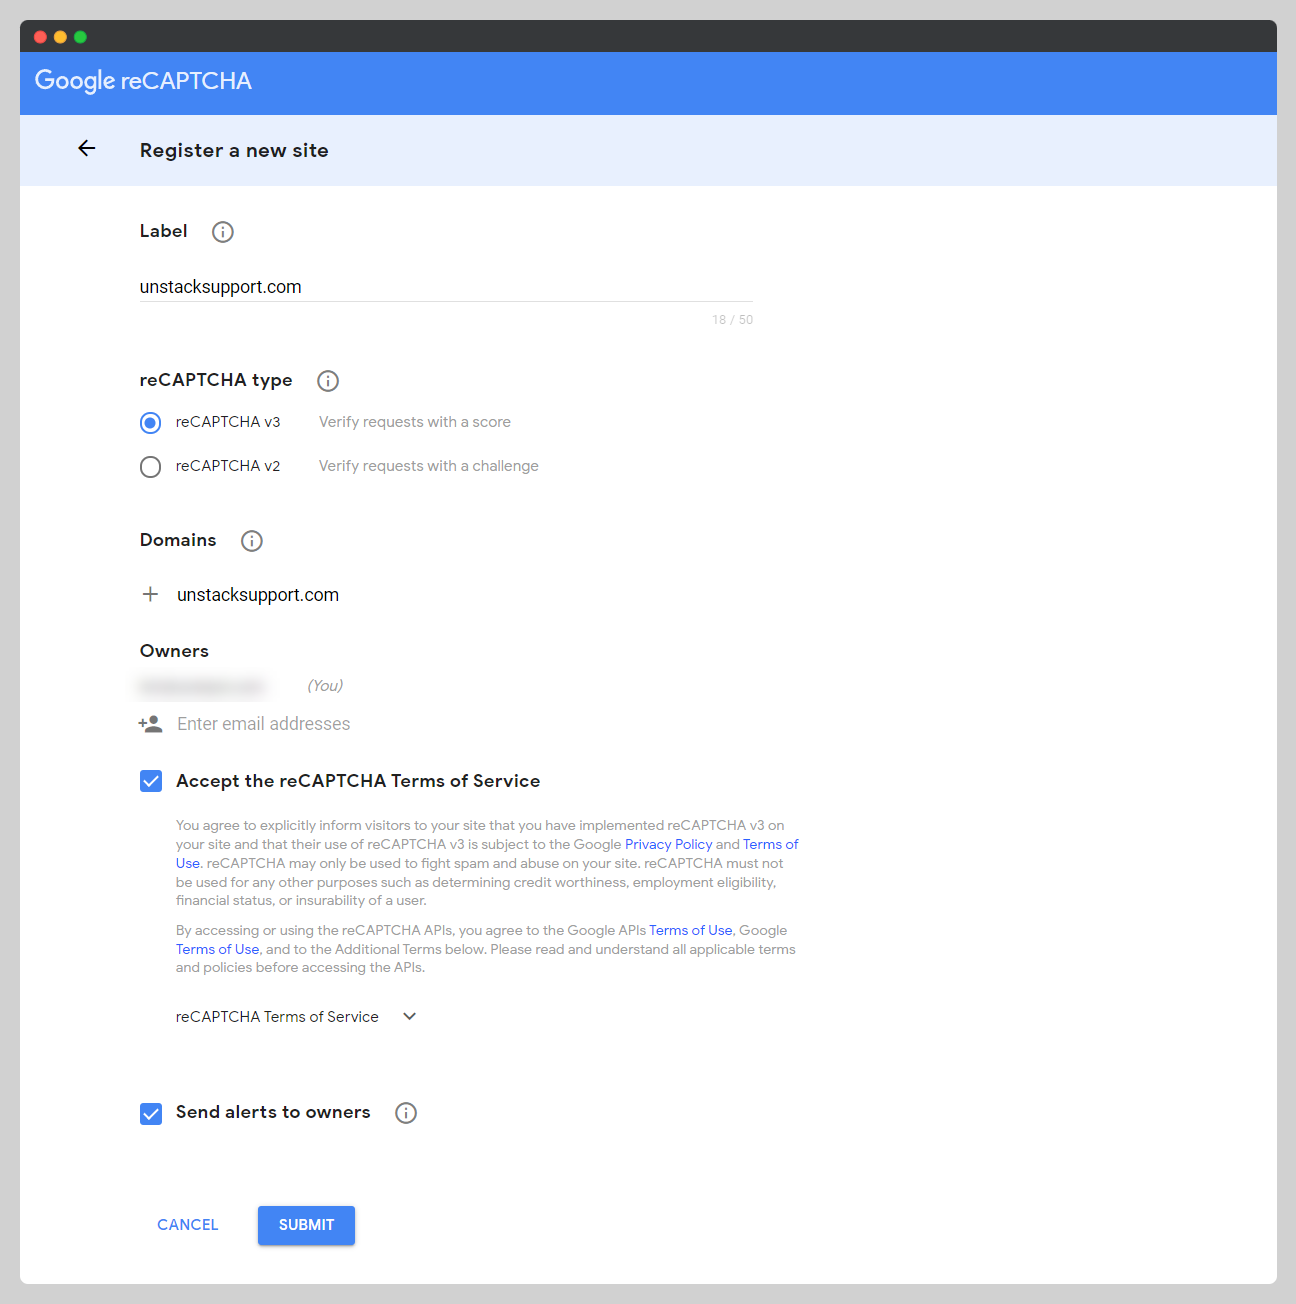
To obtain a Site Key and a Secret Key you'll need to jump into Google's reCAPTCHA signup flow and input the information that they require.
noteStudio offers support for two versions; V2 and V3. And while there are many differences between them, the main difference is that V3 doesn't require the standard click on "I'm not a robot" that reCAPTCHA has become so well known for.
-
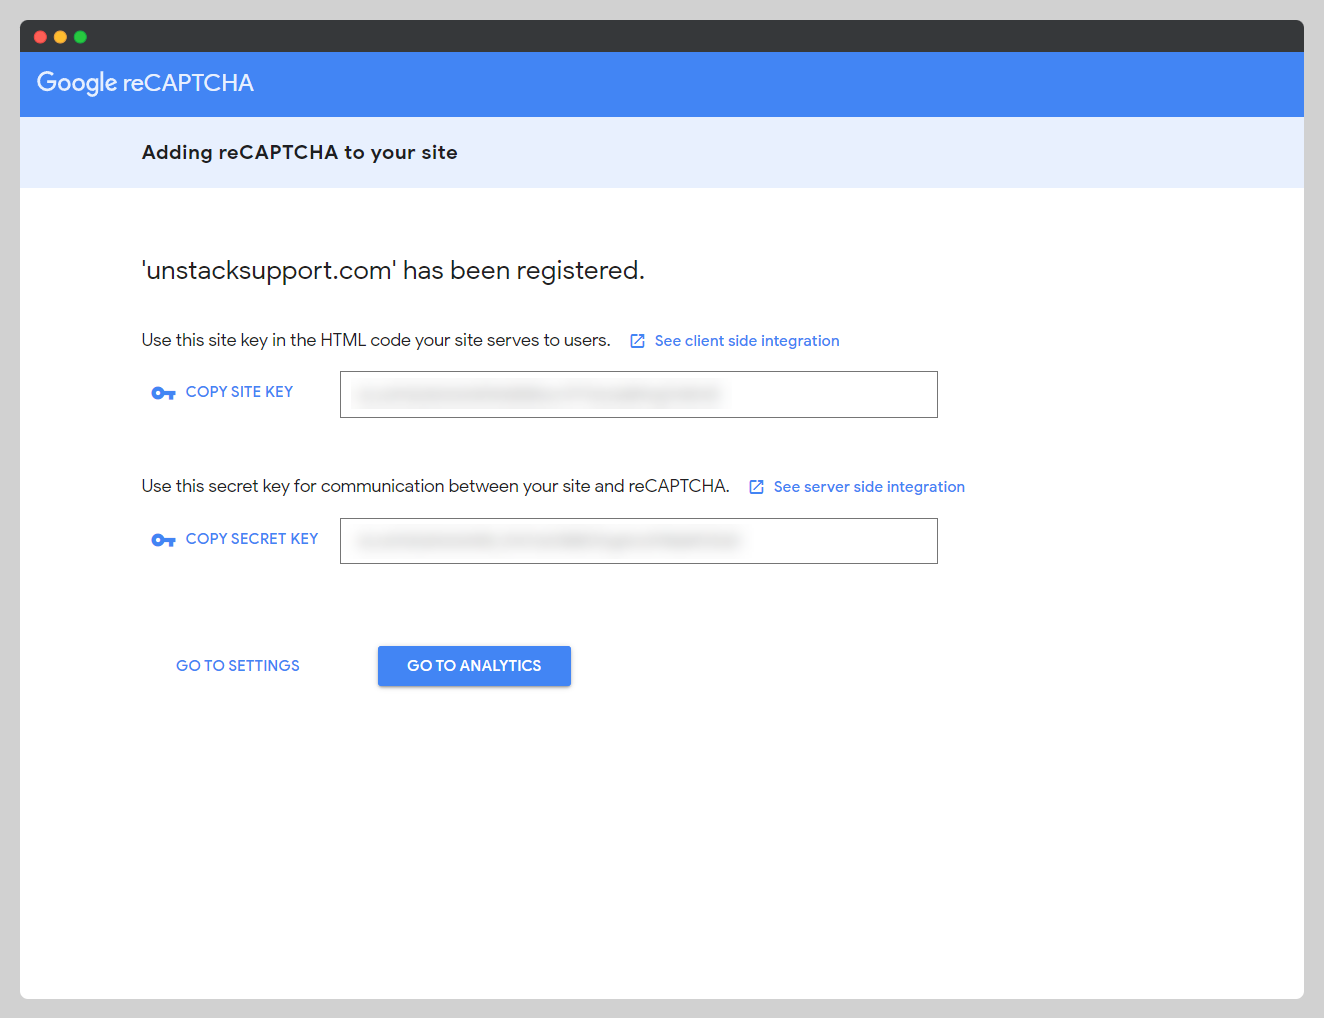
With both your Site Key and Secret Key jump back into Studio and drop those values into the corresponding fields.
If you've selected reCAPTCHA V3, you'll need to also set a threshold before you can save the configuration. This threshold is directly tied to the "score" that Google uses to determine if the user is legitimate. Studio defaults this to 0.7, but you're more than welcome to set this to whatever you think it should be. We highly recommend reading up on this via Google's official documentation before you make a decision.
-
Once satisfied, save the configuration. You've now set up reCAPTCHA on your site! 🎉