Integrating Authorize.net
You can quickly and easily integrate Studio with Authorize.net. Once configured, you have the ability to make payments for orders through your storefront.
Prerequisites
- Ensure that you have configured Authorize.net in Commerce Manager.
- Ensure that you have an Authorize.net account.
Configure the Authorize.net Integration
Follow these steps to configure the Authorize.net integration in Studio.
Go to Settings > Integrations.
Navigate to Payment & Storefront.
Select + next to Authorize.net.
The Authorize.net settings page is displayed.
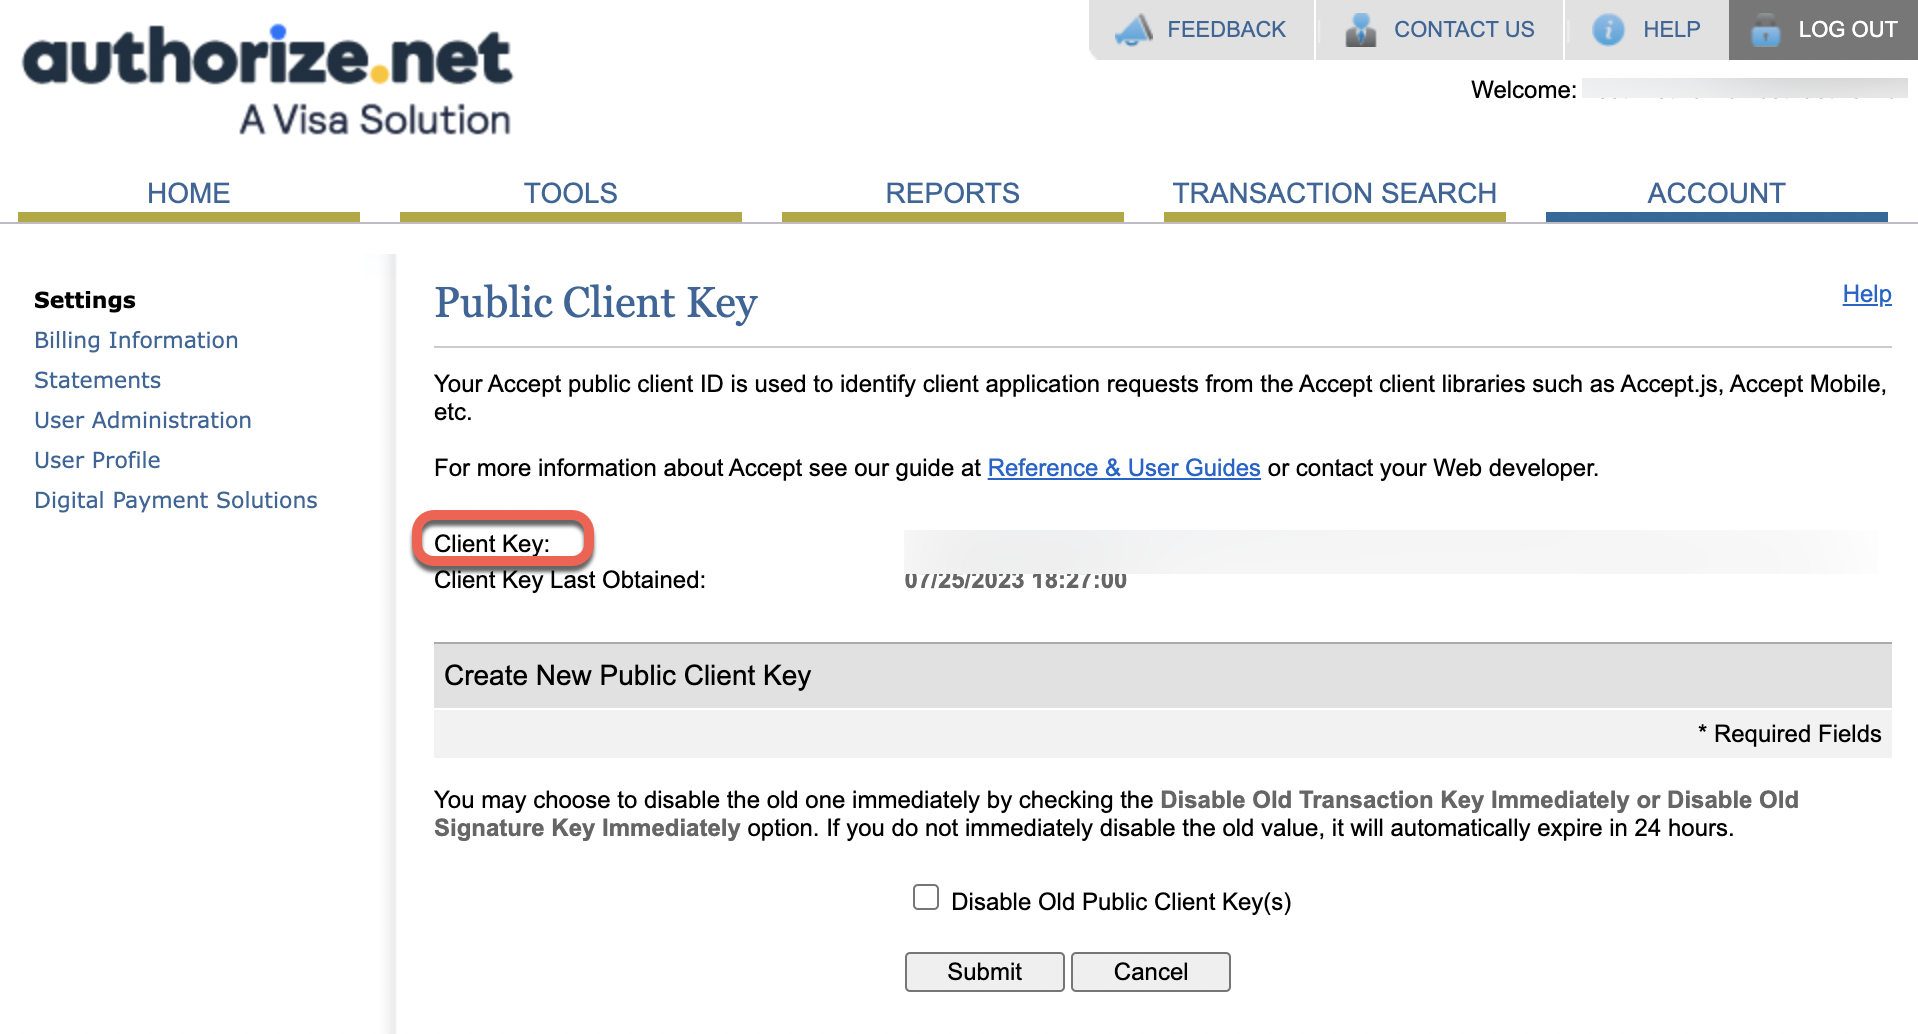
In API Public Client Key, enter your client key generated from your Authorize.net account, as shown below.
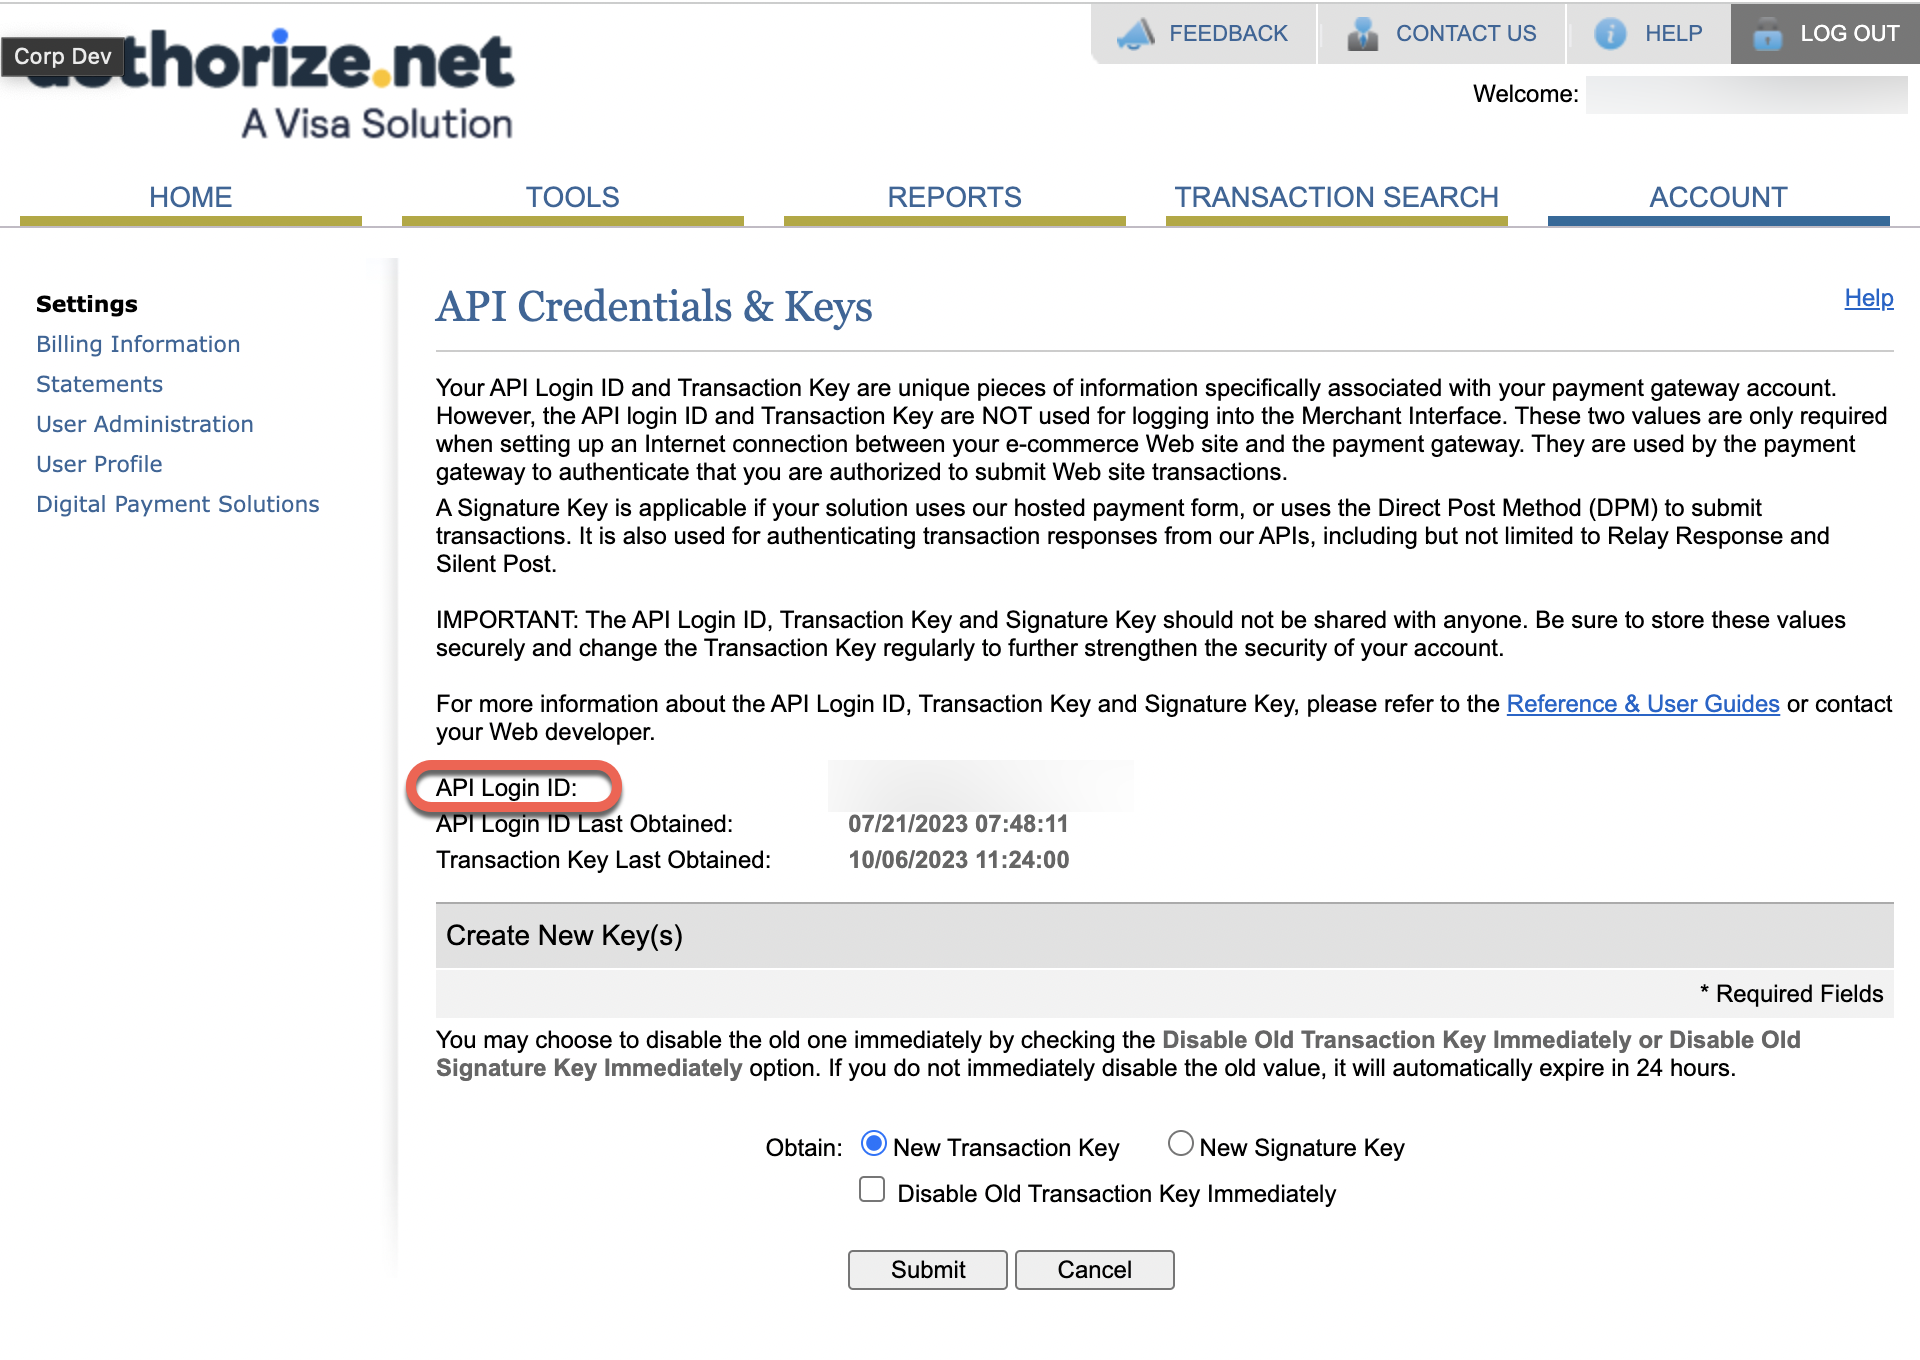
- In API Login ID, enter your Authorize.net login ID.
In the Mode field, select either Test to use the test payment method or Live to use the production environment.
The Test mode is used to verify your connection to the payment gateway. In Test mode, transactions are not processed. If you want to perform transactions, choose Live mode.
Select Connect Account to successfully integrate Authorize.net into Studio.