Overview
An integration is a series of steps that execute one after another in series. Each step runs an action - a small bit of code designed to perform a specific task. Actions can be things like HTTP - GET to fetch the contents of a webpage from the internet, or Amazon S3 - Put Object to save a file to Amazon S3. You can use a combination of actions from common built-in components to build an integration.
An integration is started when its trigger fires. Triggers can either follow a schedule, or can be invoked via a webhook URL.
Integrations should be developed to be configuration-driven, so they can be deployed to multiple customers with potentially different configurations. That is accomplished by leveraging config variables, and have configuring steps to reference those variables.
Many integrations have a single flow. That is, they have a single trigger that fires, and a single set of steps that are executed one after another. Builder also supports grouping multiple related flows together into a single deployable integration. For example, if you have a third-party service (Acme ERP) that sends data via a variety of webhooks to your integrations, it probably makes sense to have a single Acme Corp integration that you or your customers deploy that is made up of several logical flows. Each flow has its own trigger, though they all share config variables.
When an integration is completed, it can be published. You can then enable the integration through the Integration Hub.
We recommend that you follow our Getting Started tutorials to first acquaint yourself with integration development and deployment.
Creating a new integration
To create a new integration in the web app, click Integrations from the left-side menu, and then click the + Add Integration button in the upper-right.
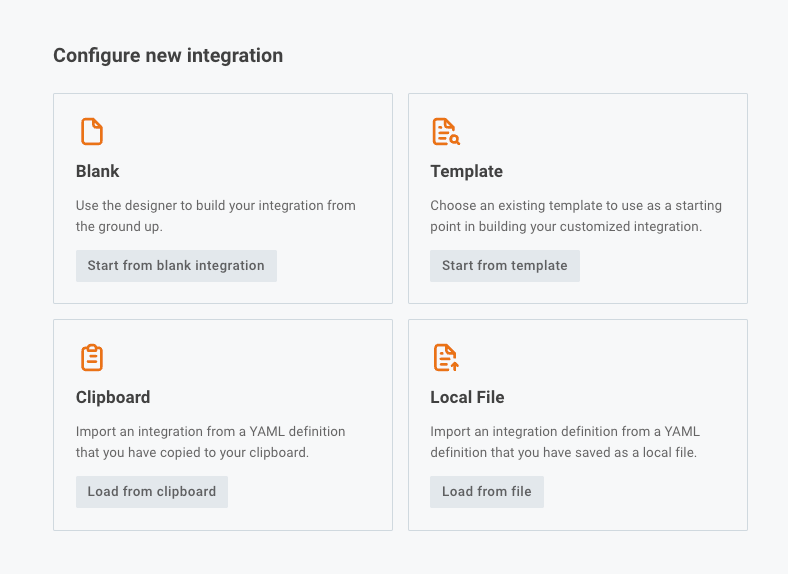
When you create a new integration you have a few options:
- You can create a blank integration from scratch.
- You can start from an existing template that you or someone else created.
- Behind the scenes, integrations are saved as YAML definitions. You can load a YAML file from your clipboard or from a file.
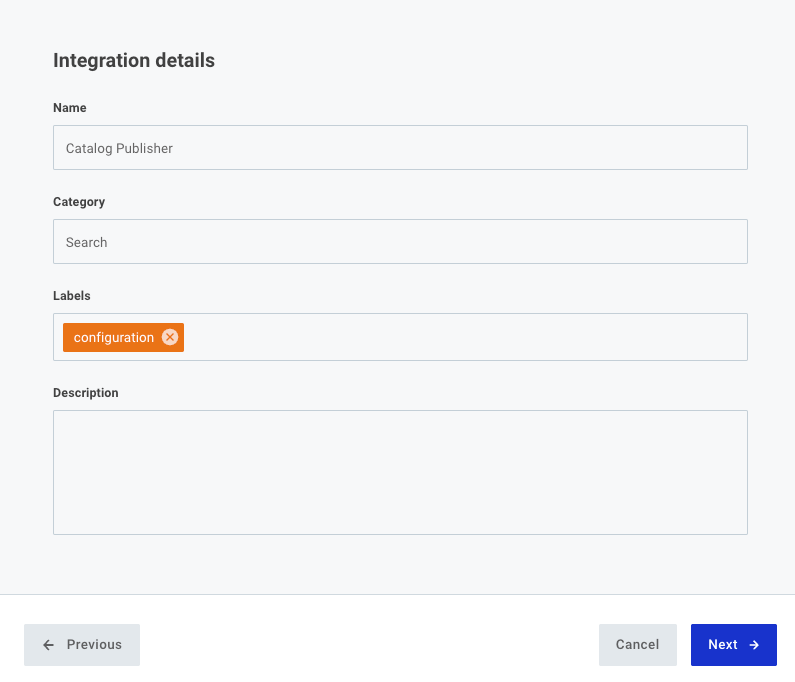
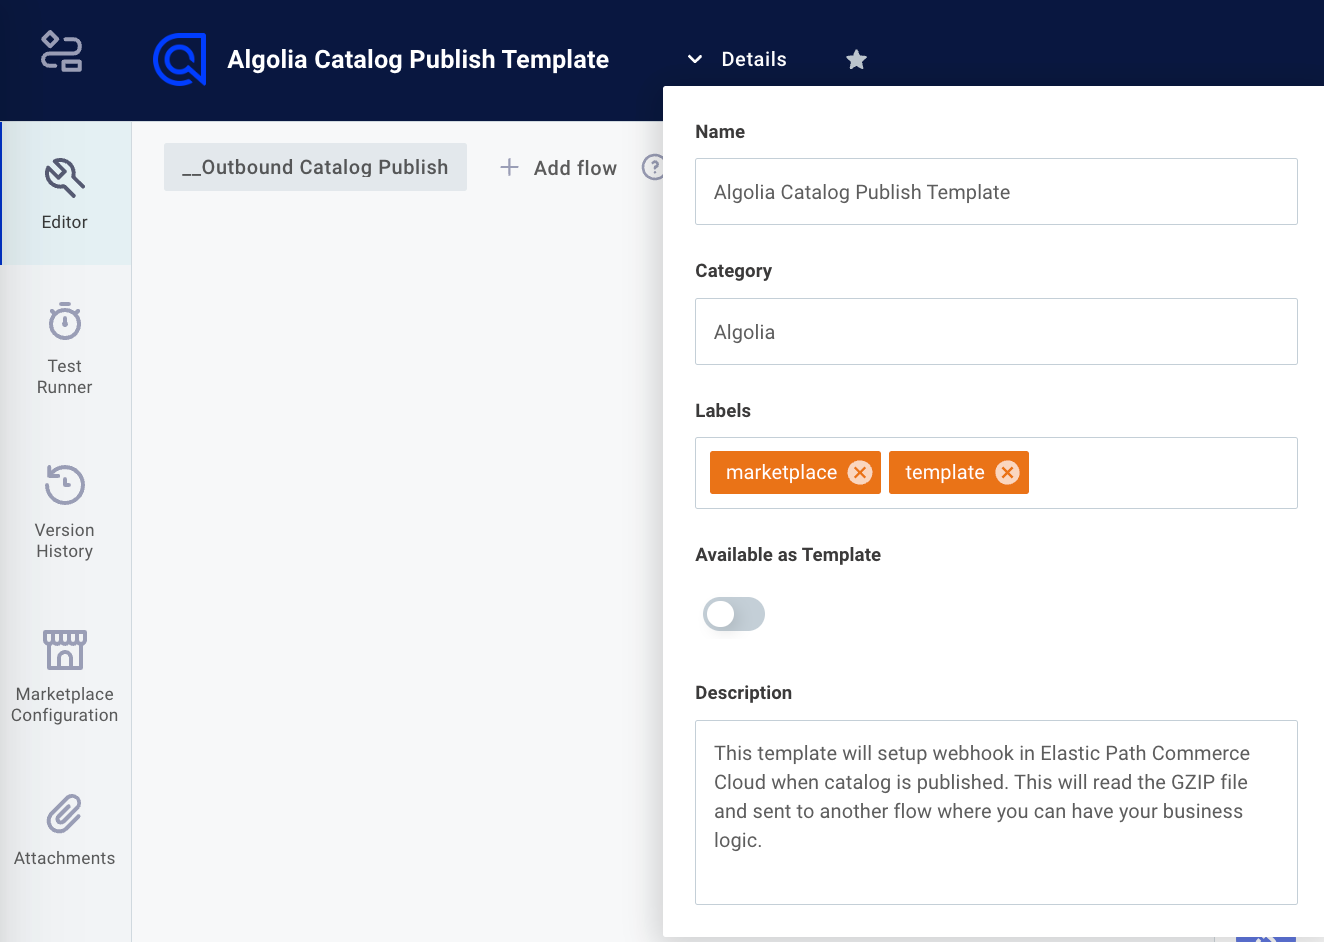
You will be prompted to give your integration a name and description, and can optionally categorize your integration and assign it labels.
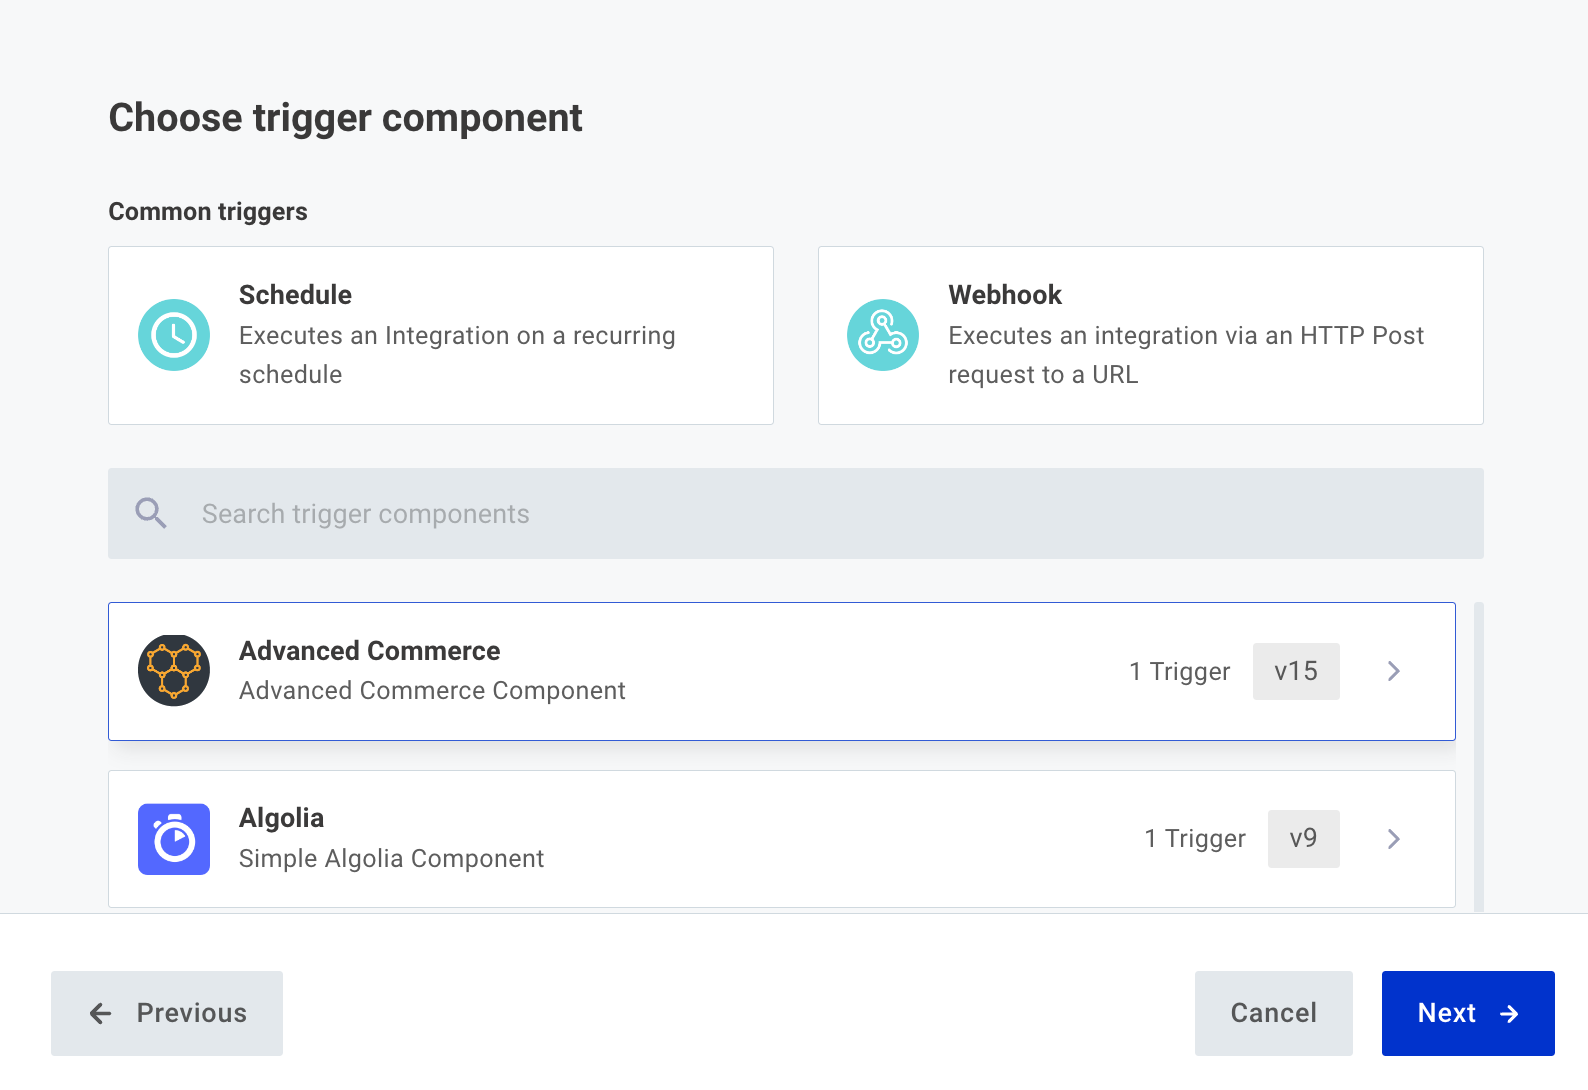
Next, you'll be asked to select a trigger for your integration. This is what will cause your integration to run, and you can change your trigger at any time.
For more information, see:
Integration templates
Some of your integrations will look similar to one another. For example, if you are importing opportunities and accounts from a dozen CRM vendors, the steps that fetch data will be unique, but the steps that send data to your app will always look the same. Rather than developing those common steps over and over, it saves time to create an integration template that you and your team can start from when you build additional similar integrations.
To turn your integration into a template, first publish a version of your integration. Then, open the Details dropdown and select Available as Template.
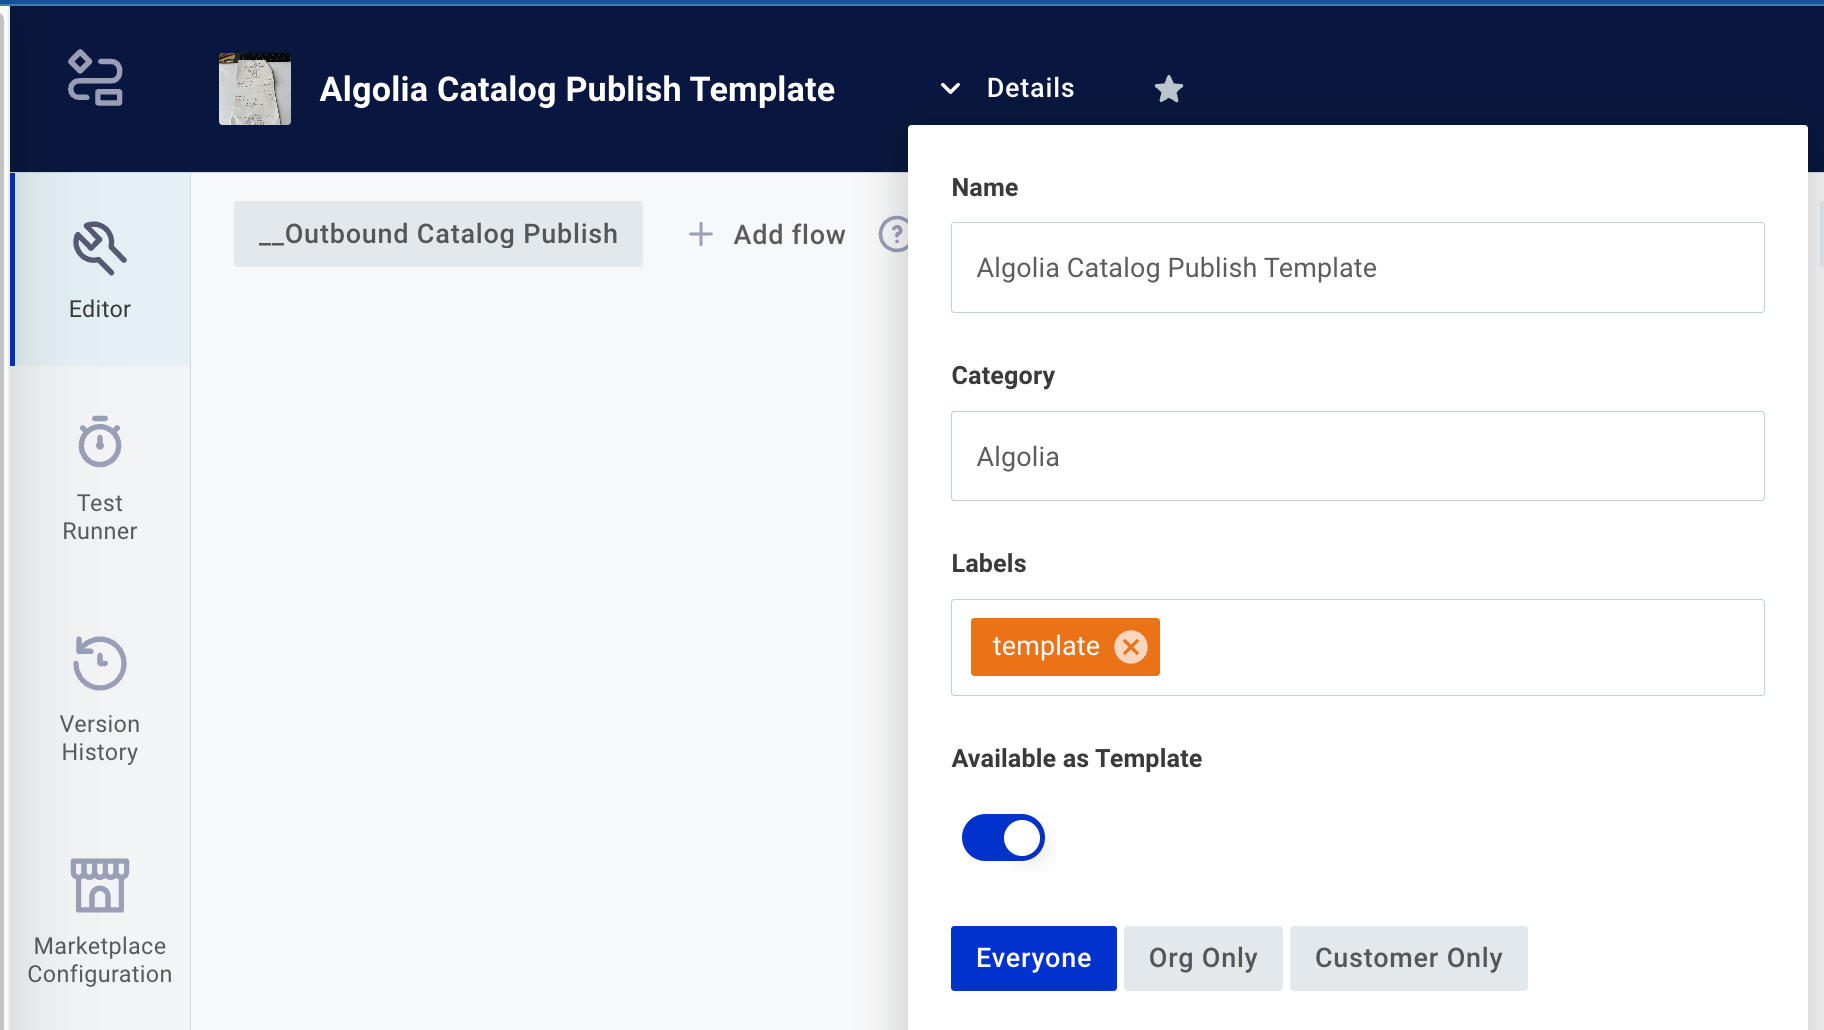
You can choose if the template is just for org users.
Assigning an icon to an integration
Integrations can be assigned icons, to make them more presentable in the Integration Hub. To assign an icon to an integration from the integration designer by clicking the icon to the left of your integration's name:
![]()
Square PNG images that are at least 400 pixels wide look best as integration icons.
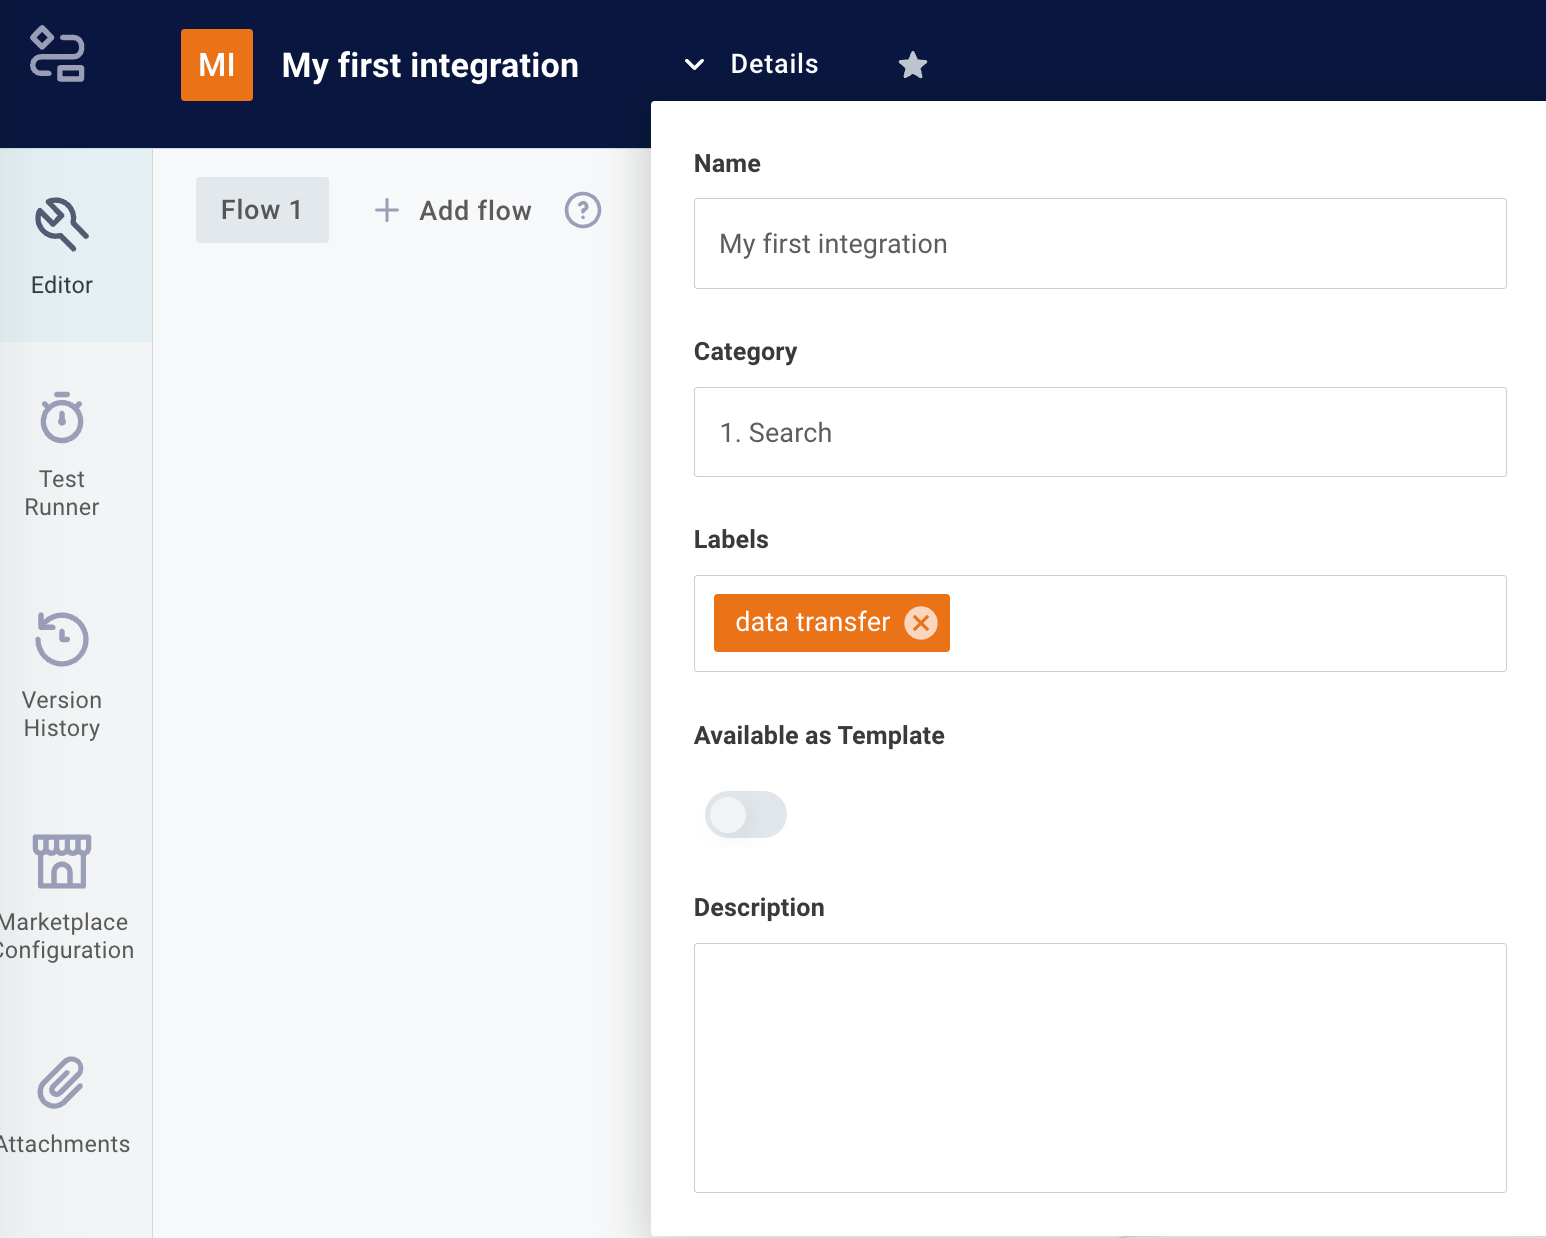
Integration labels
Labels help you keep your integrations organized. You can assign any number of labels to an integration from within the integration designer by opening the DETAILS menu:
You can search for integrations by label. Note: for consistency, labels are always lower-cased.
If you would like to update labels on previously published versions of your integration, open the VERSION HISTORY drawer and select a previously published version of your integration. Add labels from the DETAILS menu, and click Save.
Labels applied to published integration versions appear in the version dropdown menu on an instance configuration page.
Listing and searching integrations
To view all of the integrations your organization has created, click the Integrations link on the left-hand sidebar.
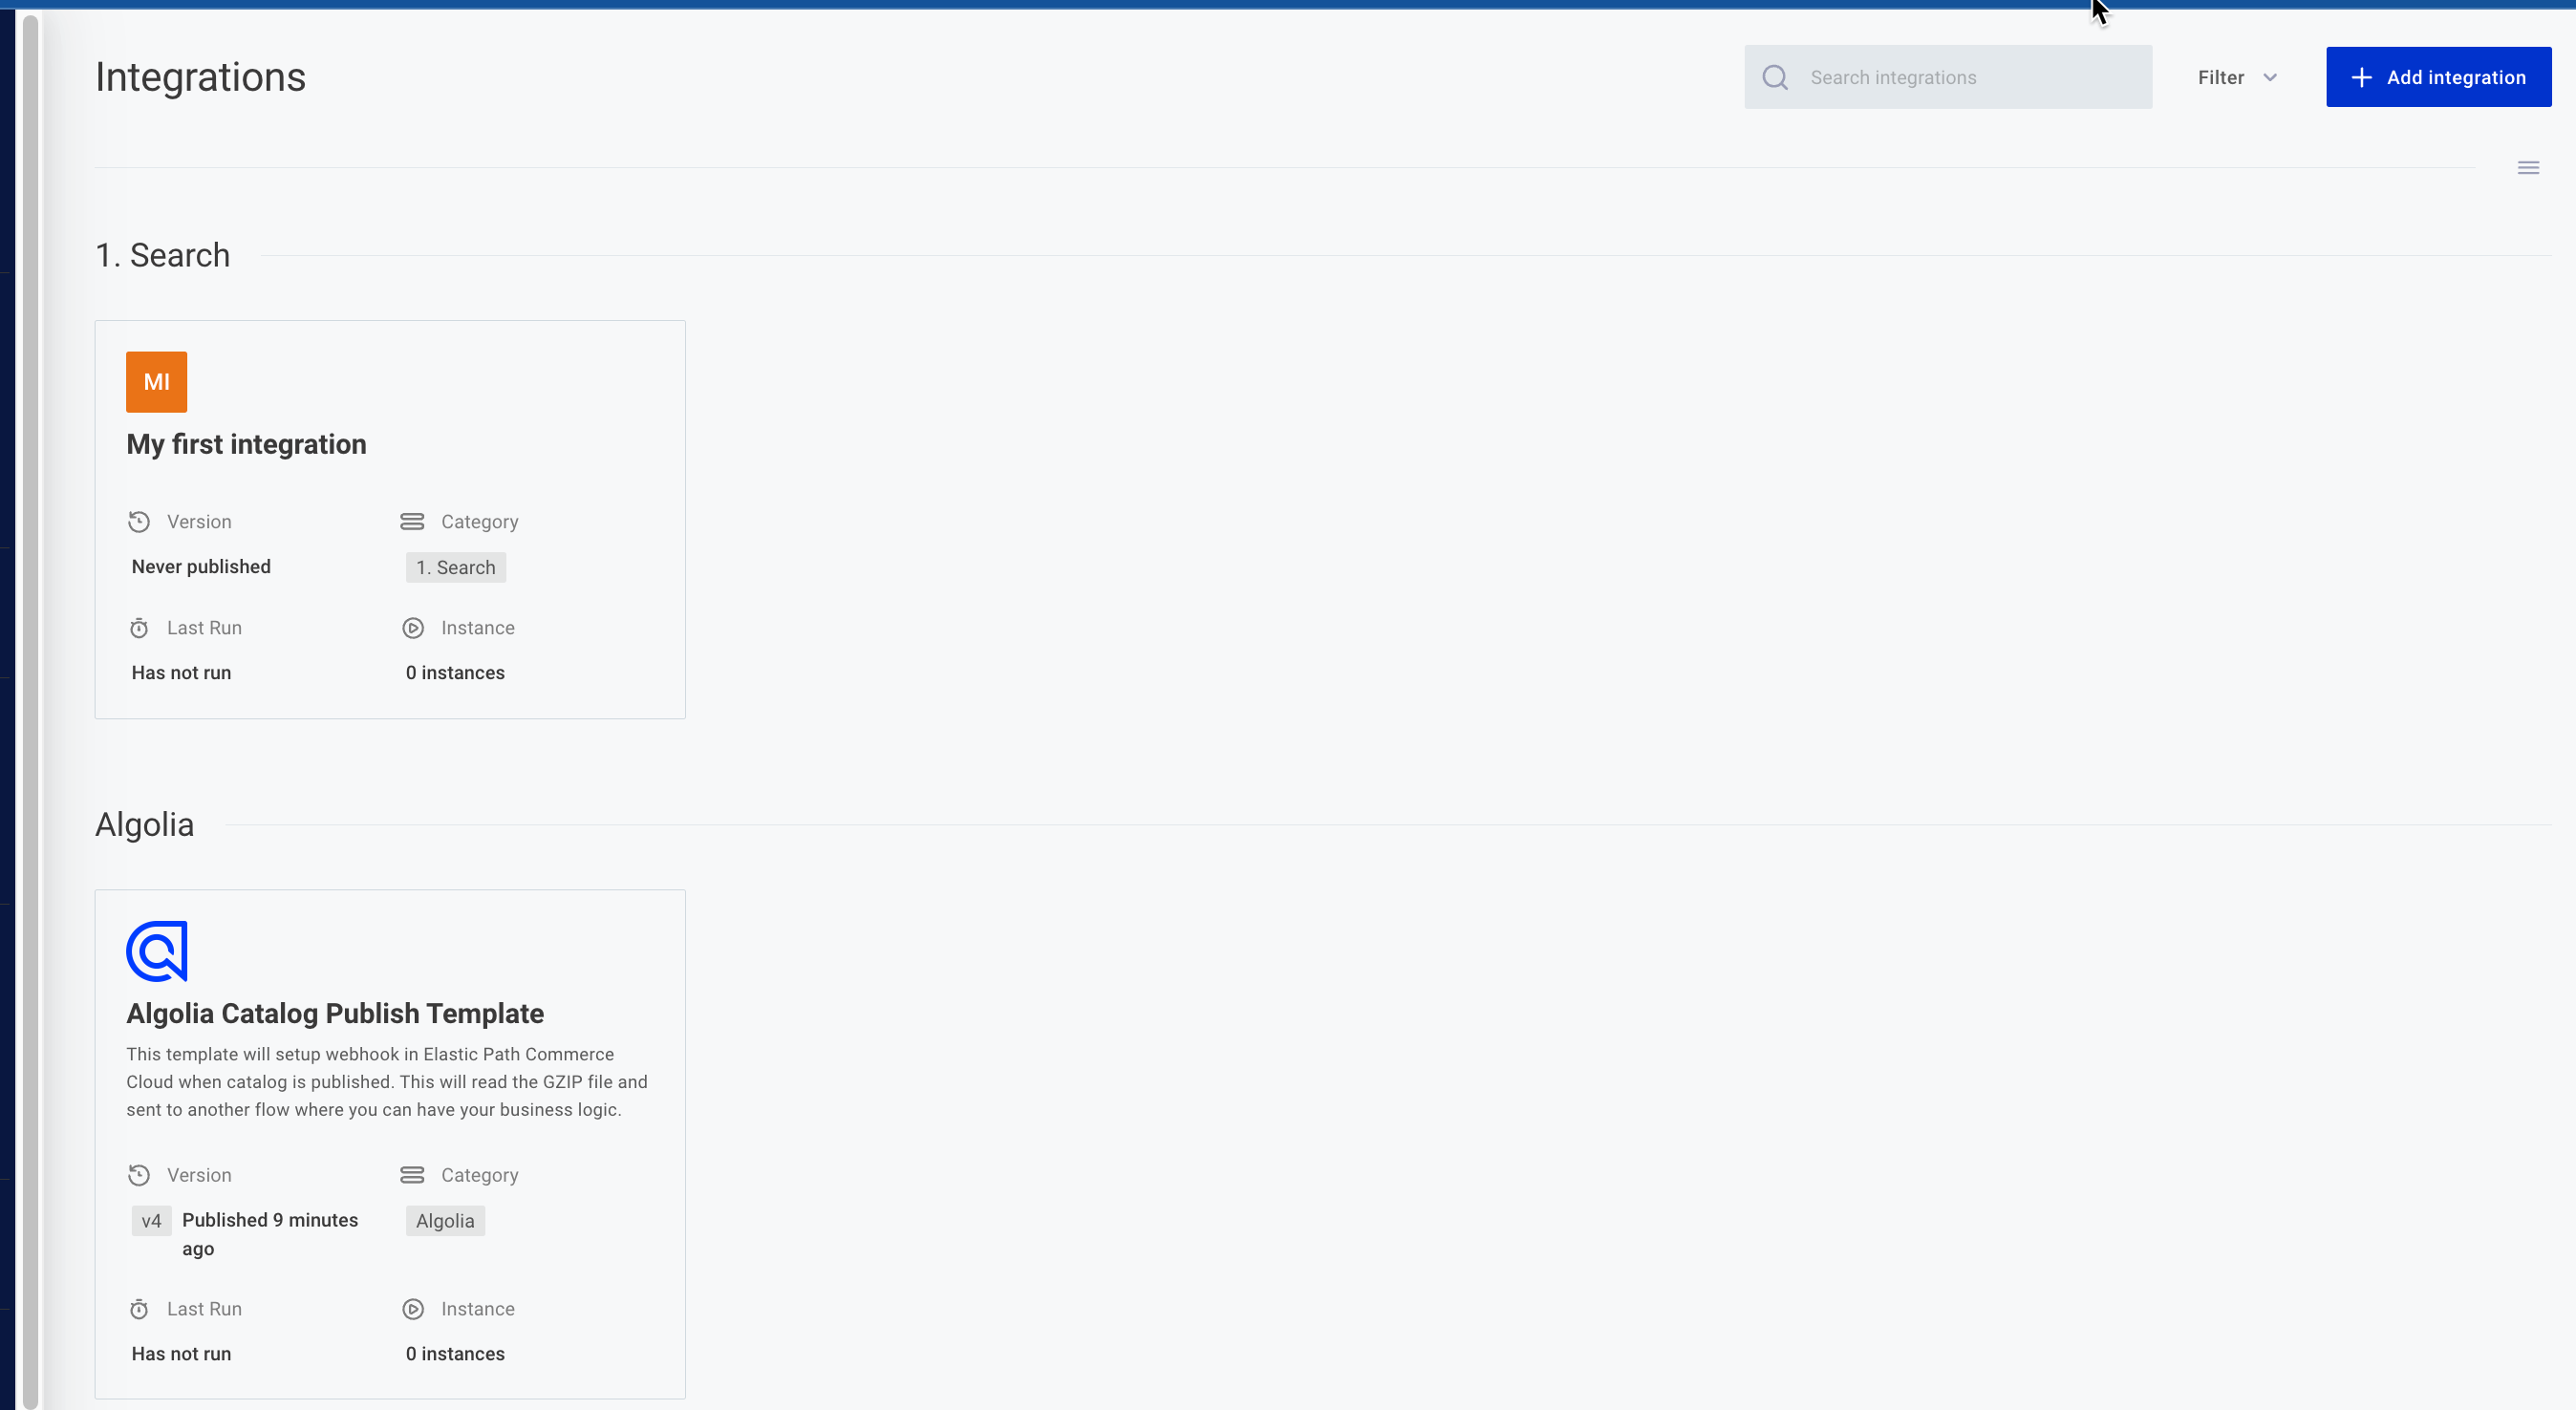
You can search for specific integrations by name by typing a part of the name in the upper search bar, or you can search by description, category, labels or marketplace availability by clicking the Filter button to the right of the search bar.

Categorizing integrations
Integrations can be assigned a "category" for easy sorting and filtering. For example, you might have a dozen "ERP" integrations, a few "Inventory Management" integrations, etc. Assigning each integration a category allows your team, as well as your customers in the Integration Hub to view integrations sorted by category.
You can set a category for an integration by clicking the DETAILS dropdown button on the top-left of the integration designer:
Publishing an integration
By publishing an integration, you mark it ready for deployment.
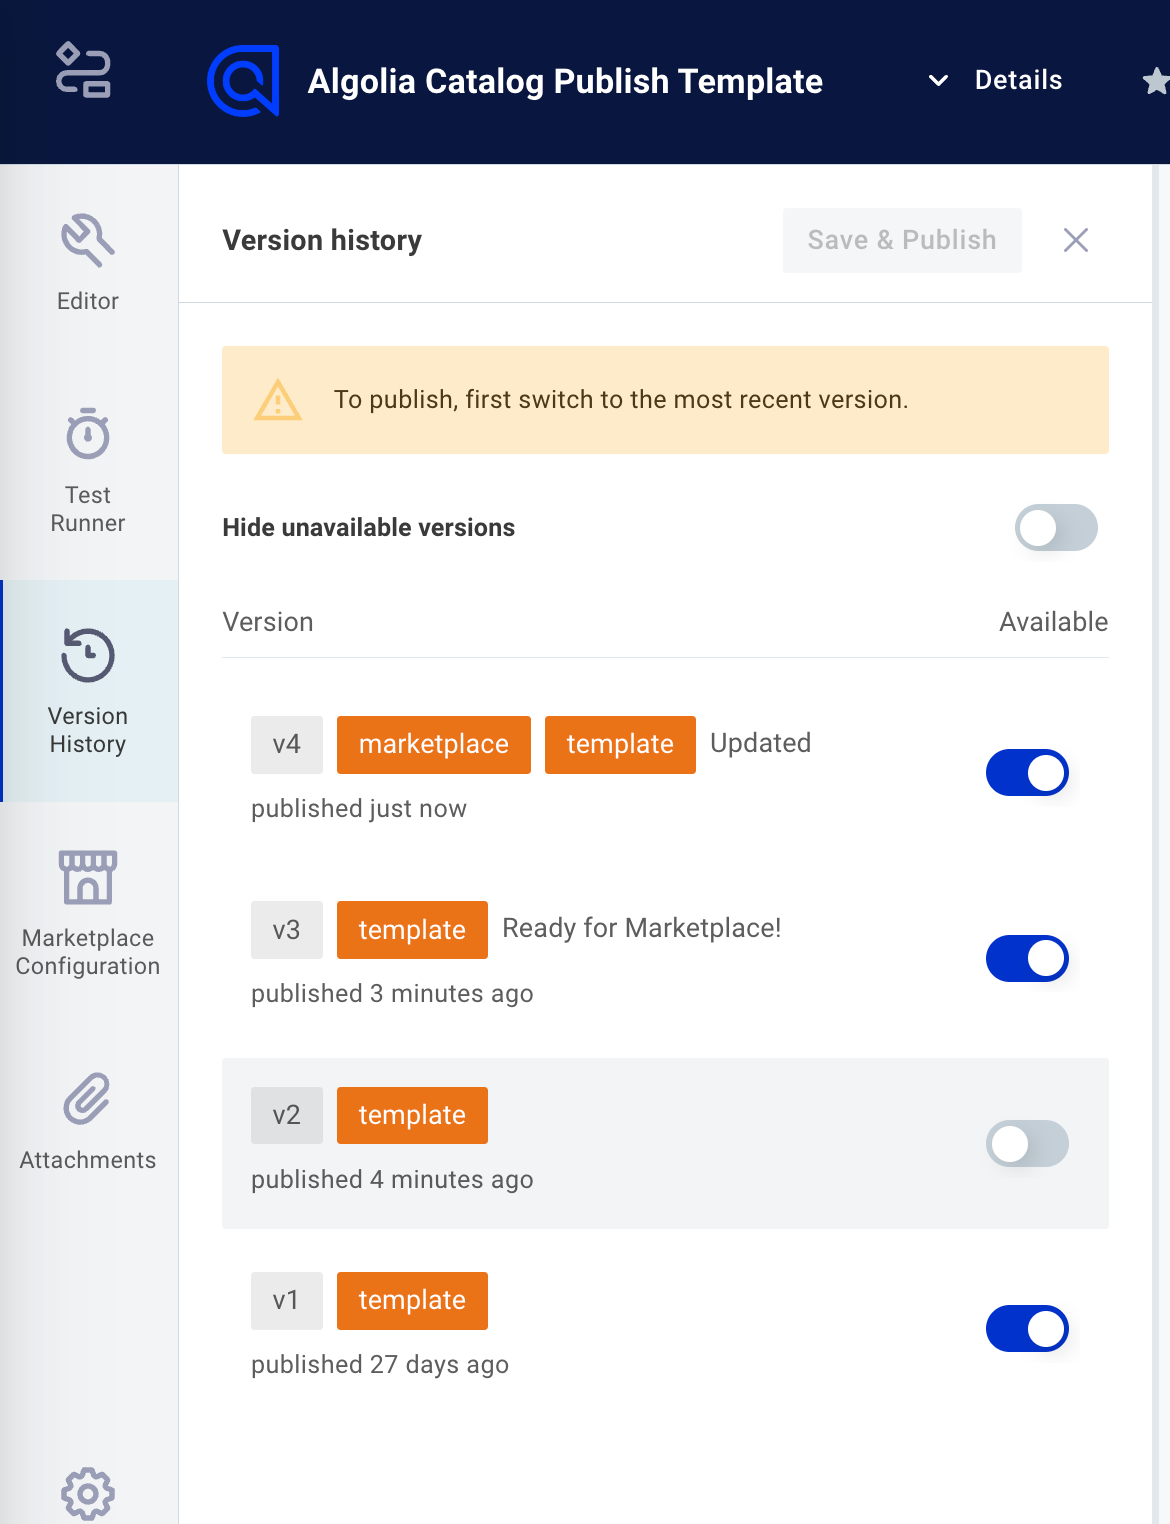
To publish an integration, first open the VERSION HISTORY tab on the left side of the page. If you have unpublished changes you'll see an Unpublished Draft listed among the integration's versions. Type a note about the changes you made to the integration, and then click SAVE & PUBLISH to release a new version of your integration:
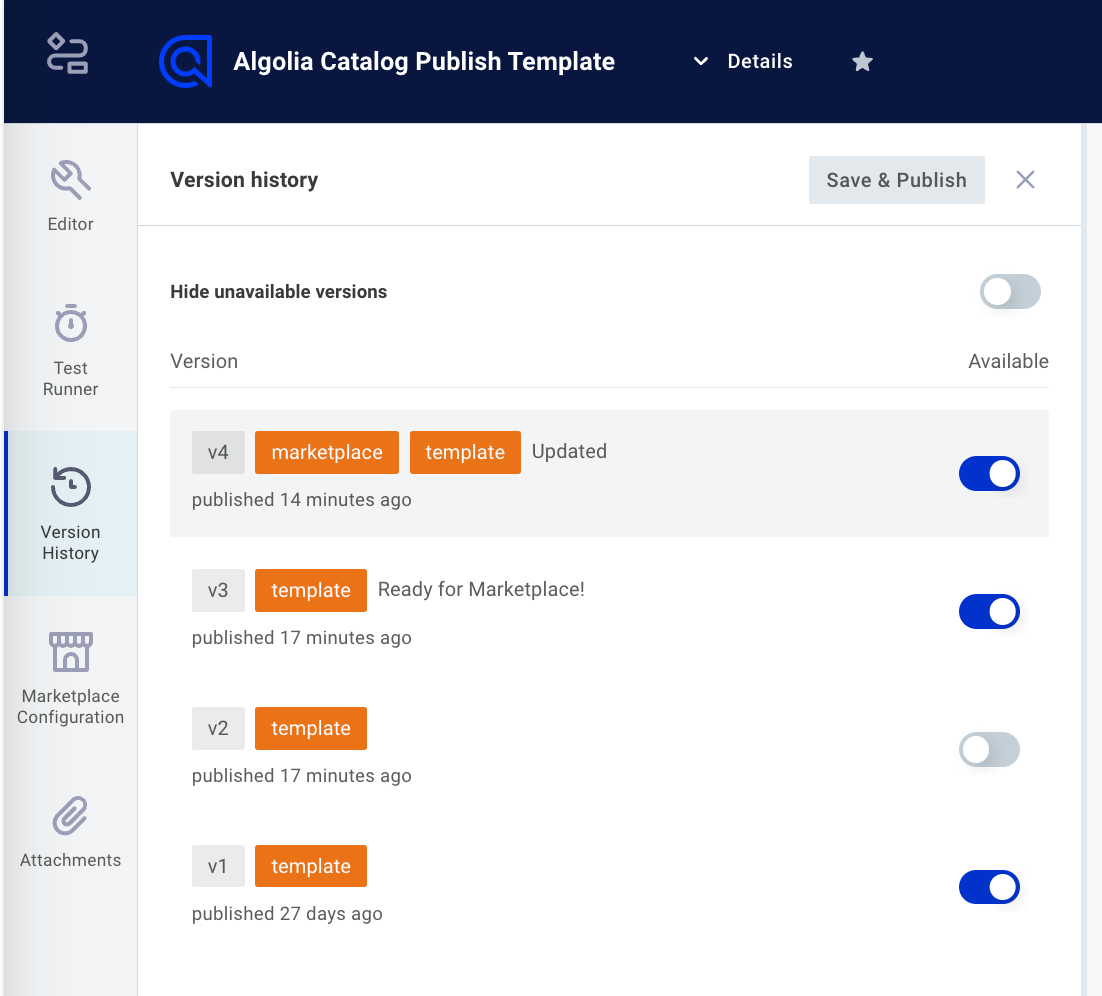
Integration versions can be marked Available or Unavailable by toggling the blue toggles to the right of integration versions. Marking an integration version Unavailable prevents that version from being deployed.
Deploying an integration
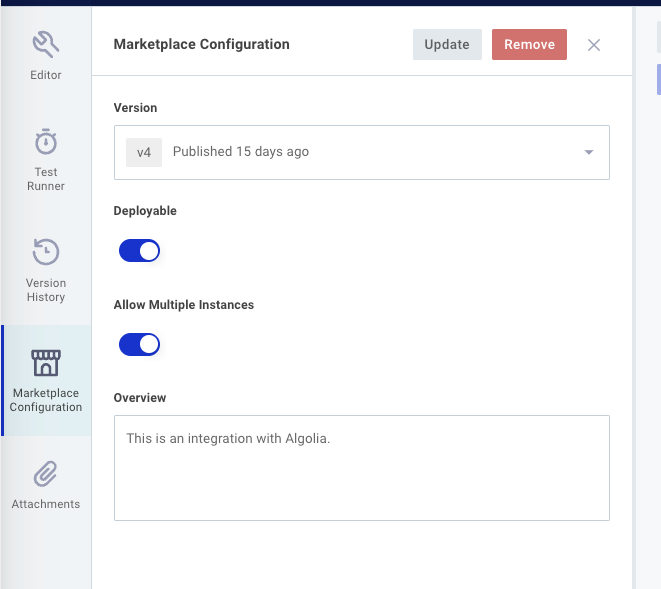
Once an integration has been published, an instance of the integration can be configured and deployed to a customer.
You can also enable your customers to deploy integrations themselves, using Integration Hub.
Viewing deployed integrations
To view a deployed integration, in Builder, click the Marketplace Configuration tab.
Forking an integration
Sometimes you will want to make a copy of an integration and modify the copy. This is called forking an integration.
From the integration designer, click the Settings. icon on the bottom left of the page. Then, click Fork Integrations. Give your forked integration a new name and description and then click ADD.
Deleting an integration
Use caution when deleting an integration. Deletion of an integration also deletes all deployed instances of that integration.
From the integration designer, click the Settings icon on the bottom left of the page. Click the Delete Integration button on the bottom of the page and confirm by clicking REMOVE INTEGRATION.
Integration attachments
Your team can save and share integration-related documents alongside an integration by clicking on the Attachments tab from the integration designer page.

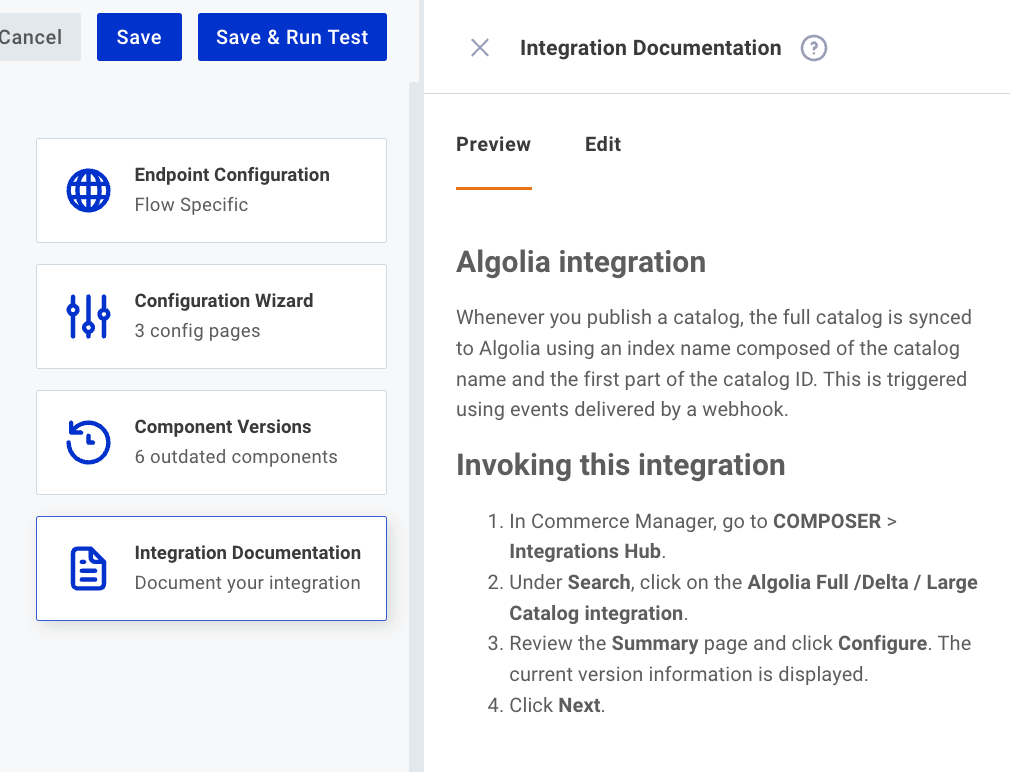
Internal integration documentation
It's helpful to share documentation, specs and notes about an integration with your team members. You can add internal (non-customer-facing) notes and documentation to an integration by clicking the Integration Documentation button on the right-hand side of the integration designer. This will open up a drawer on the right-hand side of the designer.
The drawer has two tabs: Edit and Preview.
In the Edit tab you can type Markdown syntax, including external links, code snippets and externally-hosted images:
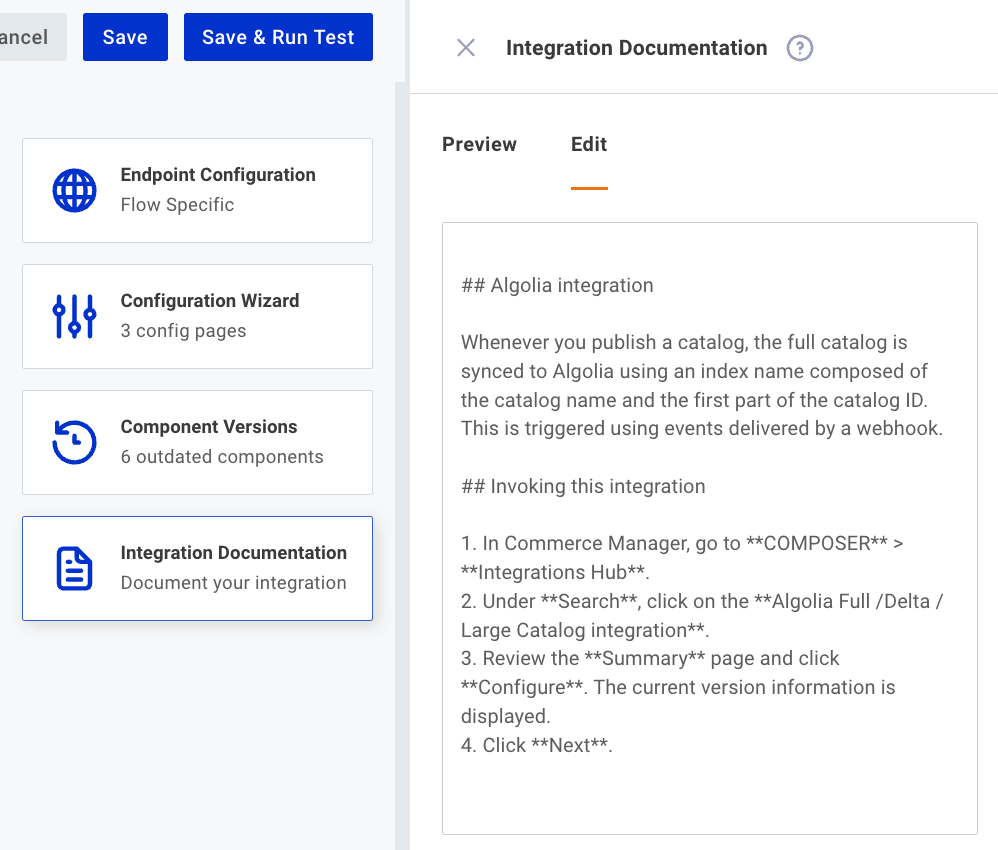
In the Preview tab you can view the rendered markdown:
YAML definition
Behind the scenes, integrations are represented in YAML. You can view the YAML that defines your integration's flows, steps, inputs, connections and config variables by clicking Manage at the bottom-left of Builder, and selecting Save/Load.
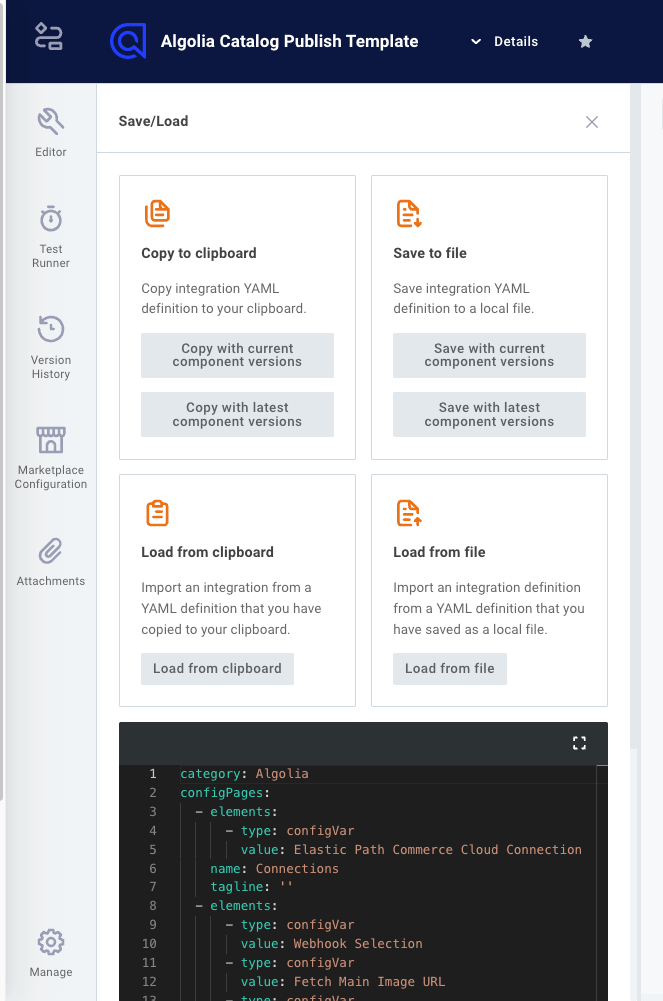
If you are exporting the integration and importing it in a different region (US -> EU, for example), make sure you click a latest component versions button, as component versions may not match between regions.
The YAML present in this drawer corresponds to the integration that is currently being displayed. You can view the YAML of a previous version of the integration by first opening the VERSION HISTORY drawer and selecting an older integration version.
If you want to spot differences between an older version of your integration and the current version, you can compare the YAML definition of the older version with the YAML definition of the current version using your favorite diff tool (VSCode has a great built-in diff tool).
Exporting an integration
Once you've opened the Save/Load drawer in the integration designer, you can click Copy to clipboard to copy the integration's YAML definition into your clipboard, so you can paste it into an editor of your choice. You can also click Save to file to download a copy of your integration.
Importing an integration
If you have a YAML definition of your integration saved in your clipboard, you can click Load from clipboard to replace your current integration with the definition that you have copied. Or, you can save a modified YAML file to your computer, and load the YAML definition by clicking Load from file and selecting the file you saved.