Using Dynamic Text Content
Have you ever wished your website or landing page experience could be tailored to the users visiting those pages? Well today's your lucky day - through Studio you're able to use URL Query Parameters and contact-specific attributes to dynamically update any text element on your site before the user even loads the page.
How do we use it?
This is an obvious one, but before you get started with this guide you'll really want to have an idea as to how you're going to use this feature. To give you a couple ideas, here are a couple examples of how we've used this feature on unstack.com:
For one, if we have already recorded a user's "Company" name via a form, then we've configured our header CTA to include
this value through the addition of {{ contact.company }}. It should be noted that if we have not yet recorded the
user's company name, then this variable returns as blank and nothing is added to the CTA.

Another example of how this feature can be utilized is showcased in the below landing page.
By adding {{ cms|headaches }} to the header of this page, we're able to dynamically update the text content of this
variable with a value that's defined in the page URL. In this case we need to replace [value] in ?cms=[value] and then
append that string to the end of our URL. If we don't, then the "headaches" portion of {{ cms|headaches }} will be
added as the default value that should appear since a value for "cms" isn't defined.

In this example, visiting https://www.unstack.com/ex-dynamic-content?cms=WordPress
or https://www.unstack.com/ex-dynamic-content?cms=Wix or https://www.unstack.com/ex-dynamic-contentwill show the
same page, but different text in the header. (See below)
https://www.unstack.com/ex-dynamic-content?cms=WordPress

https://www.unstack.com/ex-dynamic-content?cms=Wix

https://www.unstack.com/ex-dynamic-content

Additional Notes
Hopefully the above examples gave you a couple ideas on how you might utilize this feature - below are some notes/guideline to keep in mind when using this feature with your Studio site.
Setting a default value
Using {{ parameter }} will pull the value between the square brackets in ?parameter=[value] as long as the latter is
present in your URL. In the case that the value indicated is not present, nothing will be added in place.
That said, you are able to assign a default value to the parameter by adding a pipe character after it, and then a default string to add in case the parameter is undefined. If done correctly your placeholder should look like the below:
{{ parameter | [default value] }}
Since we only use the default if the parameter doesn't exist, we do not auto-detect if a URL parameter is empty.
Therefore ?parameter= would not trigger the default and would need to be removed from the URL entirely for the default
to trigger.
Setting up multiple URL parameters for a single page
Studio does support multiple URL placeholders on a single page, however you'd need to make sure you're only including a "?" before the first parameter, and separating any additional parameters with an "&". If done correctly your URL string should look like the below:
unstack.com/ex-dynamic-content**?parameter1=value1¶meter2=value2**
Using pre-collected information
If a user has filled out an Studio form, you can dynamically add the values collected to your site. This includes both default and custom fields. Below is a list of all supported default fields and instructions on how to reference the values of your custom fields.
| Field | Placeholder |
| First Name | {{ contact.first_name }} |
| Last Name | {{ contact.last_name }} |
| Full Name | {{ contact.full_name }} |
| Company Name | {{ contact.company }} or {{ contact.organization }} |
| Phone Number | {{ contact.phone }} |
| Email Address | {{ contact.email }} |
| City | {{ contact.city }} |
| State | {{ contact.state }} |
| Country | {{ contact.country }} |
| Address | {{ contact.address }} |
| Location | {{ contact.location }} |
| ID | {{ contact.id }} |
To pull in the data collected by any custom fields you'll need to assign that field a specific name within the field's settings.
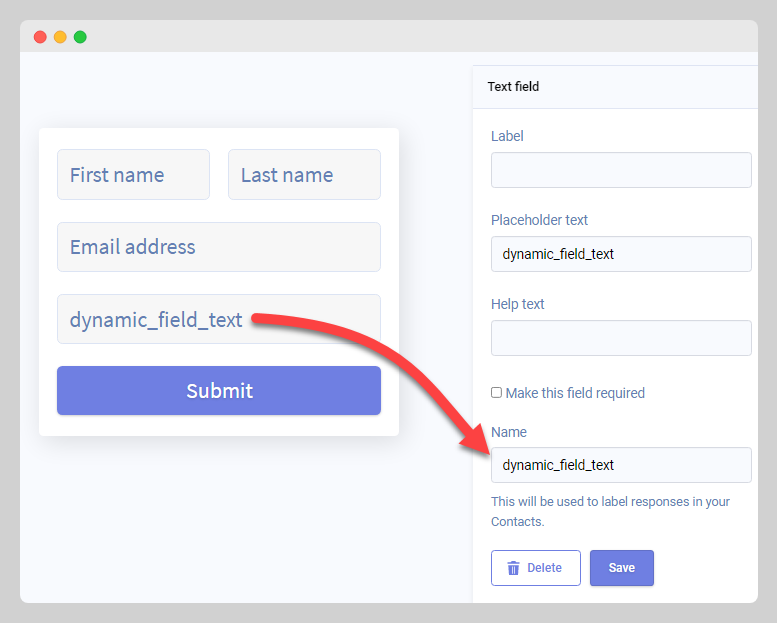
In the above example, you'd add the value of this field on a page by adding the parameter shown below to a page:
{{ contact.dynamic_field_text }}