Managing Blogs
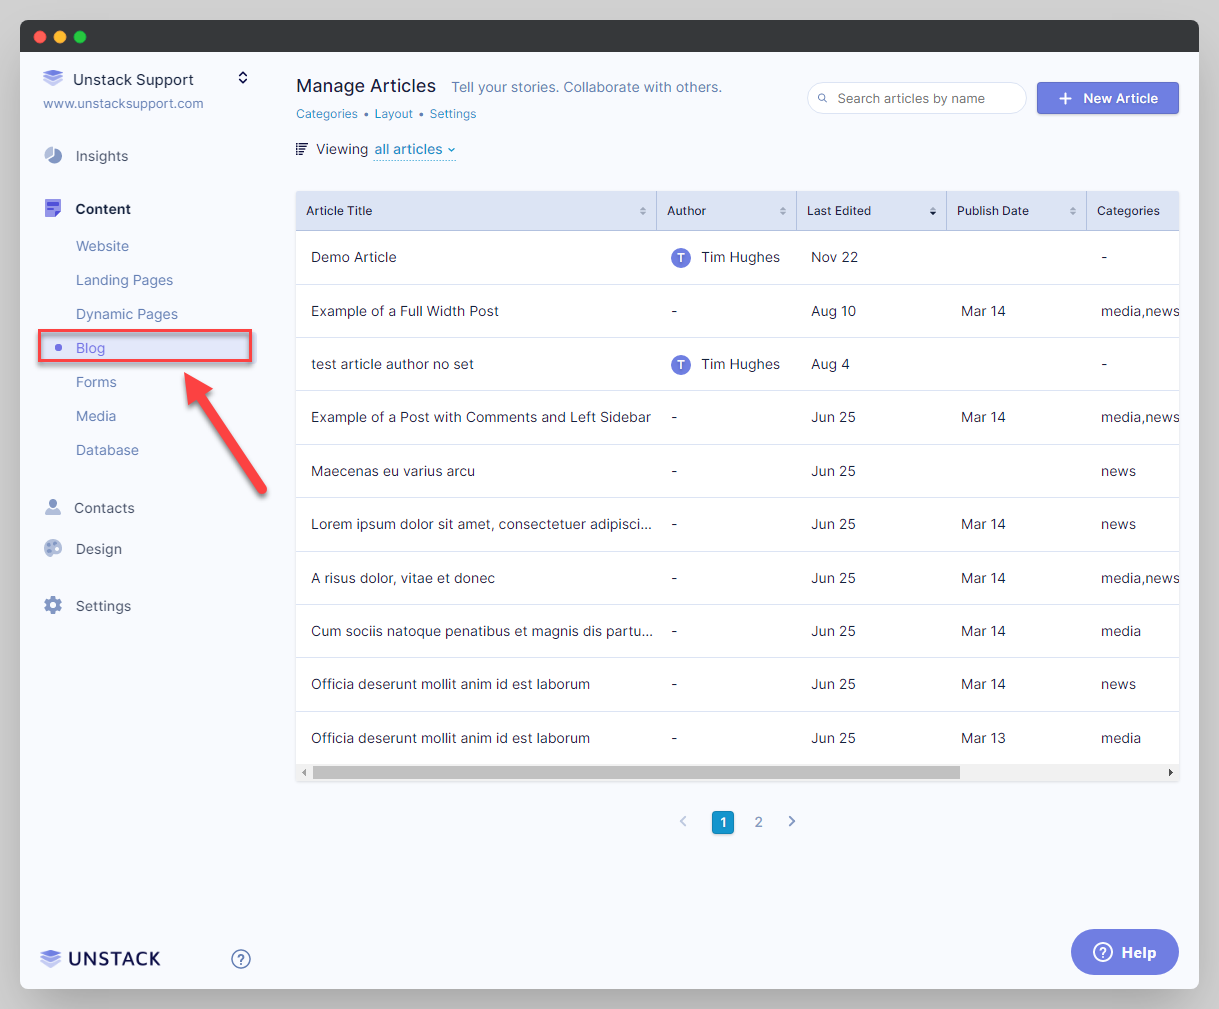
Accessing Your Blog
Navigate to the Blog tab under the "Content" section of the main menu.
Blog Settings
Within Content, Blog you're able to adjust your settings by selecting "Settings" from the top left of
your screen. This will open your blog settings.
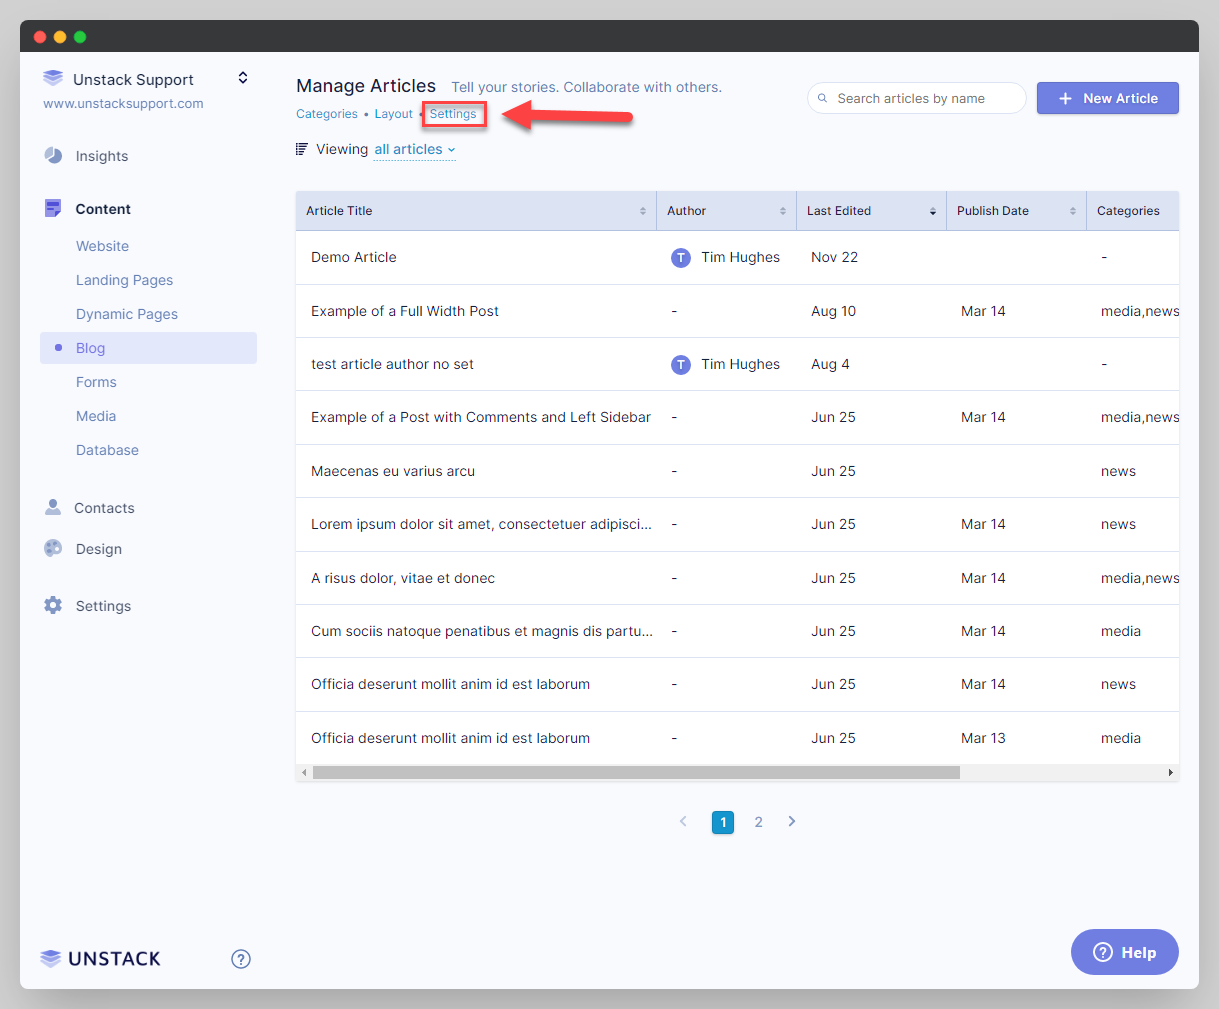
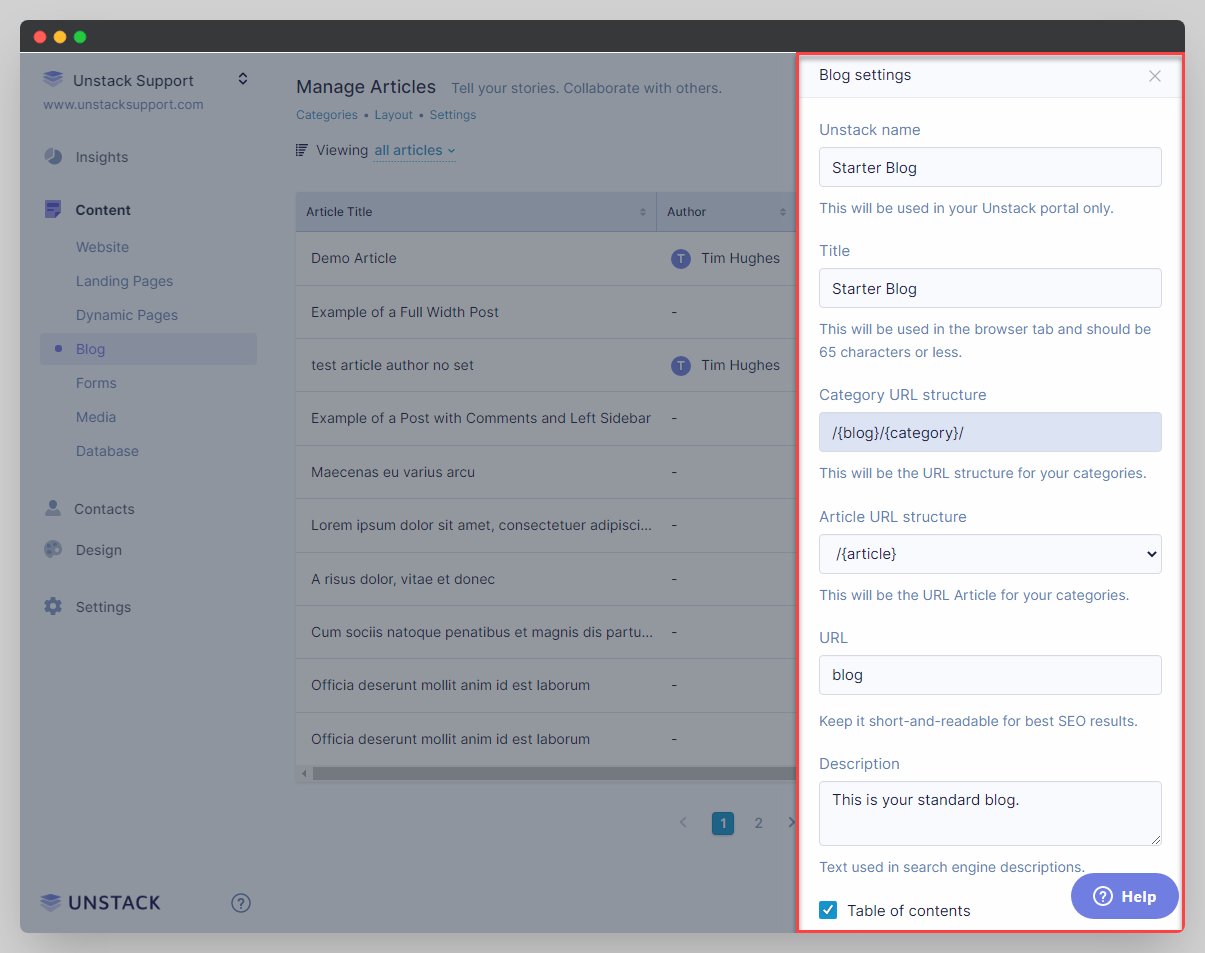
Upon clicking that option, a sidebar will open displaying all the available settings for your blog. Below are the definitions and options for each setting.
-
Studio Name: Define an internal-only name used for organization.
-
Title: Define a public-facing title for the blog. This is also what is used when your browser needs a title for the tab.
-
Category URL Structure: This field is not editable and has a single value:
/{blog}/{category}/ -
Article URL Structure: There are four options available here:
/{blog}/category}/{article}/{blog}/{article}/{category}/{article}/{article}
-
URL: Define the URL where the blog should be found.
-
Description: Define a meta description for the blog.
-
Table of Contents: Check the box here to add a dynamically-generated table of contents to all your articles. See Adding a Table of Contents to Articles.
-
Hide From Search Engines: Want to hide your entire blog from being indexed by search engines? Enable this option and we'll prevent them from being able to index your blog.
Blog Categories
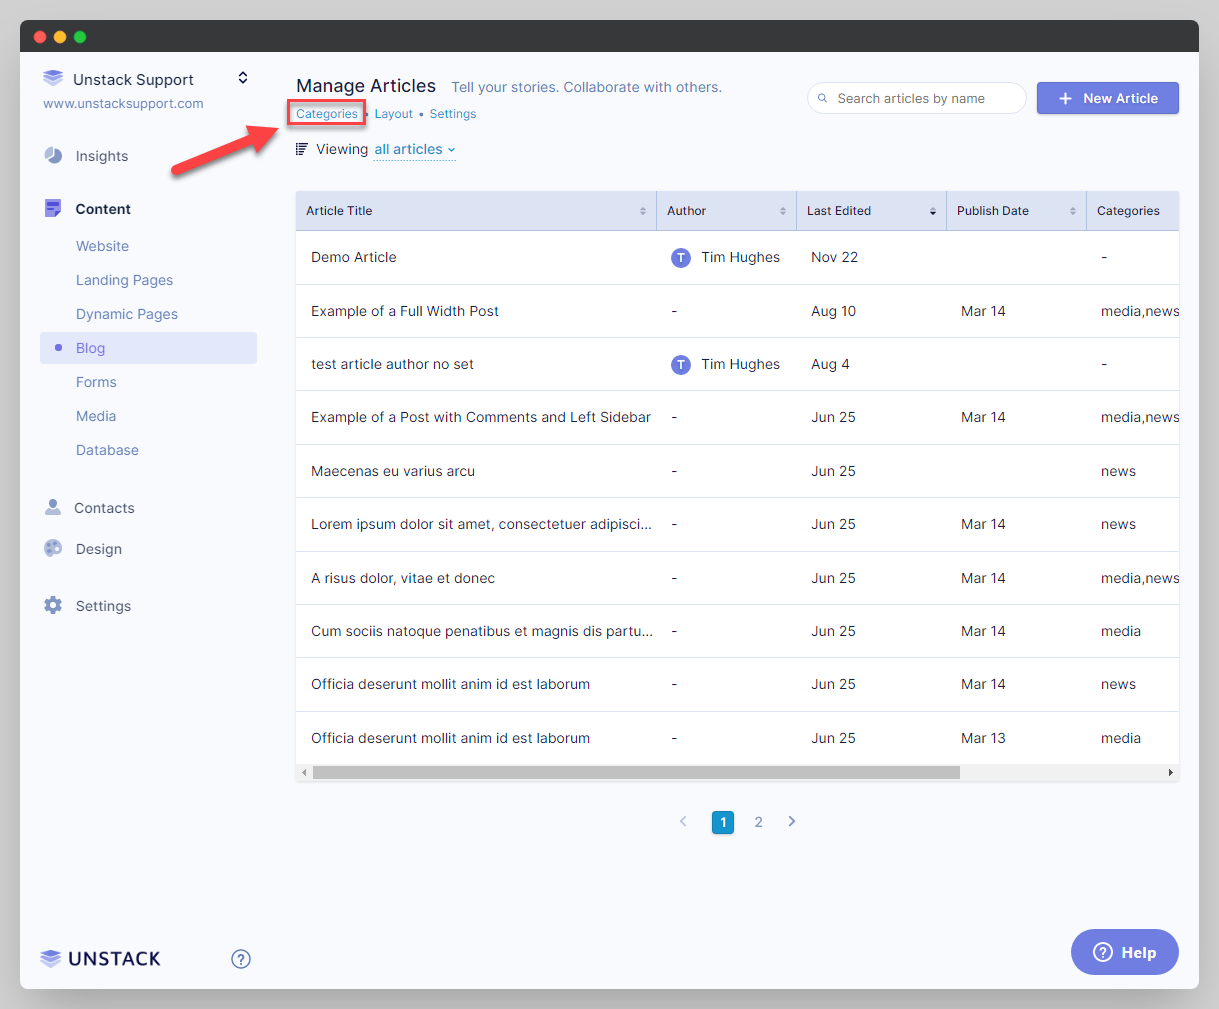
Categories are an organizational tool that you can use with your articles in Studio. They allow for a further degree of organization and make it easier for you and your users to find articles about specific topics.
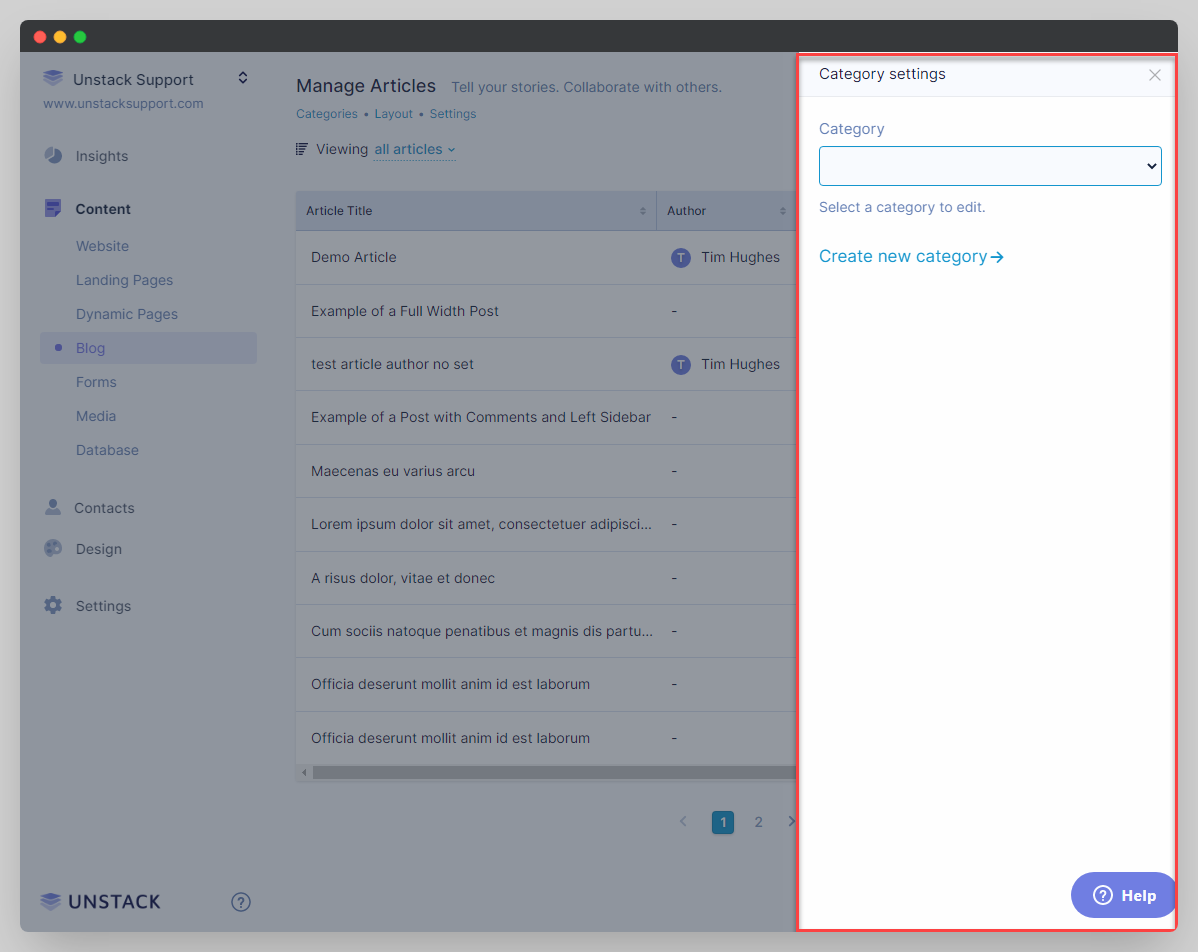
To manage the settings of your categories, select "Categories" from the top left of your screen. This opens a menu where you can either select the category you'd like to edit, or create a new category outright.
If you select "Create New Category" you'll be brought to a separate screen (Image #3) with a variety of options that you need to set before you can create your category. You'll find definitions for all these options below:
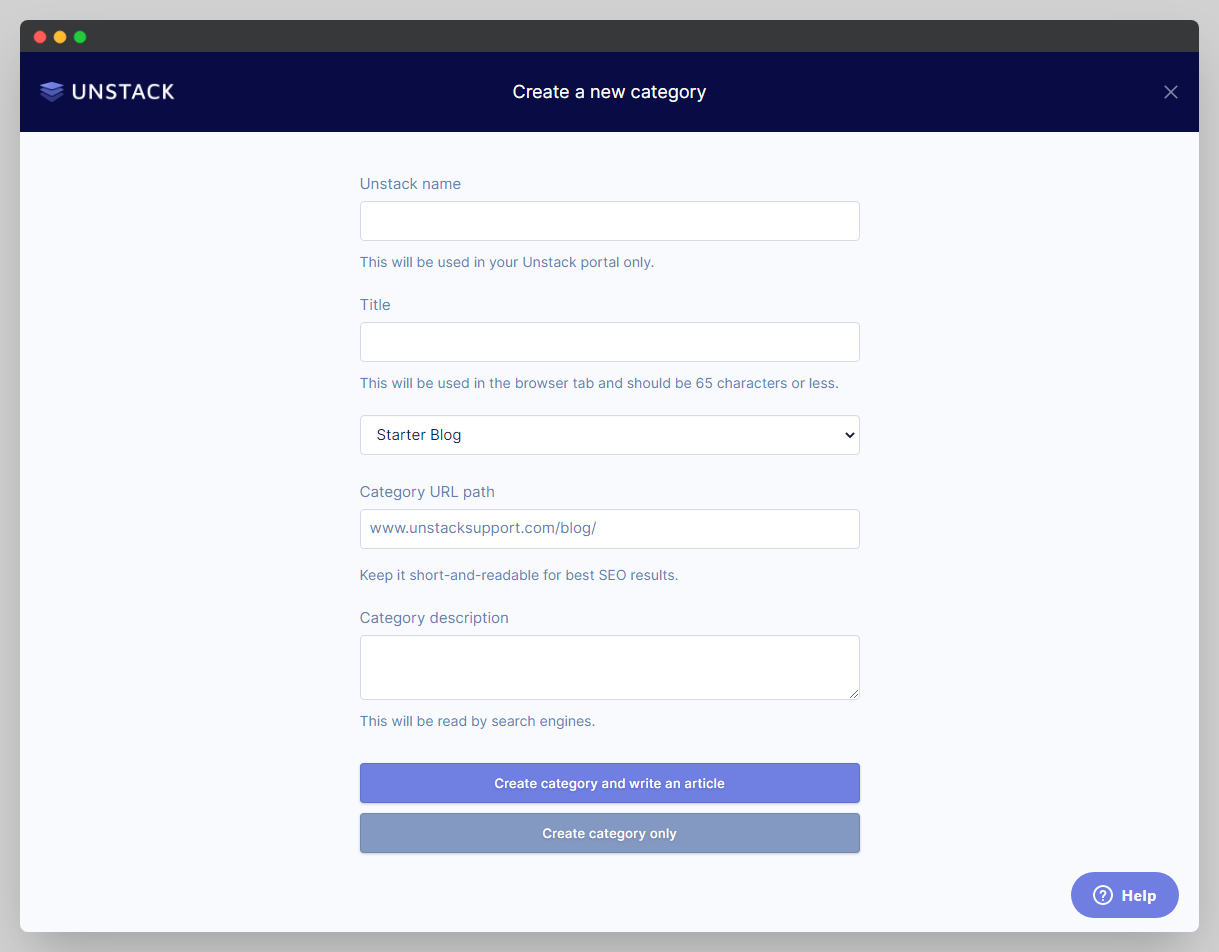
- Name: Define a name for this category which will be used to reference it internally.
- Title: Define a title for this category which will be used to reference it externally.
- Category URL Path: Define a URL Path for this category. This will be what is used when visitors view the category page.
- Category Description: Define a meta description for this category.
Layouts
In this section
Accessing Layout Settings
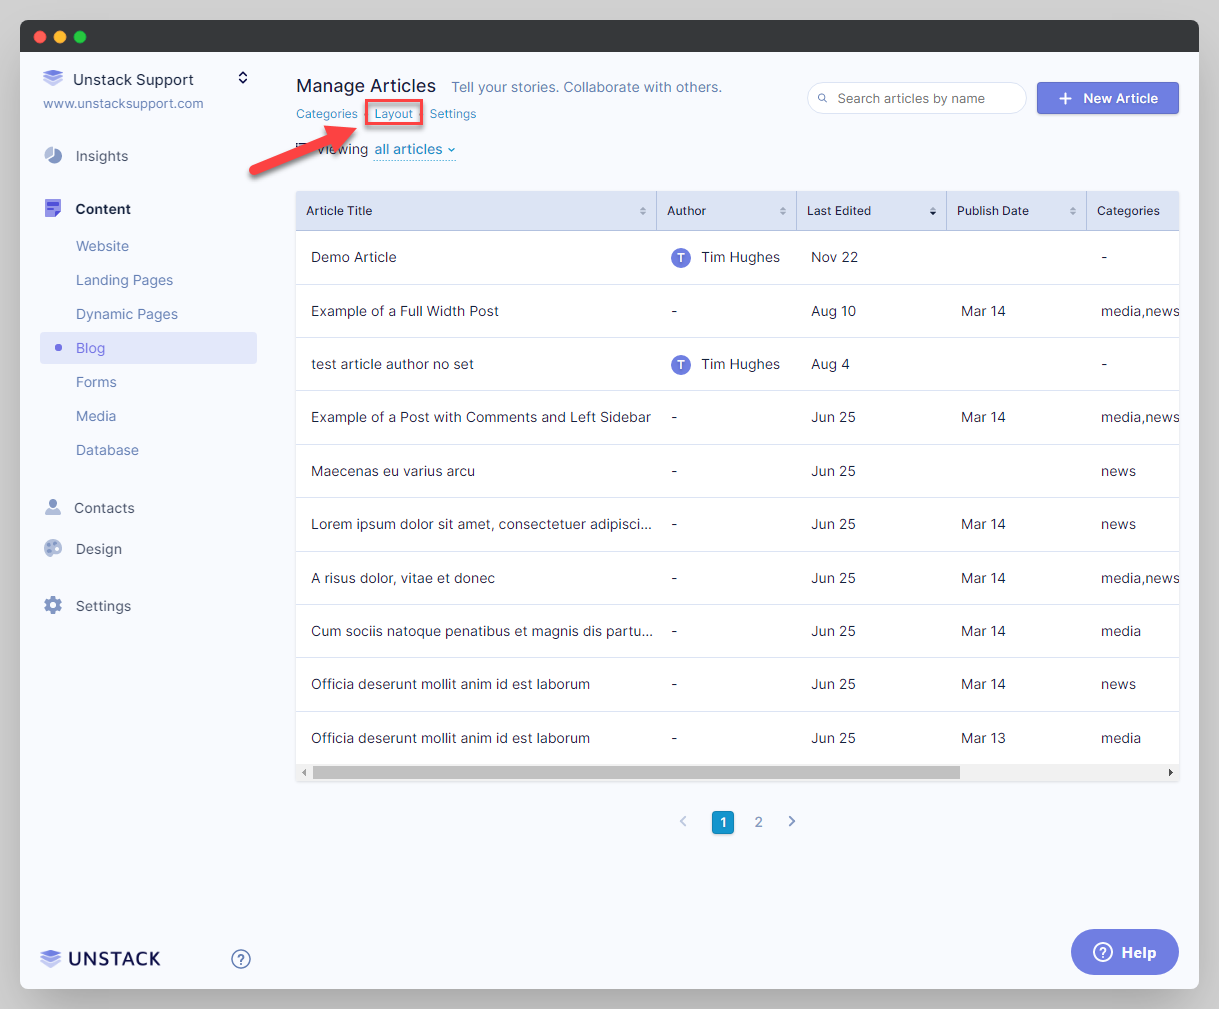
In Content, Blog, you can access your category and article layout settings by clicking Layout.
Adjusting Category Layout
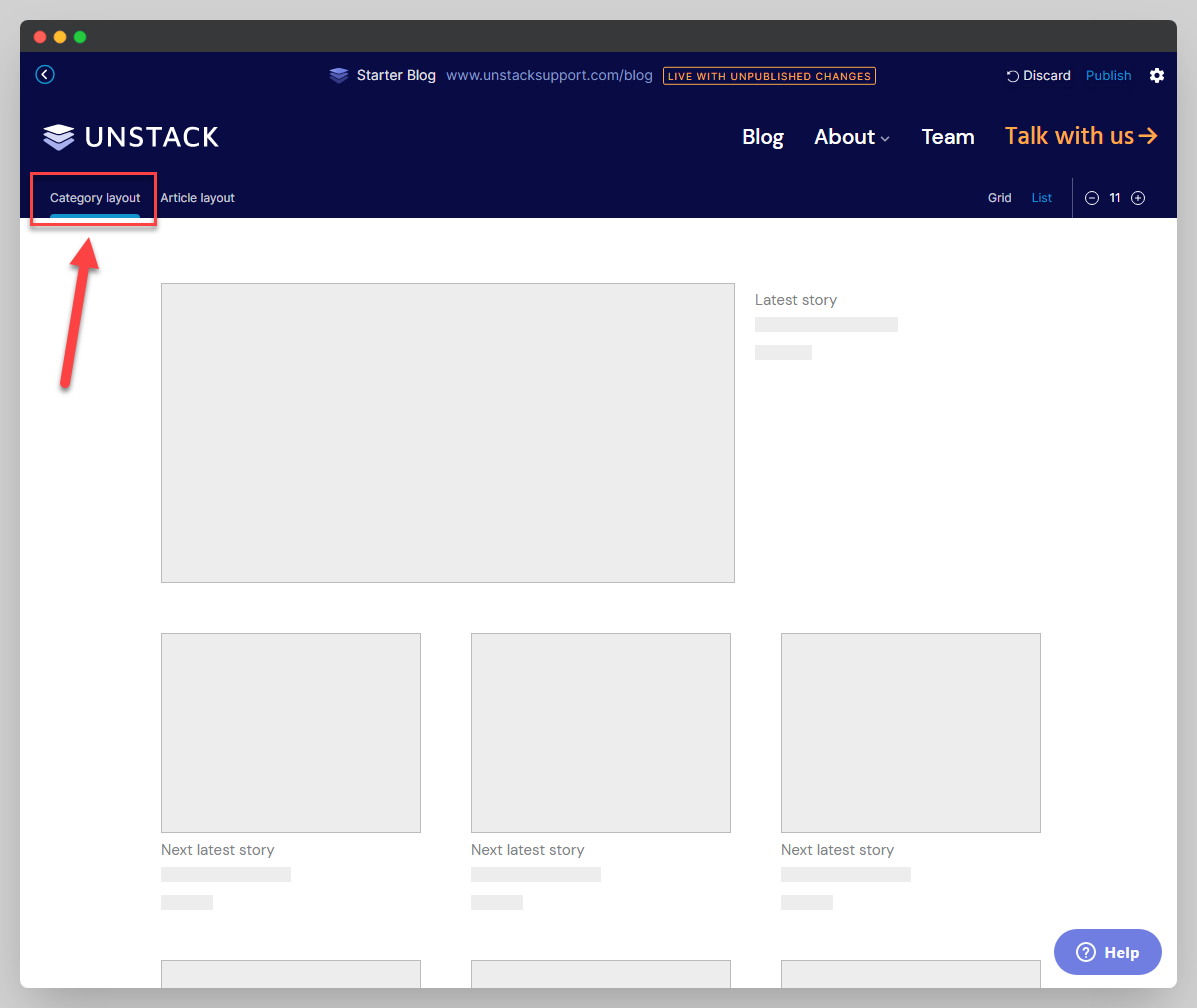
By default, clicking "Layout" will bring you to your Article layout settings. Click on "Category layout" tab to switch over to it's settings.
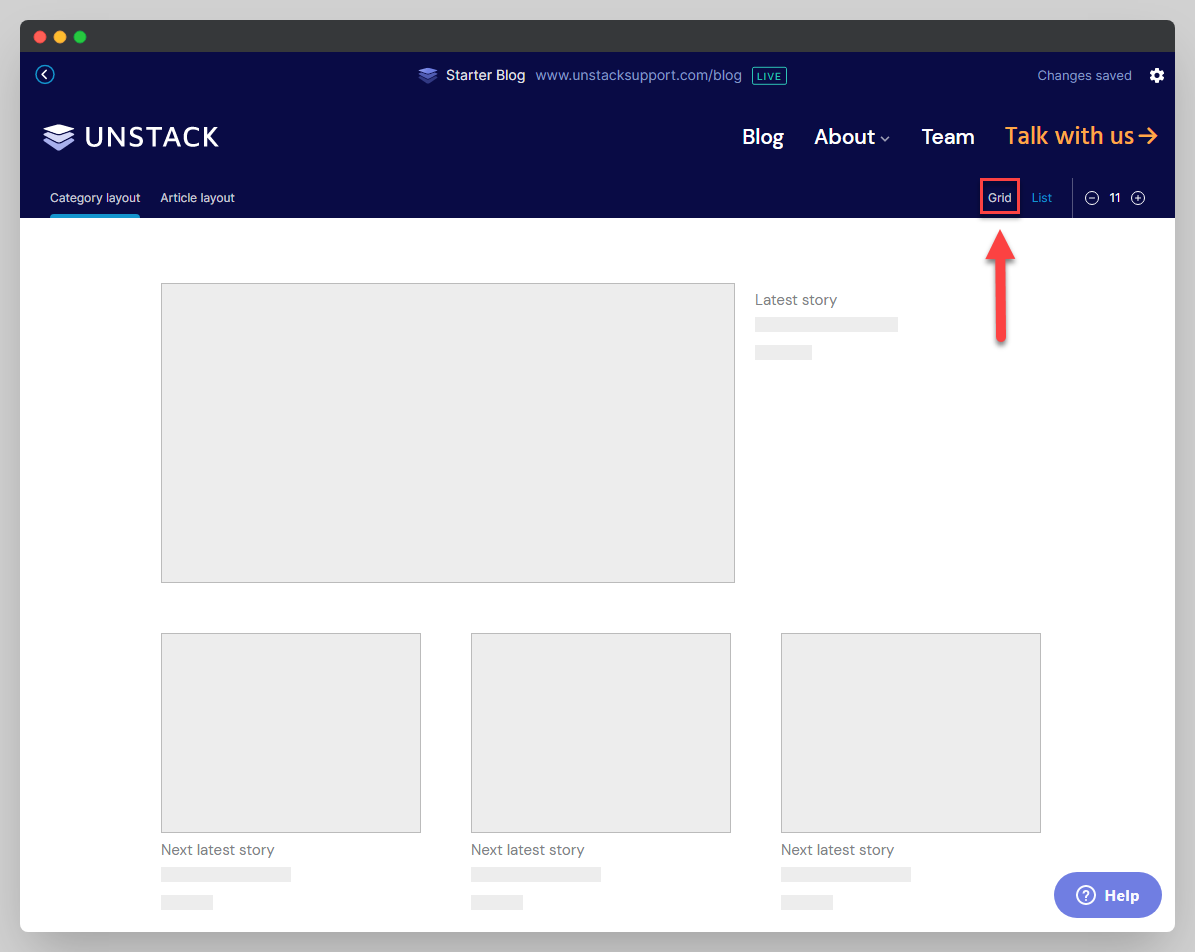
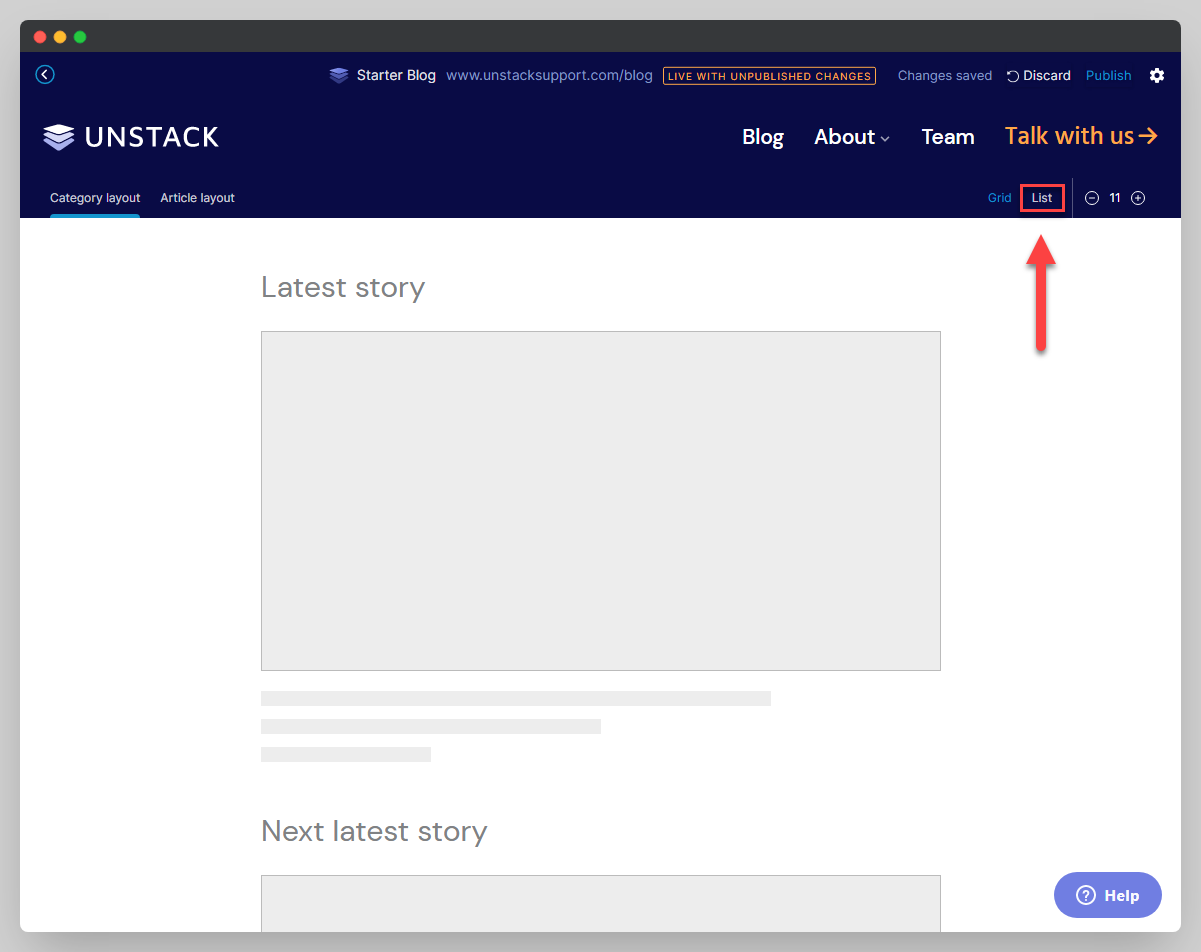
You have the option of switching between two settings for Category layout, "Grid" & "List".
Grid: Feature's your most recent story on top, and previous articles in rows of 3's underneath.
List: Feature's your most recent story on top and stacks all previous stories in rows of one on top of each other.
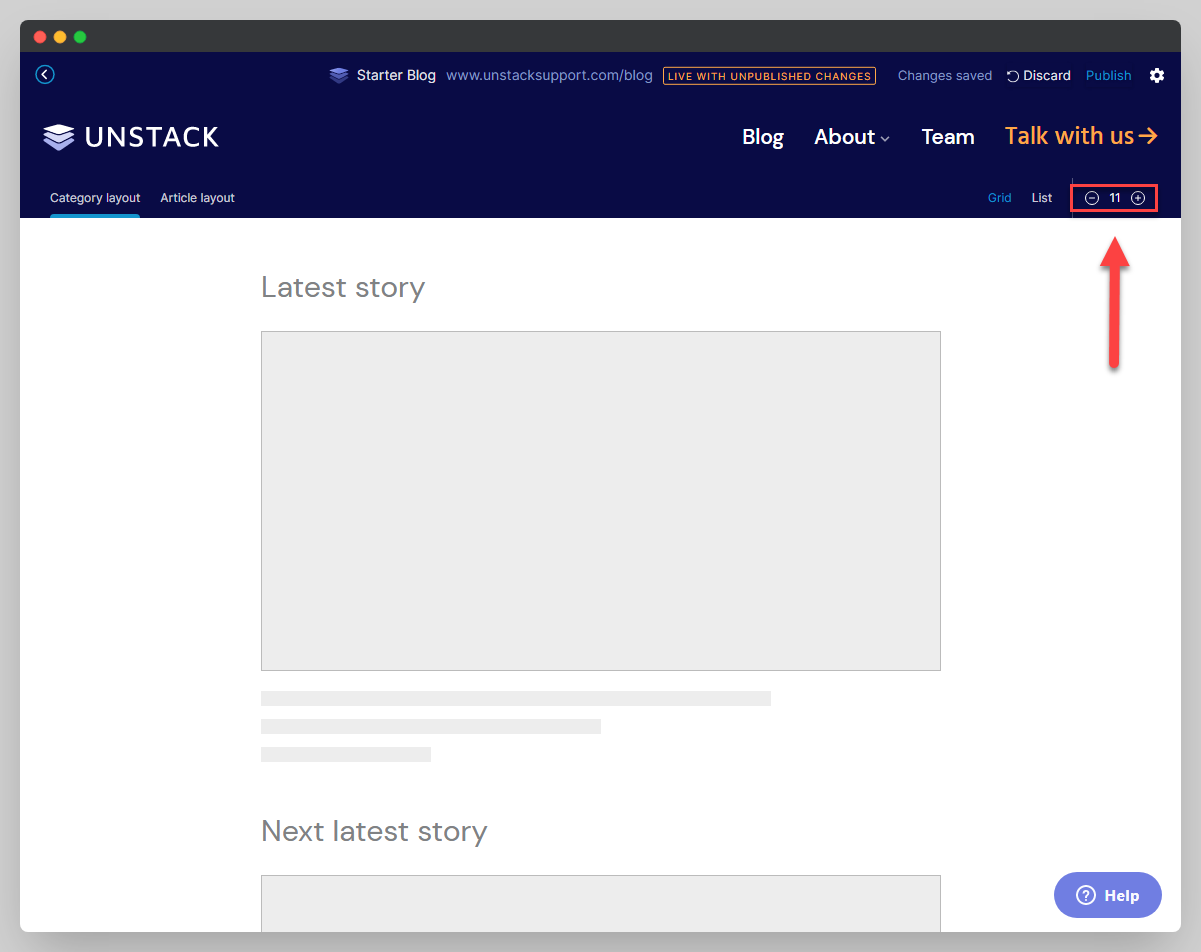
You can adjust the amount of rows by clicking on the plus (+) & minus (-) buttons shown in the screenshot below.
Category layout settings can only be viewed on a Blog Category page (example.com/categorypagename)
Adjusting Article Layout
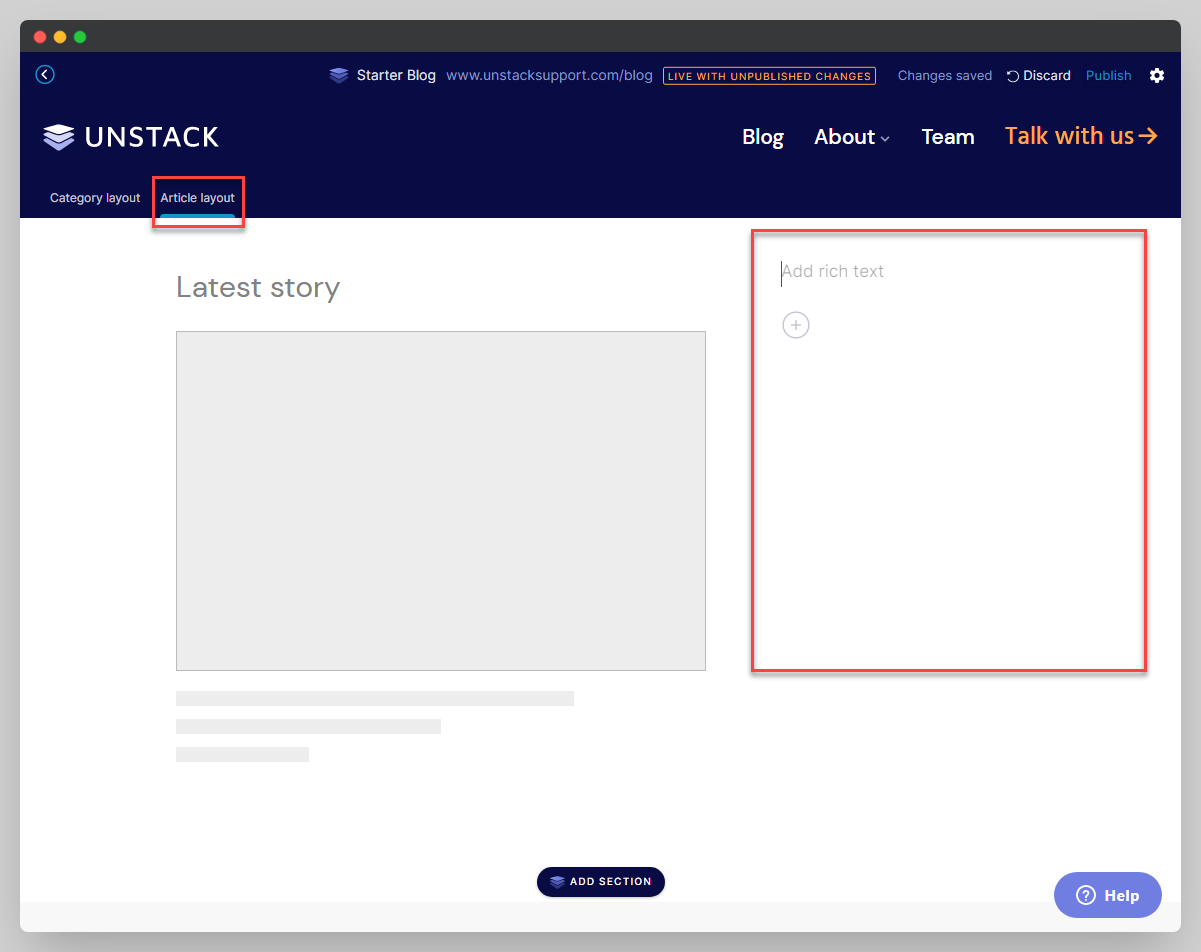
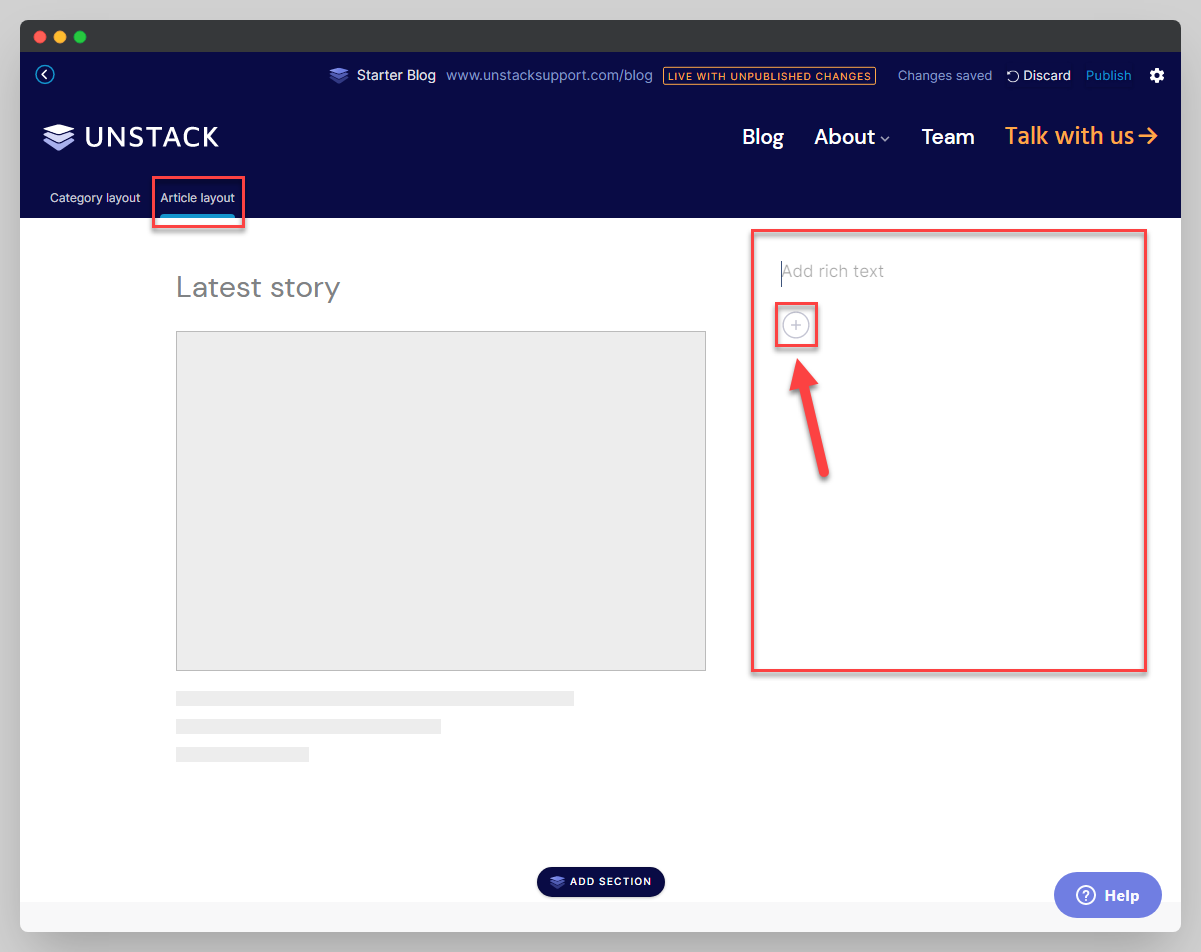
To access Article layout settings, click on the Article layout tab.
Sidebar Call-to-Action (CTA)
The sidebar option shown in the screenshot below provides a space for a call-to-action which will follow the user as they scroll through the article.
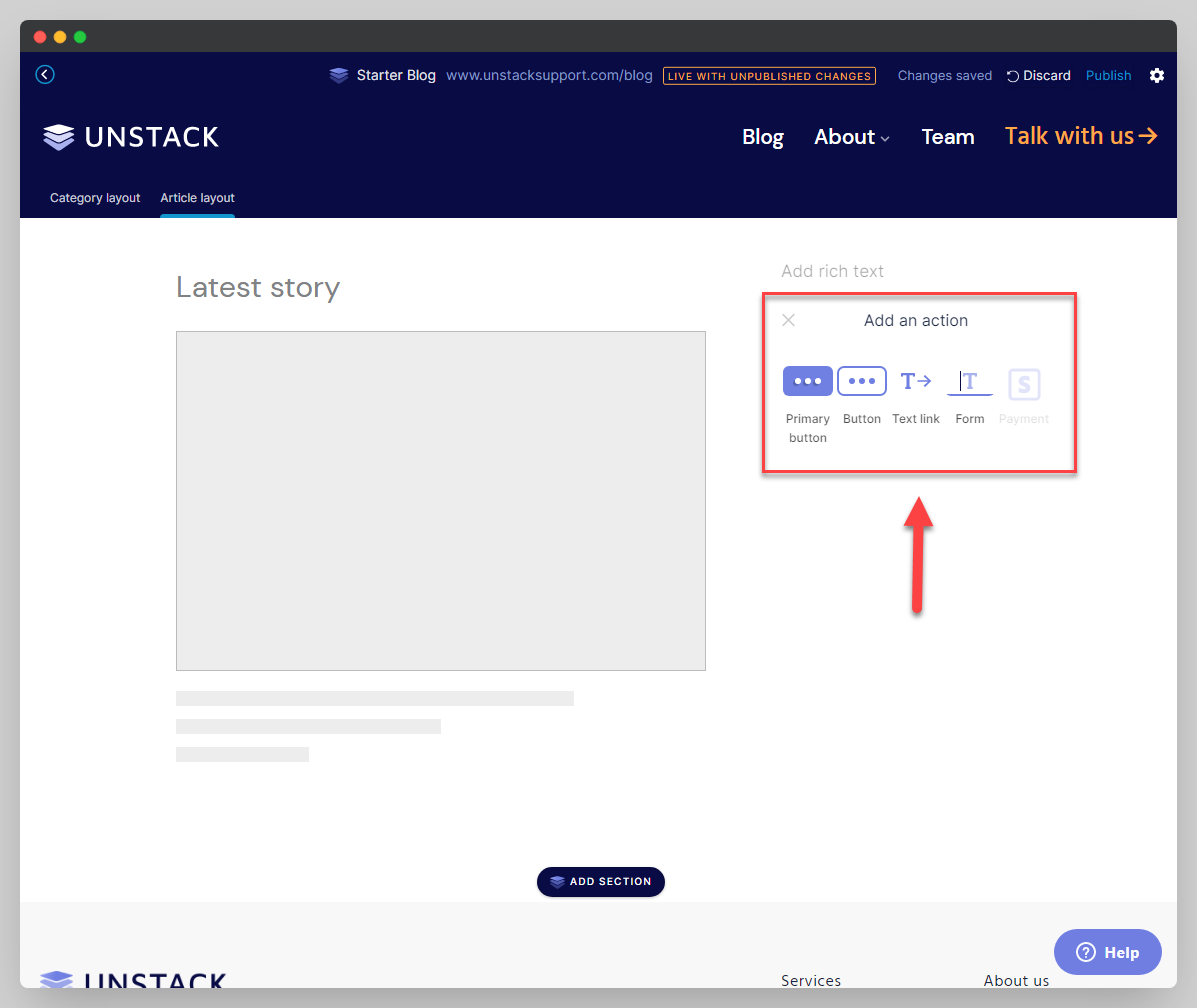
Adding a button, text link, or form
Clicking on the plus (+) symbol in the sidebar CTA will allow you to add a button, text link or form. See this in action in the screenshot:
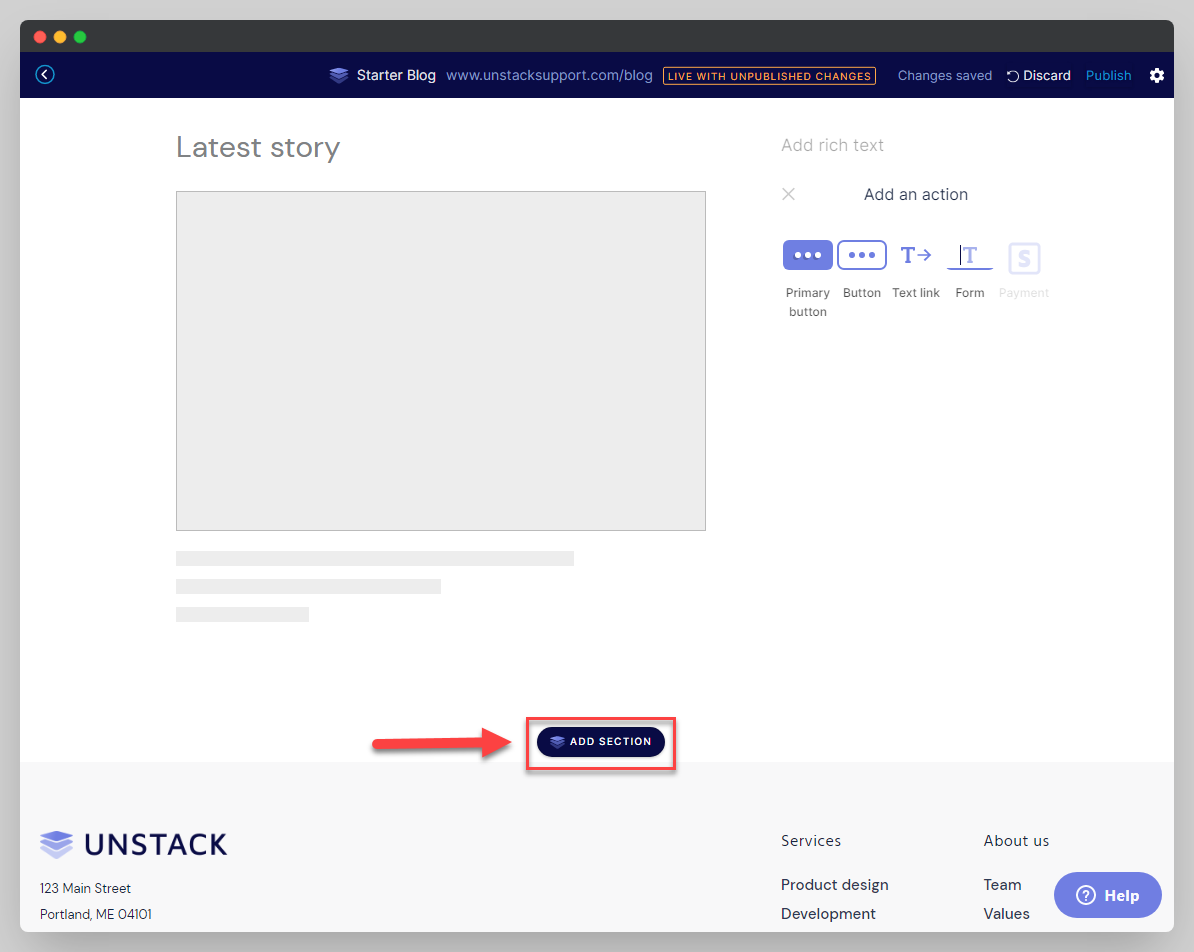
Footer Sections
The ability to add a section globally to all blog articles provides options for adding social share, DISQUS for comments, and other third-party blogging tools and CTA's.
Click the "Add Section" button shown below to add any type of section you would like.
- Make sure to click "Publish" in the top right corner of the page to publish and save any changes you've made to the settings.
- The CTA sidebar and Footer sections are global to all articles, this means it will show up on every article. Currently, there is no way to toggle this on or off for individual articles.
Article Settings
In this section:
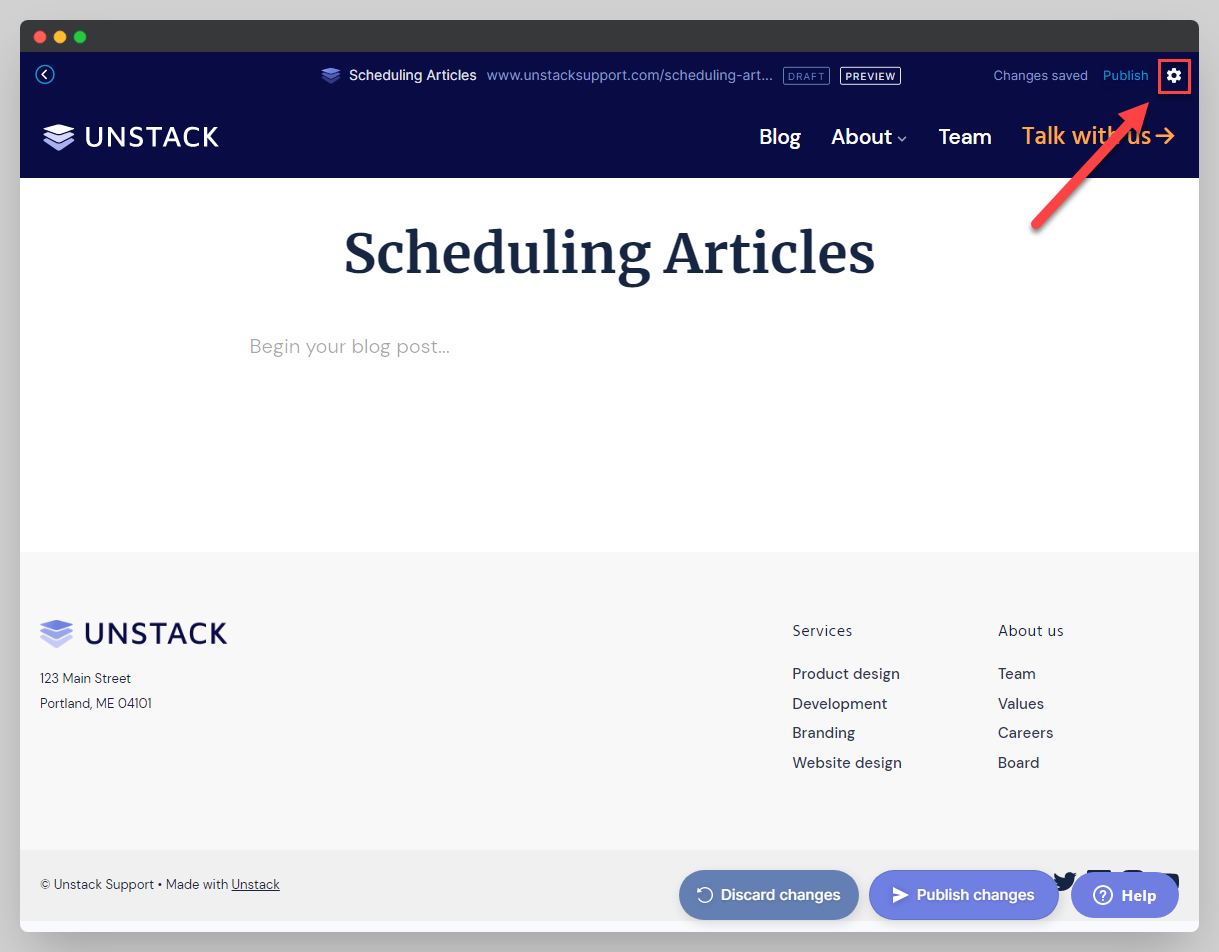
Scheduling Articles
Click the gear icon to the far right of the article you are working on to access it's settings.
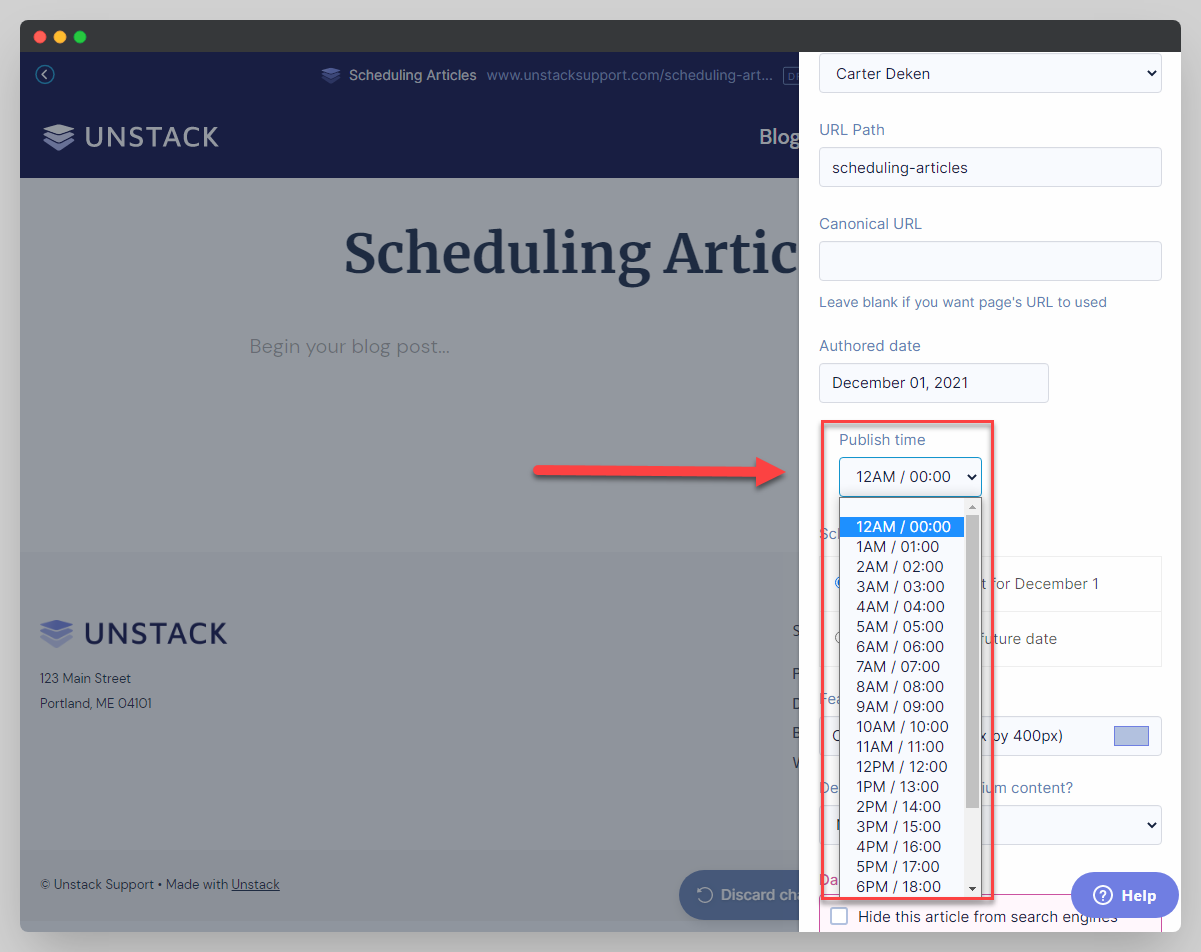
Within the settings, scroll down to access "Authored date" and "Publish time".
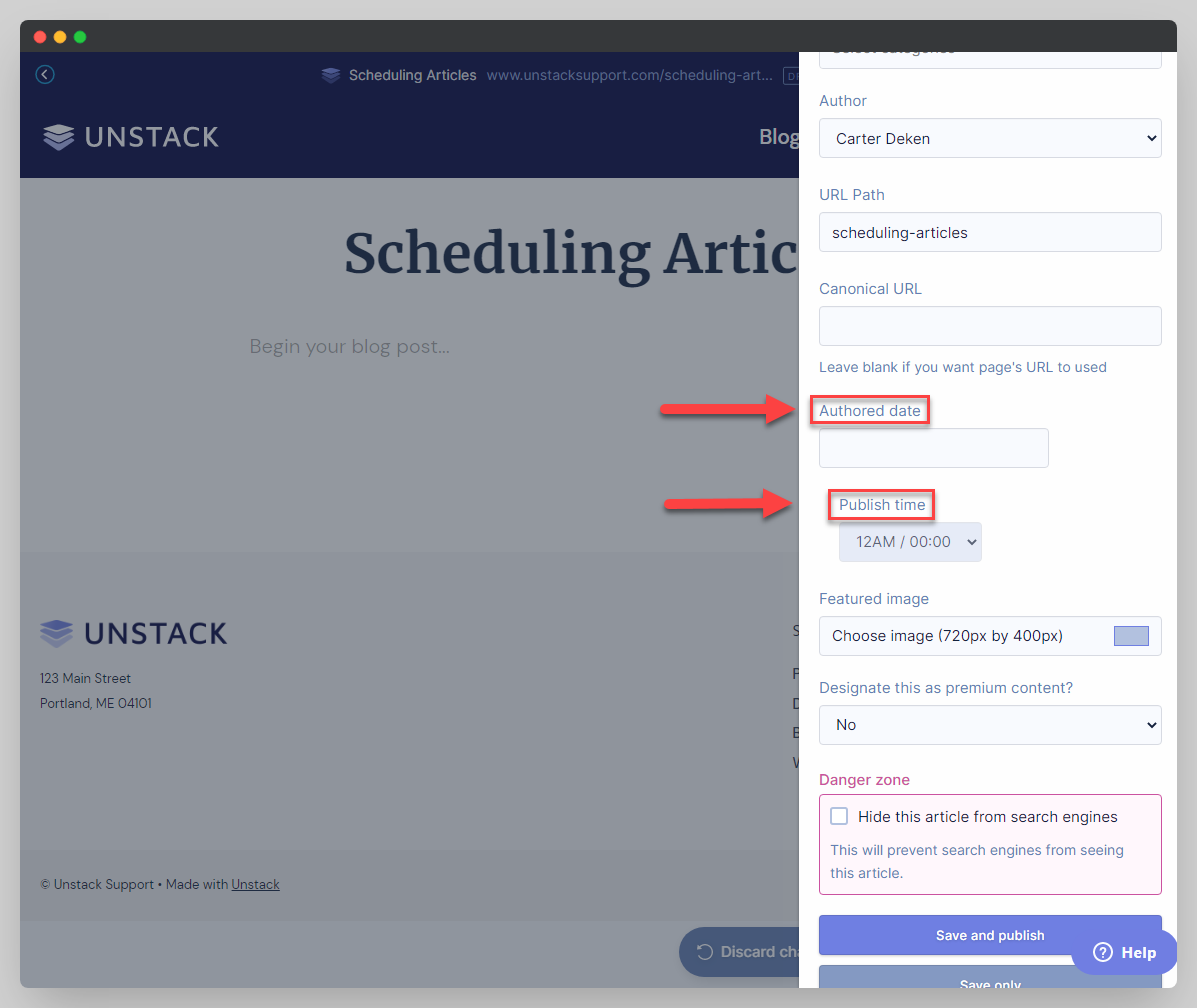
Click on the blank space under "Authored date" to choose or type a future date.
Before you are able to adjust the "Publish time", you'll need to set the Scheduling options to "Schedule this post for " Your date here" shown in the screenshot.
Now, you'll be able to set your Publish time.

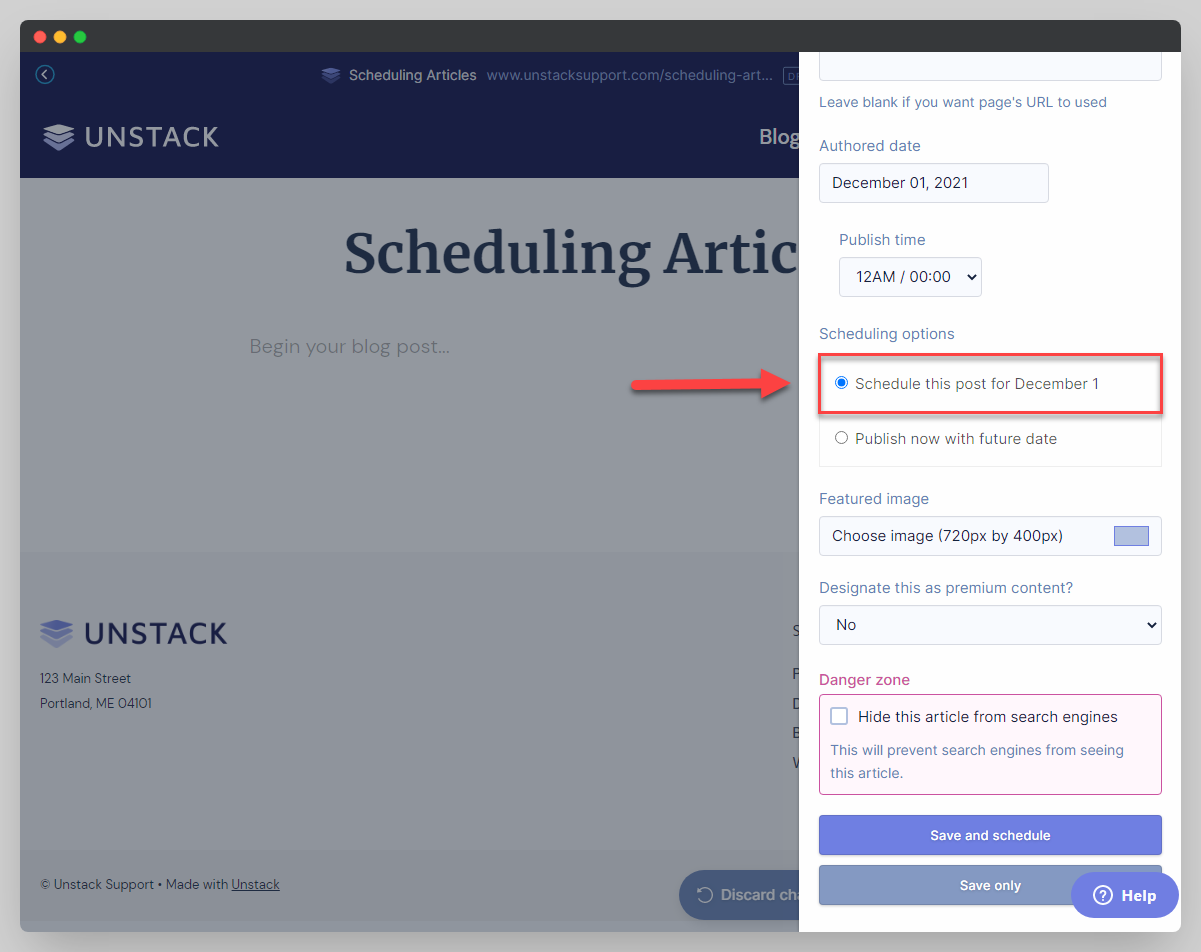
Click "Save and schedule" button at the bottom of the settings to finalize your changes.
If you make any changes to your articles content, make sure to go back into your settings and make sure the scheduling options are correct.
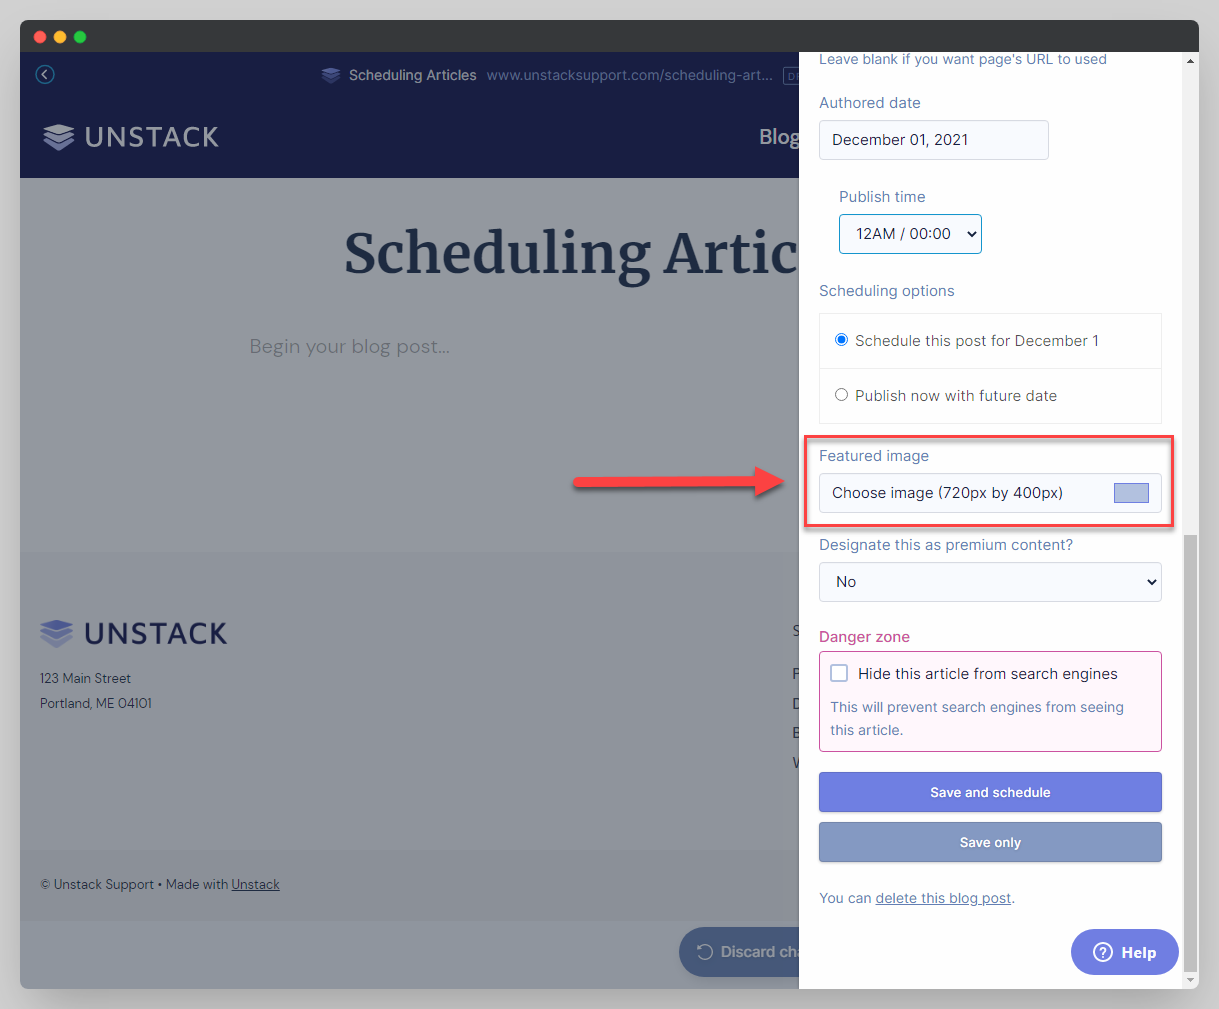
Setting a Featured Image
To set a featured image, scroll to the bottom of the settings of the article you are editing until you see the "Featured image" section. Click on the media settings below it to change or upload a new image.
Author Settings
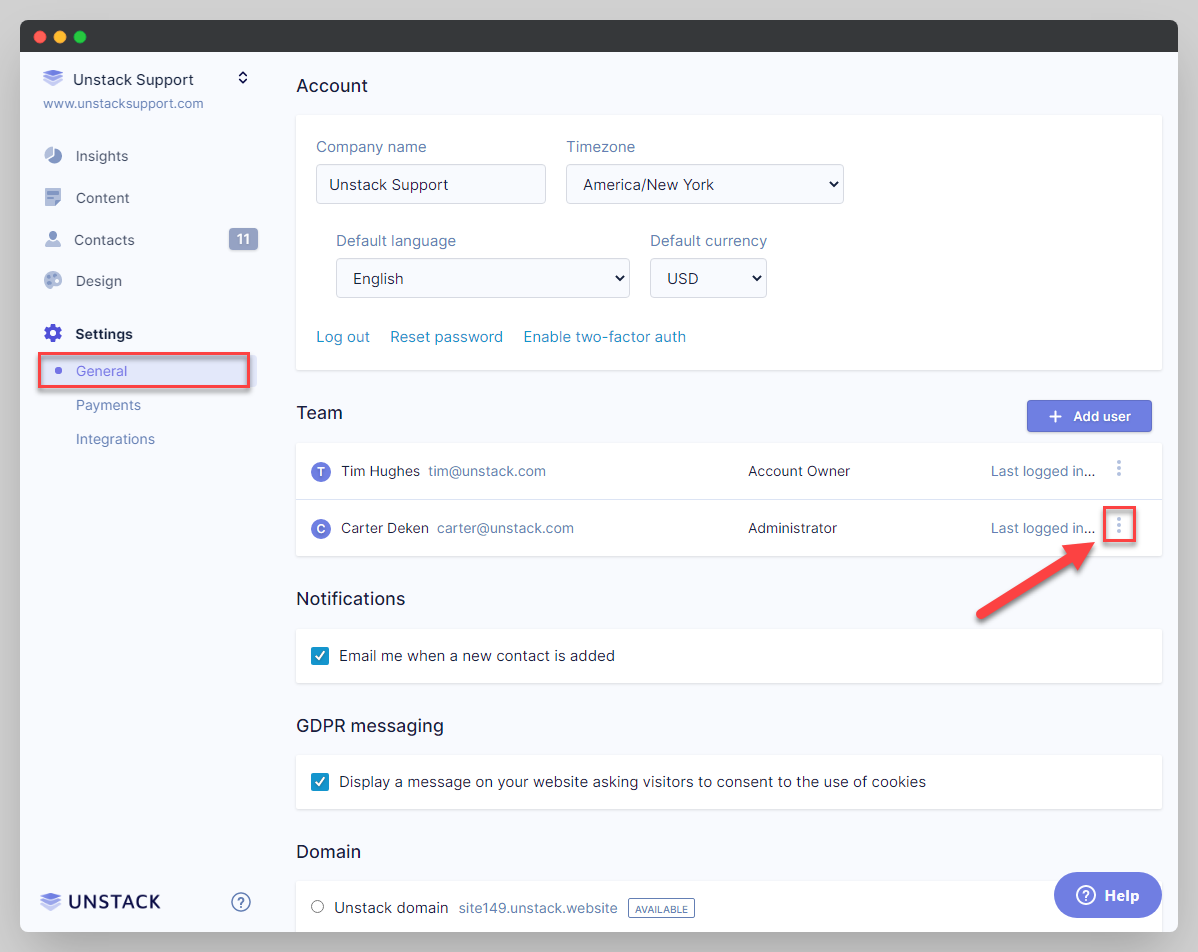
Author settings can be found within the Settings > General page, under Team. Select the person you'd like to edit by clicking on the 3 horizontal dots.
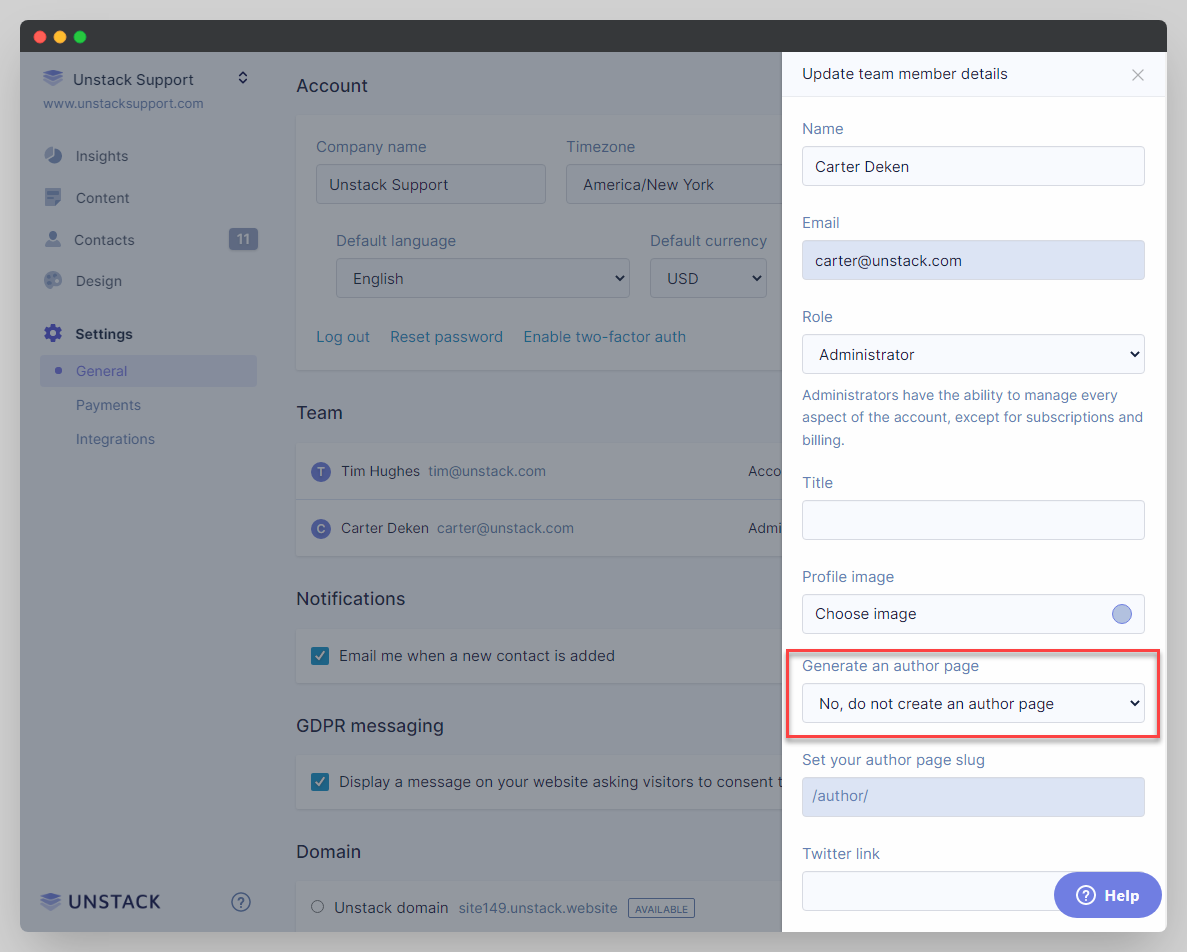
This opens their settings drawer where (if the profile is yours or you are an admin) you can adjust their profile information and Generate an author page.
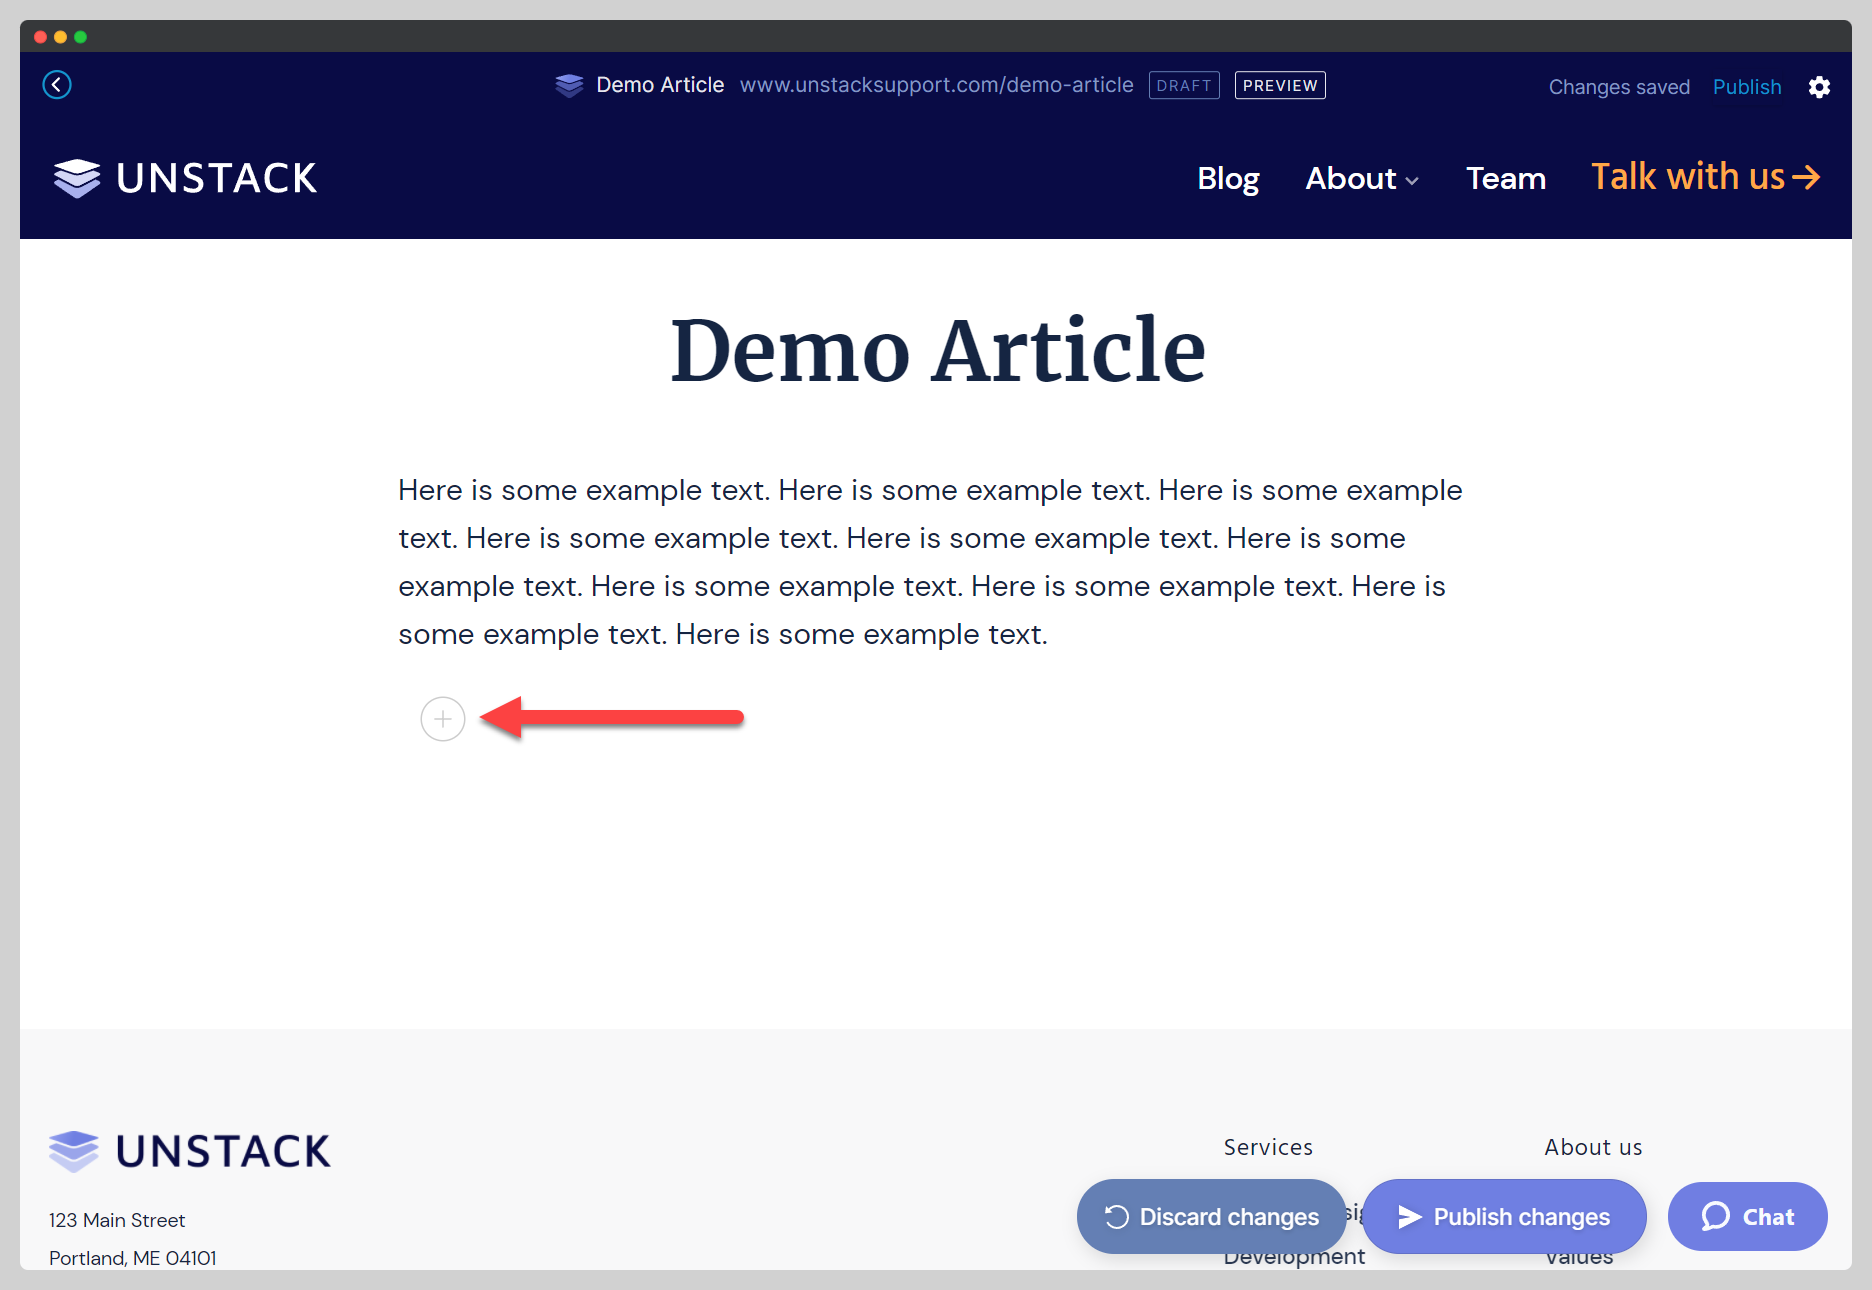
Adding Video, Image, Form, or Divider
Currently you can embed the following into your Studio articles: YouTube, Vimeo, Wistia, Transistor, Buzzsprout, and SoundCloud.
-
Create a new line by clicking the
<Enter>key. -
Once you're on a new, empty line you'll see a greyed plus icon to the right of your cursor.
-
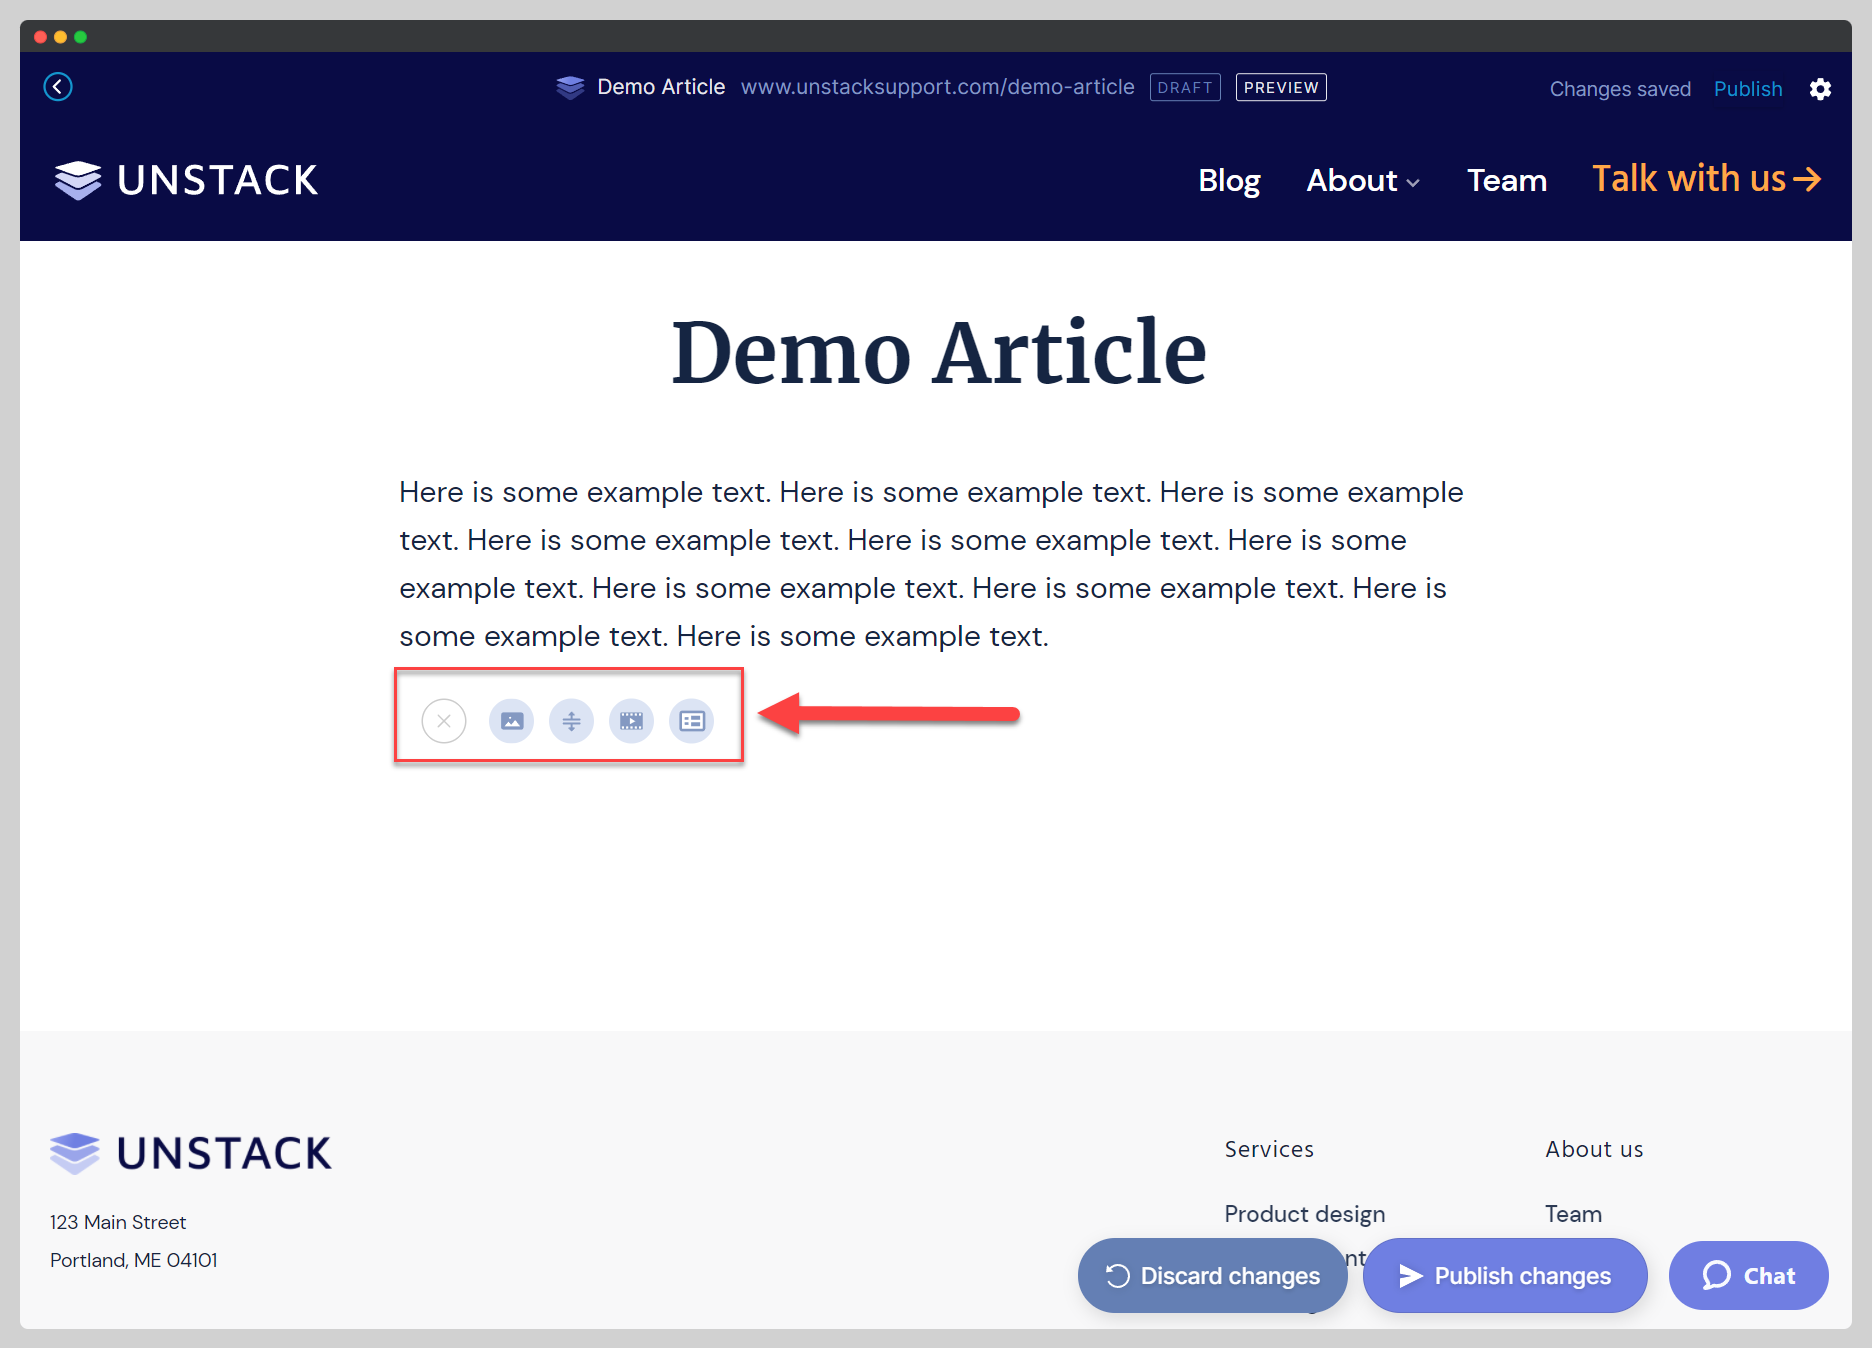
Click the greyed plus icon to expand a tray of options. Via these tray options is how you're able to add an image, divider, video or form to your article.
Considerations for YouTube
For YouTube links, make sure you're pasting the full URL rather than the shortened version.
Full URL: youtube.com/watch?v=VIDEO-ID
Short URL: youtube/VIDEO-ID
Adding tags to blog posts
Similar to blog categories, you can create tags on blog posts articles that link together with other articles that have this same tag.
In order for the tags option to show, make sure you have the "Generate dynamic pages for tags" box checked under your account settings.
- To create tags, head to a blog article, open it's settings, and scroll down until you see the new option titled " tags".
- To input a new tag, type in the name of the tag and hit the "enter" key on your keyboard.
Tags cannot be deleted, and can be duplicated if typed into the tag field multiple times.
We know this is a lot to take in, so please, if you have any questions feel free to reach out to the Studio support team!