Configuring the Plugin
Plugin Configuration
Before configuring the Self-Managed Commerce Composer plugin, integrations need to be created in the Elastic Path Composable Commerce Composer. These integrations will create webhook URLs that the Self-Managed Commerce Composer plugin can invoke.
For detailed documentation about creating integrations in Composer, see our Elastic Path Composable Commerce Composer documentation.
Create Elastic Path Composer integrations
-
Login to Elastic Path Commerce Cloud Commerce Manager in your assigned region. If you don't have credentials, please open a support case requesting Elastic Path Composable Commerce credentials.
-
On the left-hand navigation bar, click "Composer", then "Builder".
-
In the top-right corner, click "+ Add integration".
-
In the dialog that appears, click "Quickstart".
-
In the next dialog, give your integration a name, then choose the "Universal Webhook" trigger, and click "Create trigger".
-
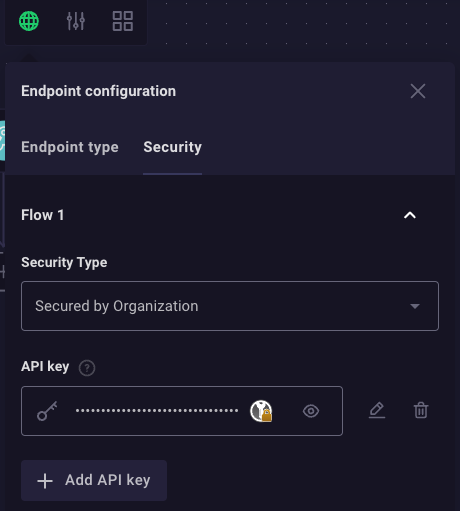
In the top-middle of the screen, click the "Endpoint configuration" icon (looks like a globe), then click on the "Security" tab.
-
Change the Security Type to "Secured by Organization" and click "+ Add API key". This will generate an API key that you will need to configure in the Self-Managed Commerce Composer plugin.

-
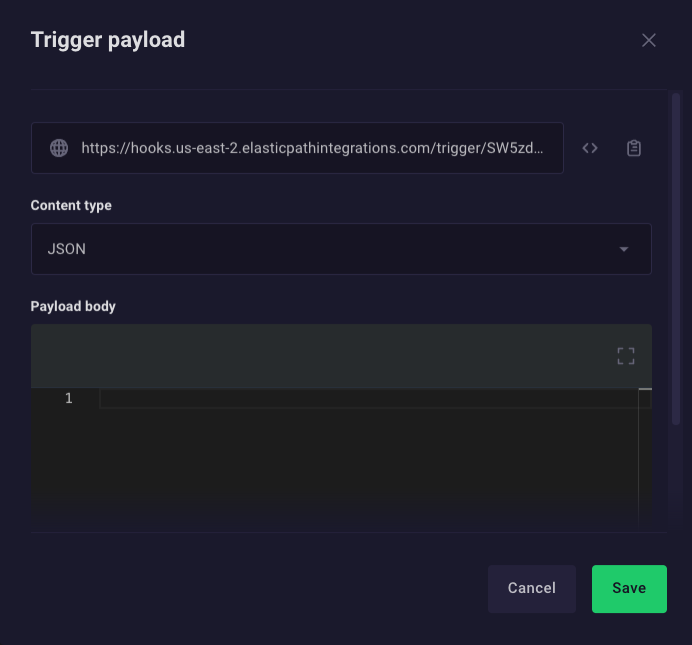
At the bottom of the screen, click "Test Configuration", and then click "Trigger payload". This will display the webhook URL that you will need to configure in the Self-Managed Commerce Composer plugin.

-
In the top-right of your screen, click the "Save" button.
-
Test your integration by opening a terminal window and running the following command:
curl {WEBHOOK_URL} --header "api-key: {API_KEY}"Make sure to replace the
{WEBHOOK_URL}and{API_KEY}placeholders using the values determined in previous steps before executing it. -
Return to your browser.
-
At the bottom of the screen, click "Test Runs" and verify that the curl request appears in the test history.
-
Add one or more steps to the integration by clicking the "+" icon below the Universal Webhook Trigger. See Builder Components for more information about how to configure components.
-
In the top-right of your screen, click the "Save" button.
Repeat the steps above for each integration you require. If you want to support all event types, you will need to create a separate integration for each one.
To use your integrations in non-production environments, skip to Defining plugin setting values to configure the Self-Managed Composer plugin for the integrations you created. Before launching in production, make sure to publish your integration and update your Self-Managed Composer plugin settings.
Publishing integrations
-
Open your integration in Composer.
-
In the top-right corner, click "Publish".
-
In the dialog that appears, click "Save & Publish".
-
On the left side of the screen click the "Marketplace configuration" icon.
-
In the dialog that appears, click "Add to Integrations Hub".
-
In the next dialog, enter an overview description, and click the "Add" button.
-
On the left-hand navigation bar, click "Integrations Hub".
-
Scroll down to the "Uncategorized" section to find the integration you published, and click on it.
-
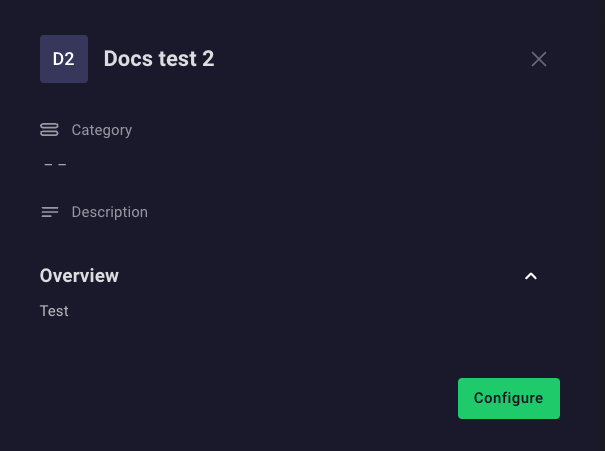
In the dialog that opens, click the "Configure" button.

-
In the next dialog, open the trigger details to view the webhook URL and make note of it. Click the "+ Add API key" button to create an API key and make note of that as well.
-
Click the "Next" button.
-
Click the "Finish" button.
Use the webhook URL and API key from the steps above to define the plugin setting values in the next section.
Defining plugin setting values
The Composer plugin is configured using the extensions.json mechanism provided by the Extension Point Framework.
To change the Composer plugin configuration, open extensions/plugins/ext-plugin-config/src/main/resources/extensions.json in the Self-Managed Commerce source code repository, and update the values described below. See Backend Integration for a sample extensions.json file to use as a starting point.
The setting values supported by the Composer plugin are described below:
| Extension Class | Setting Key | Description |
|---|---|---|
com.elasticpath.plugins.composer.extensions.CustomerEventsExtension | API_KEY | The API key for the Elastic Path Composer integration customer events webhook. |
com.elasticpath.plugins.composer.extensions.CustomerEventsExtension | WEBHOOK_URL | The webhook URL for the Elastic Path Composer integration customer events webhook. |
com.elasticpath.plugins.composer.extensions.ShoppingCartEventsExtension | API_KEY | The API key for the Elastic Path Composer integration shopping cart events webhook. |
com.elasticpath.plugins.composer.extensions.ShoppingCartEventsExtension | WEBHOOK_URL | The webhook URL for the Elastic Path Composer integration shopping cart events webhook. |
com.elasticpath.plugins.composer.extensions.ShoppingCartItemEventsExtension | API_KEY | The API key for the Elastic Path Composer integration shopping cart item events webhook. |
com.elasticpath.plugins.composer.extensions.ShoppingCartItemEventsExtension | WEBHOOK_URL | The webhook URL for the Elastic Path Composer integration shopping cart item events webhook. |
com.elasticpath.plugins.composer.extensions.OrderReleaseEventsExtension | API_KEY | The API key for the Elastic Path Composer integration shopping cart item events webhook. |
com.elasticpath.plugins.composer.extensions.OrderReleaseEventsExtension | WEBHOOK_URL | The webhook URL for the Elastic Path Composer integration shopping cart item events webhook. |
After updating these values, commit your changes and deploy the Self-Managed Commerce services as usual.
See Testing for information about verifying the integration functionality.