Try asking: How do I integrate Elastic Path Commerce with a third-party ...
Build modern commerce experiences
Launch faster, tackle complex challenges, and create world-class experiences with our powerful APIs , e-Commerce Services, & tools for developers.
Trusted by these leading brands...
Elastic Path Composable Commerce
ELASTIC PATH
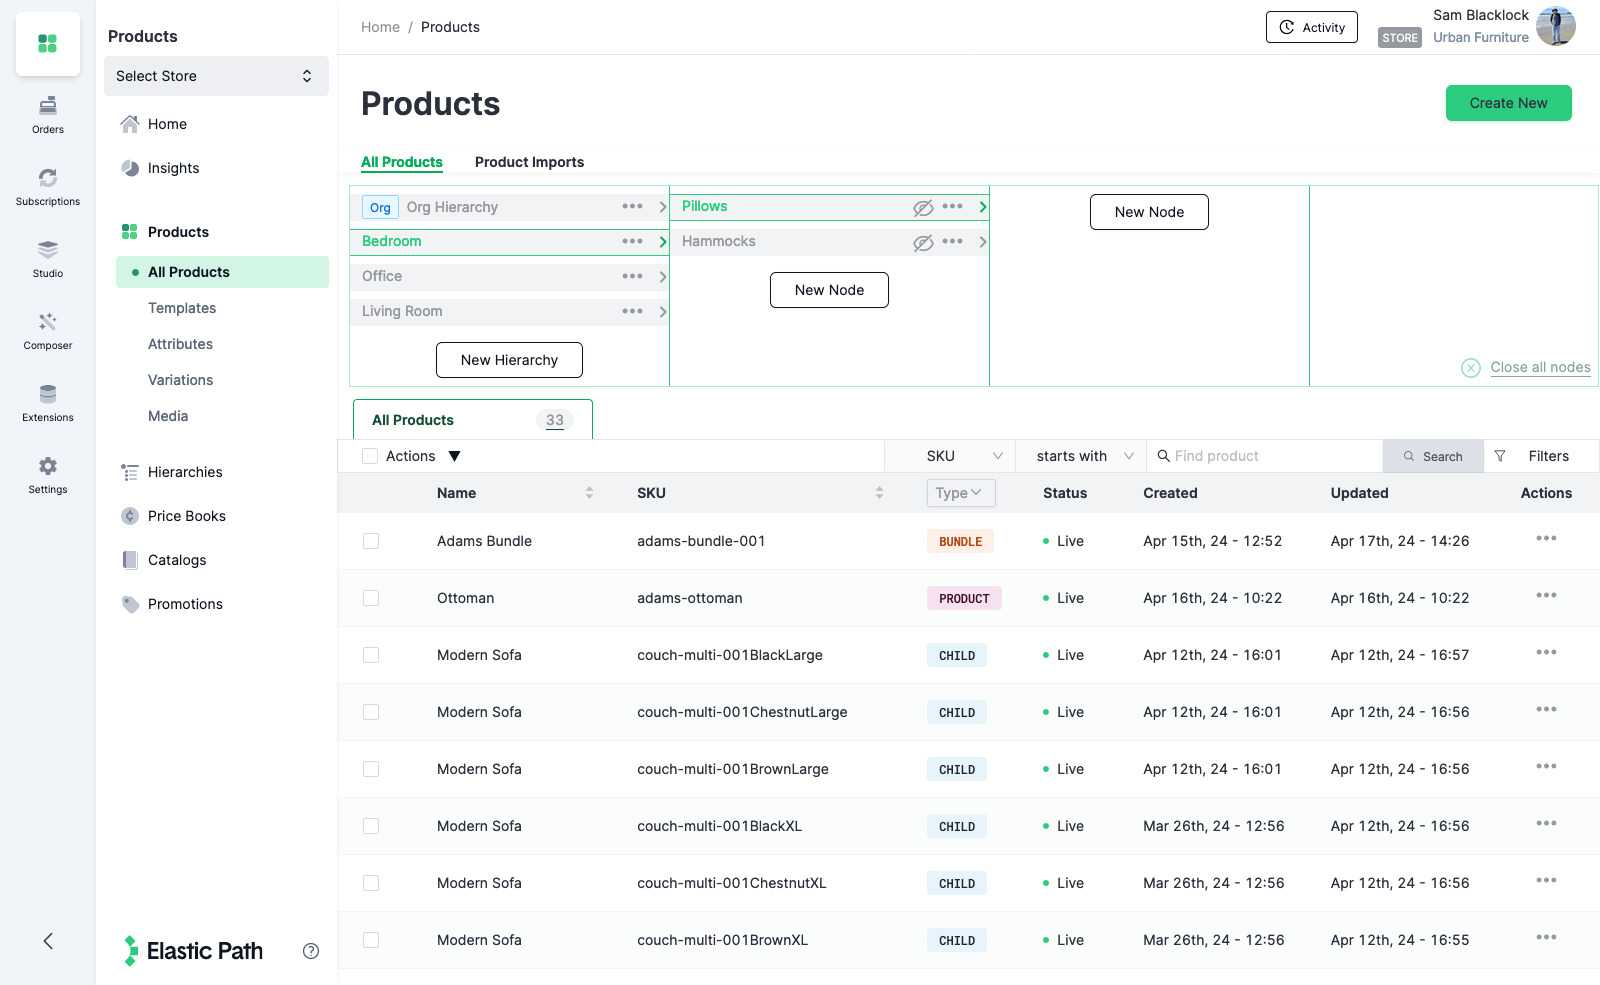
Merchandise
Effortlessly orchestrate your product offerings, craft compelling catalogs, and execute sophisticated, rules-driven promotions.
- Unlimited catalogs for unlimited channels
- Implement diverse pricing and promotional strategies
- Complex & configurable bundles
- Up to 10,000 product variations
- Empowers merchandisers
- Accelerates time-to-market
- Improve Customer Experience
Elastic Path Composable Commerce
Modern commerce APIs
- React Hooks
- node.js
- Python
- go
- Java
- cUrl
import { useProduct } from "@elasticpath/react-shopper-hooks"

export default function Products() {
   const { data: product, isLoading } = useProduct({
     productId: "18ab29..."
   })

    return (
     <div>
       {isLoading && <span>Loading...</span>}
       {product && <span>{product.attributes.name}</span>}
     </div>
   )
}
fetch("https://useast.api.elasticpath.com/catalog/products/${productId}", {
    headers: {
    "Content-Type": "application/json",
    Authorization: "Bearer XXXX"
  }
}).then(response => response.json())
  .then(data => console.log(data));
import requests

url = "https://useast.api.elasticpath.com/catalog/products/{}".format(productId)
headers = {
    "Content-Type": "application/json",
    "Authorization": "Bearer XXXX"  # Replace XXXX with your actual token
}

response = requests.get(url, headers=headers)
data = response.json()
print(data)
package main

import (
	"fmt"
	"io/ioutil"
	"net/http"
)

func main() {
	productID := "YOUR_PRODUCT_ID" // Replace with actual product ID
	token := "XXXX"                // Replace XXXX with your actual token

	url := fmt.Sprintf("https://useast.api.elasticpath.com/catalog/products/%s", productID)

	req, err := http.NewRequest("GET", url, nil)
	if err != nil {
		fmt.Println("Error creating request:", err)
		return
	}

	req.Header.Set("Content-Type", "application/json")
	req.Header.Set("Authorization", "Bearer "+token)

	client := &http.Client{}
	resp, err := client.Do(req)
	if err != nil {
		fmt.Println("Error making request:", err)
		return
	}
	defer resp.Body.Close()

	body, err := ioutil.ReadAll(resp.Body)
	if err != nil {
		fmt.Println("Error reading response body:", err)
		return
	}

	fmt.Println(string(body))
}
import java.io.BufferedReader;
import java.io.IOException;
import java.io.InputStreamReader;
import java.net.HttpURLConnection;
import java.net.URL;

public class Main {
    public static void main(String[] args) {
        String productId = "YOUR_PRODUCT_ID"; // Replace with actual product ID
        String token = "XXXX"; // Replace XXXX with your actual token

        String url = "https://useast.api.elasticpath.com/catalog/products/" + productId;

        try {
            URL obj = new URL(url);
            HttpURLConnection con = (HttpURLConnection) obj.openConnection();

            // Set the request method
            con.setRequestMethod("GET");

            // Set request headers
            con.setRequestProperty("Content-Type", "application/json");
            con.setRequestProperty("Authorization", "Bearer " + token);

            int responseCode = con.getResponseCode();
            if (responseCode == HttpURLConnection.HTTP_OK) {
                BufferedReader in = new BufferedReader(new InputStreamReader(con.getInputStream()));
                String inputLine;
                StringBuffer response = new StringBuffer();

                while ((inputLine = in.readLine()) != null) {
                    response.append(inputLine);
                }
                in.close();

                // Print response
                System.out.println(response.toString());
            } else {
                System.out.println("HTTP request failed with error code: " + responseCode);
            }
        } catch (IOException e) {
            e.printStackTrace();
        }
    }
}
curl -X GET "https://useast.api.elasticpath.com/catalog/products/${productId}" \
-H "Content-Type: application/json" \
-H "Authorization: Bearer XXXX"
{
  "data": {
    "id": "00000000-0000-0000-0000-000000000000",
    "type": "subscription-product",
    "attributes": {
      "external_ref": "abc123",
      "name": "Magazine",
      "description": "A lovely magazine that is published every month.",
      "sku": "MAGAZINE1",
      "main_image": "https://magazine.com/cover.jpg"
    }
  }
}
Elastic Path provides an elegant set of composable APIs for building eCommerce experiences.
RESTful APIs, JSON responses, and normalized objects
Modern, easy to use SDKs for JavaScript and React
Get updates on catalogs, orders, carts, accounts, users, and more via webhooks
Build or customize low- or no-code integrations
Multi-region hosting and full GDPR & CCPA compliance. Fully SOC2 certified.
Business user tooling seamlessly integrates Elastic Path into your site
Get started now!
Start Free TrialELASTIC PATH COMPOSER
Quickly connect
commerce data to every tool in your arsenal
Composer comes preconfigured with dozens of instant-on integrations. Need more? Quickly customize how data flows between tools in your stack
Get started now!
Start Free TrialWe’re fiercely committed
to your success
Customer success
You’ve got big dreams. We’re here for it. Get strategic guidance from our customer success team — from pre-implementation to launch day and beyond.
Get in touch →Expert services
Migration and implementation services with planning workshops, roadmap evaluations, and dedicated project managers to ensure your commerce vision is brought to life.
Learn more about global services →Vendor & partner support
A centralized service offering that reduces the risk of managing multi-vendor, composable solutions with proprietary monitoring & holistic issue resolution.
Learn more about our partner program →What our customers
are saying...
View case studies“We selected Elastic Path because we believe in the same thing: innovating our business together. Having a partner who truly believes in what you are looking to create is the best partner out there.”
“Our merchandising and marketing teams feel more in control of their destiny and the company’s performance. We no longer have to rely on IT for many aspects of what we want to optimize and improve with our sites.”
“Product Experience Manager has made it more seamless for our team to launch new products, make changes, and update our merchandising strategy.”
“Never have I come across a company that so thoughtfully, consistently, and gracefully delivers on the intention behind the concept of ‘client success’ as Elastic Path.”
“We wanted a more modern architecture that would allow us to be more nimble as a team, both from a development standpoint and a site merchandiser perspective. We feel confident that Elastic Path helps us reach that goal.”
“Elastic Path empowered us to explore new revenue opportunities with their simple yet flexible commerce platform.”